Dell S2810dn Smart Dell Smart Printer Users Guide - Page 78
Checking the Shared Printer, My Network Places
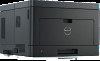 |
View all Dell S2810dn Smart manuals
Add to My Manuals
Save this manual to your list of manuals |
Page 78 highlights
Windows® 8, Windows® 8 64-bit Edition, Windows® 8.1, Windows® 8.1 64-bit Edition, Windows Server® 2012, or Windows Server® 2012 R2 1 On the Desktop screen, right-click the bottom left corner of the screen, and then click Control Panel Hardware and Sound (Hardware for Windows Server® 2012/Windows Server® 2012 R2) Devices and Printers. 2 Right-click the printer icon and select Printer properties. 3 On the Sharing tab, click Change Sharing Options if exists. 4 Select the Share this printer check box, and then type a name in the Share name text box. 5 Click Additional Drivers and select the operating systems of all network clients using this printer. 6 Click Apply, and then click OK. Checking the Shared Printer To confirm that the printer is properly shared: • Ensure that the printer object in the Printers, Printers and Faxes, or Devices and Printers folder is shared. The shared icon is shown under the printer icon. • From a network client, browse Network or My Network Places. Find the host name of the server and the shared name you assigned to the printer. After you have checked that the printer is shared, use methods such as Windows Point and Print to use the shared printer from a network client. NOTE: If the OS bit editions (32/64 bit edition) differ between a print server and a client computer, you need to manually add the printer driver for the client computer edition on the server. Otherwise, the printer driver cannot be installed on the client computer using methods such as Point and Print. For example, if the print server runs on Windows Vista® 32-bit edition, while the client computer runs on Windows® 7 64-bit edition, follow the procedures below to additionally install the printer driver for 64-bit client on the 32-bit server. a Click Additional Drivers on the screen for sharing printers. For details about how to display this screen, see "Enabling Shared Printing from the Computer." b Select the x64 check box, and then click OK. c Insert the Software and Documentation disc into your computer. d Click Browse to specify the folder that contains the 64-bit OS driver, and then click OK. Installation starts. 78 Installing Printer Drivers on Windows® Computers
-
 1
1 -
2
-
3
-
4
-
5
-
6
-
7
-
8
-
9
-
10
-
11
-
12
-
13
-
14
-
15
-
16
-
17
-
18
-
19
-
20
-
21
-
22
-
23
-
24
-
25
-
26
-
27
-
28
-
29
-
30
-
31
-
32
-
33
-
34
-
35
-
36
-
37
-
38
-
39
-
40
-
41
-
42
-
43
-
44
-
45
-
46
-
47
-
48
-
49
-
50
-
51
-
52
-
53
-
54
-
55
-
56
-
57
-
58
-
59
-
60
-
61
-
62
-
63
-
64
-
65
-
66
-
67
-
68
-
69
-
70
-
71
-
72
-
 73
73 -
 74
74 -
 75
75 -
 76
76 -
 77
77 -
 78
78 -
 79
79 -
 80
80 -
 81
81 -
 82
82 -
 83
83 -
84
-
85
-
86
-
87
-
88
-
89
-
90
-
91
-
92
-
93
-
94
-
95
-
96
-
97
-
98
-
99
-
100
-
101
-
102
-
103
-
104
-
105
-
106
-
107
-
108
-
109
-
110
-
111
-
112
-
113
-
114
-
115
-
116
-
117
-
118
-
119
-
120
-
121
-
122
-
123
-
124
-
125
-
126
-
127
-
128
-
129
-
130
-
131
-
132
-
133
-
134
-
135
-
136
-
137
-
138
-
139
-
140
-
141
-
142
-
143
-
144
-
145
-
146
-
147
-
148
-
149
-
150
-
151
-
152
-
153
-
154
-
155
-
156
-
157
-
158
-
159
-
160
-
161
-
162
-
163
-
164
-
165
-
166
-
167
-
168
-
169
-
170
-
171
-
172
-
173
-
174
-
175
-
176
-
177
-
178
-
179
-
180
-
181
-
182
-
183
-
184
-
185
-
186
-
187
-
188
-
189
-
190
-
191
-
192
-
193
-
194
-
195
-
196
-
197
-
198
-
199
-
200
-
201
-
202
-
203
-
204
-
205
-
206
-
207
-
208
-
209
-
210
-
211
-
212
-
213
-
214
-
215
-
216
-
217
-
218
-
219
-
220
-
221
-
222
-
223
-
224
-
225
-
226
-
227
-
228
-
229
-
230
-
231
-
232
-
233
-
234
-
235
-
236
-
237
-
238
-
239
-
240
-
241
-
242
-
243
-
244
-
245
-
246
-
247
-
248
-
249
-
250
-
251
-
252
-
253
-
254
-
255
-
256
-
257
-
258
-
259
-
260
-
261
-
262
-
263
-
264
-
265
-
266
-
267
-
268
-
269
-
270
-
271
-
272
-
273
-
274
-
275
-
276
-
277
-
278
-
279
-
280
-
281
-
282
-
283
-
284
-
285
-
286
-
287
-
288
-
289
-
290
-
291
-
292
-
293
-
294
-
295
-
296
-
297
-
298
-
299
-
300
-
301
-
302
-
303
-
304
-
305
-
306
-
307
-
308
-
309
-
310
-
311
-
312
-
313
-
314
-
315
-
316
 |
 |