Denon AVR-1705 Owners Manual - Page 19
System Set Up, Front, Large, Center, Small - setup
 |
View all Denon AVR-1705 manuals
Add to My Manuals
Save this manual to your list of manuals |
Page 19 highlights
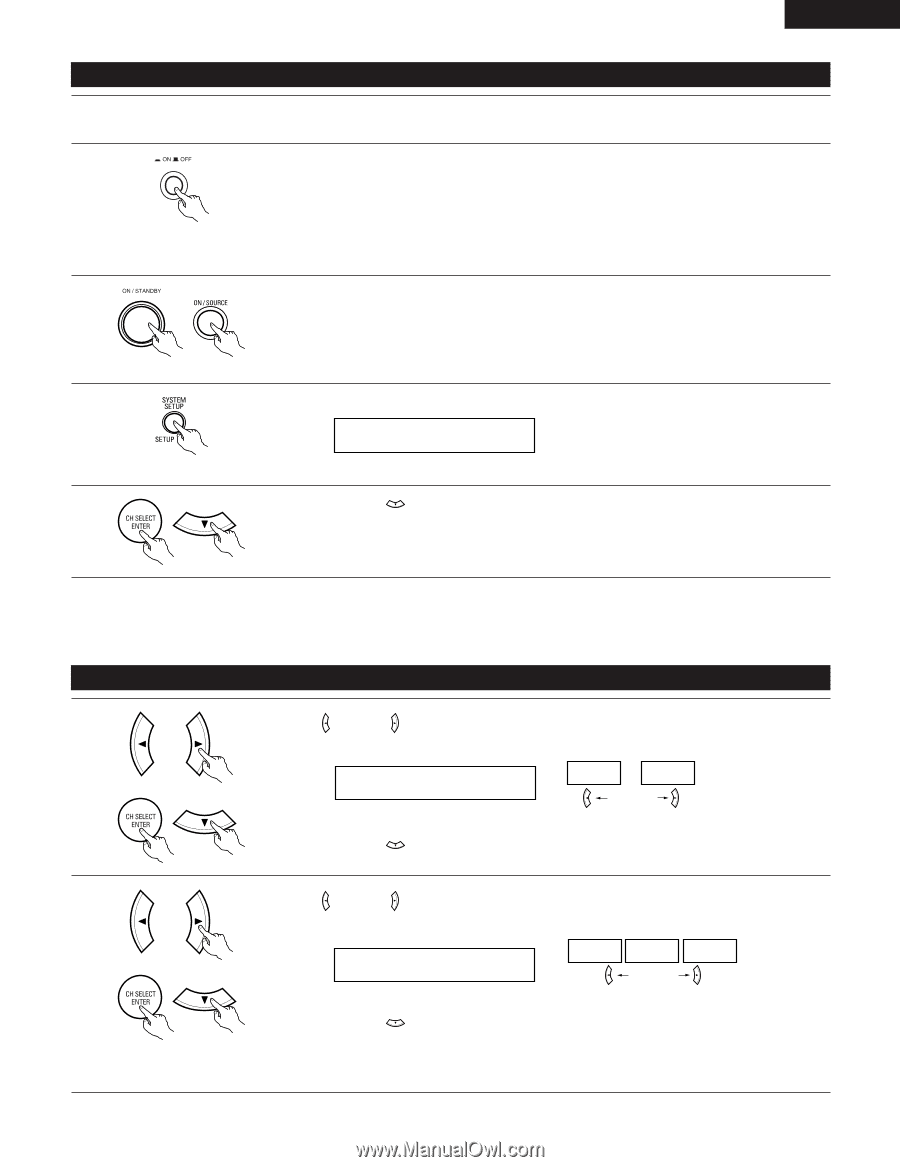
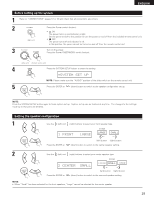
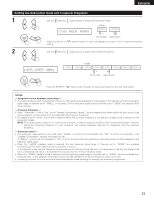
ENGLISH Before setting up the system 1 Refer to "CONNECTIONS" (pages 10 to 16) and check that all connections are correct. 2 Press the Power switch (button) . • ¢ ON The power turns on and indicator is light. Set the power switch to this position to turn the power on and off from the included remote control unit. (Main unit) • £ OFF The power turns off and indicator is off. In this position, the power cannot be turned on and off from the remote control unit. 3 Turn on the power. Press the Power ON/STANDBY switch (button). (Main unit) (Remote control unit) 4 Press the SYSTEM SETUP button to enter the setting. *SYSTEM SET UP NOTE: Please make sure the "AUDIO" position of the slide switch on the remote control unit. 5 Press the ENTER or (down) button to switch to the speaker configuration set up. NOTE: Press the SYSTEM SETUP button again to finish system set up. System set up can be finished at any time. The changes to the settings made up to that point are entered. Setting the speaker configuration 1 Use the (left) and (right) buttons to select your front speaker type. 1 FRONT LARGE (Initial) LARGE SMALL Press the ENTER or (left) button (right) button (down) button to switch to the center speaker setting. 2 Use the (left) and (right) buttons to select your center speaker type. 2 CENTER SMALL (Initial) LARGE SMALL NONE Press the ENTER or (left) button (right) button (down) button to switch to the surround speaker setting. NOTE: • When "Small" has been selected for the front speakers, "Large" cannot be selected for the center speaker. 19
-
 1
1 -
2
-
3
-
4
-
5
-
6
-
7
-
8
-
9
-
10
-
11
-
12
-
13
-
 14
14 -
 15
15 -
 16
16 -
 17
17 -
 18
18 -
 19
19 -
 20
20 -
 21
21 -
 22
22 -
 23
23 -
 24
24 -
25
-
26
-
27
-
28
-
29
-
30
-
31
-
32
-
33
-
34
-
35
-
36
-
37
-
38
-
39
-
40
-
41
-
42
-
43
-
44
-
45
-
46
-
47
-
48
-
49
-
50
-
51
-
52
-
53
-
54
-
55
-
56
-
57
-
58
-
59
-
60
-
61
-
62
-
63
-
64
-
65
-
66
-
67
-
68
-
69
-
70
-
71
-
72
-
73
-
74
-
75
 |
 |