Dewalt DW715 Instruction Manual
Dewalt DW715 Manual
 |
View all Dewalt DW715 manuals
Add to My Manuals
Save this manual to your list of manuals |
Dewalt DW715 manual content summary:
- Dewalt DW715 | Instruction Manual - Page 1
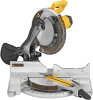
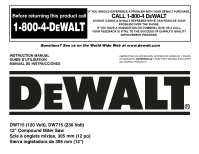
Web at www.dewalt.com INSTRUCTION MANUAL GUIDE D'UTILISATION MANUAL DE INSTRUCCIONES INSTRUCTIVO DE OPERACIÓN, CENTROS DE SERVICIO Y PÓLIZA DE GARANTÍA. ADVERTENCIA: LÉASE ESTE INSTRUCTIVO ANTES DE USAR EL PRODUCTO. DW715 (120 Volt), DW715 (230 Volt) 12" Compound Miter Saw Scie à onglets mixtes - Dewalt DW715 | Instruction Manual - Page 2
- Dewalt DW715 | Instruction Manual - Page 3
ELECTRIC BRAKE 7 GUARD ACTUATION AND VISIBILITY 7 MITER LOCK ADJUSTMENT 7 BRUSHES...7 CONTROLS ...8 OPERATION ...8 SWITCH ...8 CUTTING WITH YOUR SAW 8 CROSSCUTS...8 BEVEL CUTS ...9 QUALITY OF CUT ...9 BODY AND HAND POSITION 9 CLAMPING THE WORKPIECE 9 SUPPORT FOR LONG PIECES 9 CUTTING PICTURE - Dewalt DW715 | Instruction Manual - Page 4
air slots free of chips and dirt. • DO - Use blade guards at all times. • DO - Keep hands out of path of saw blade. • DO - Shut off power, disconnect cord from power source and wait for saw blade to stop before servicing or adjusting tool. • DO - Support long work with an outboard tool rest. 2 - Dewalt DW715 | Instruction Manual - Page 5
for your saw, may be helpful. In some cases, other locally obtained work supports, length stops, clamps, etc., may be more appropriate. Use care in selecting and using accessories. Laser Guide System: DW7187 Laser is available at extra cost from DEWALT Service Centers and your home improvement - Dewalt DW715 | Instruction Manual - Page 6
LOCKNUTS DW7082 Unpacking Your Saw Check the contents of your miter saw carton to make sure that you have received all parts. In addition to this instruction manual, the carton should contain: 1. One No. DW715 miter saw. 2. One DEWALT 12" (305mm) dia. saw blade 3. One blade wrench in wrench pocket - Dewalt DW715 | Instruction Manual - Page 7
Bearings Automatic Electric Brake Familiarization Your miter saw is fully assembled in the carton. Open the box and lift the saw out by the convenient carrying handle, as shown in Figure 1. 15 Amp Motor Cut Helical Gears Carbide Blade FIG. 1 OPERATING HANDLE GUARD Place the saw on a smooth, flat - Dewalt DW715 | Instruction Manual - Page 8
English IMPORTANT SAFETY INSTRUCTIONS Changing or Installing a New Saw Blade (Fig. 3) CAUTION: • Never depress the spindle lock button while the blade is under power or coasting. • Do not cut ferrous metal (containing iron or steel) or masonry or fiber cement product with this miter saw. FIG. 3 A - Dewalt DW715 | Instruction Manual - Page 9
when installing or removing saw blades or for inspection of the saw. NEVER RAISE THE BLADE GUARD MANUALLY UNLESS THE SAW IS TURNED OFF. NOTE: Certain special cuts of large material will require that you manually raise the guard. See page 11. The front section of the guard is louvered for visibility - Dewalt DW715 | Instruction Manual - Page 10
brake may be erratic in operation until the brushes are properly seated (worn in). Always replace the brush inspection cap after inspection or servicing the brushes. While "running in" DO NOT TIE, TAPE, OR OTHERWISE LOCK THE TRIGGER SWITCH ON. HOLD BY HAND ONLY. Controls Your compound miter saw - Dewalt DW715 | Instruction Manual - Page 11
the miter arm left and right, follow it and stand slightly to the side of the saw blade. Sight through the guard louvers when following a pencil line. FIG. 11 FIG. 11A PROPER CUT IMPROPER CUT 9 CLAMPING THE WORKPIECE Turn Off and Unplug Saw. If you cannot secure the workpiece on the table and - Dewalt DW715 | Instruction Manual - Page 12
from cut to cut, check that the bevel clamp knob and the miter lock knob are securely tightened. These knobs must be tightened after making any changes in bevel or miter. The chart shown on page 15 will assist you in selecting the proper bevel and miter settings for common compound miter cuts. To - Dewalt DW715 | Instruction Manual - Page 13
Once you have cleared the workpiece, you can release the guard and it will continue to open as the cut progresses. When mitering to the right side of a base molding 3-5/8" (91mm) standing vertically against the fence as in Figure 15, the saw can only cut through the board up to 1" (25.4mm) from the - Dewalt DW715 | Instruction Manual - Page 14
1. Miter right at 45° 2. Save left side of cut Special Cuts NEVER MAKE ANY CUT UNLESS THE MATERIAL IS SECURED ON THE TABLE AND AGAINST THE FENCE. ALUMINUM CUTTING ALWAYS USE THE APPROPRIATE SAW BLADE MADE ESPECIALLY FOR CUTTING ALUMINUM. These are available at your local DEWALT retailer or DEWALT - Dewalt DW715 | Instruction Manual - Page 15
easily cut with your saw. It should be cut just like wood and CLAMPED OR HELD FIRMLY TO THE FENCE TO KEEP IT FROM ROLLING. This is extremely important when making angle cuts. CUTTING LARGE MATERIAL Occasionally you will encounter a piece of wood a little too large to fit beneath the blade guard. If - Dewalt DW715 | Instruction Manual - Page 16
fuse or reset circuit breaker. 3. Have cord replaced by authorized service center. 4. Have brushes replaced by authorized service center or replace them yourself as instructed on page 7. TROUBLE! SAW MAKES UNSATISFACTORY CUTS WHAT'S WRONG? 1. Dull blade 2. Blade mounted backwards 3. Gum or pitch on - Dewalt DW715 | Instruction Manual - Page 17
SAW TABLE 1 COMPOUND MITER CUT (POSITION WOOD WITH BROAD FLAT SIDE ON THE TABLE AND THE NARROW EDGE AGAINST THE FENCE) 10 20 30 40 50 10 20 10 20 30 30 40 6-SIDED 50 BOX 40 8-SIDED 50 BOX 60 60 70 70 80 80 SQUARE BOX 60 70 80 SET THIS BEVEL ANGLE ON SAW 15 - Dewalt DW715 | Instruction Manual - Page 18
TABLE DES MATIÈRES INSTRUCTIONS RELATIVES À LA DOUBLE ISOLATION ET À LA FICHE POLARISÉE 17 RÈGLES DU POINTEUR D'ONGLETS 22 BISEAU EN ÉQUERRE AVEC LA TABLE 22 POINTEUR DE BISEAU 22 RÉGLAGE DE LA BUTÉE DU BISEAU 22 RÉGLAGE DU GUIDE 23 FREIN ÉLECTRIQUE AUTOMATIQUE 23 ACTIVATION ET VISIBILITÉ DU - Dewalt DW715 | Instruction Manual - Page 19
SUR TOUT AUTRE OUTIL DEWALT, NOUS APPELER SANS FRAIS AU NUMÉRO SUIVANT : 1-800-4-DEWALT (1-800-433-9258 sur la table et contre le guide, ou lorsque votre main se trouve dan- gereusement proche de la lame (à moins de 15 cm UTILISER LES ACCESSOIRES RECOMMANDÉS. Une liste des accessoires recom- mandés - Dewalt DW715 | Instruction Manual - Page 20
de 15 ampères compris les instructions. MISE EN travaillez avec ce type de maté GUIDES MOBILES : TOUJOURS RÉGLER CORRECTEMENT LE GUIDE SUPPORT AVEC LES DEUX VIS AVANT D'UTILISER L'OUTIL. SUR LA TABLE : (À 2 ENDROITS) TOUJOURS BIEN SERRER LES POIGNÉES DE RÉGLAGE AVANT UTILISATION. GARDER LES MAINS À 15 - Dewalt DW715 | Instruction Manual - Page 21
guidé par laser : DW7187 Le laser est vendu séparément par les centres de réparation DEWALT et votre détaillant de rénovation domiciliaire. Les instructions table à scier est conçue pour accepter deux supports de pièces, un de chaque côté. Butée réglable : DW7051 Nécessite l'utilisation d'un support - Dewalt DW715 | Instruction Manual - Page 22
Guide contenir : 1. Une scie à onglets nº. DW715 miter saw. 2. Une lame de scie DEWALT de 305 mm (12 po) de diamètre. 3.Une clé rouleau Frein électrique automatique Moteur 15 ampères Engrenages hélicoïdaux taillés contreplaqué doit reposer à plat sur le support de la pièce. Lors de la fixation - Dewalt DW715 | Instruction Manual - Page 23
de manière à ce que le support puisse être A levé suffisamment haut pour accéder à la vis de la lame. Le pare-main inférieur demeurera levé en raison de la position de la vis du support de pare-main. B D GUIDE GAUCHE POIGNÉE DE VERROUILLAGE DU GUIDE ZONES EN RETRAIT POUR LA MAIN CL - Dewalt DW715 | Instruction Manual - Page 24
15,88 mm (5/8 po) et doit être rangé dans un endroit sûr pour un usage ultérieur. 5. Remettre le support ONGLETS (FIG. 5) Placer une équerre contre le guide de la scie et contre la lame. (Ne lame se trouve au biseau de 0° par rapport à la table. S'assurer que les leviers de biseau à loquets (N) sont - Dewalt DW715 | Instruction Manual - Page 25
ressort du balai et retirer l'ensemble du balai. S'assurer que les balais sont propres et qu'ils glissent librement dans leurs guides. Toujours replacer dans son support un balai utilisé dans le sens où il se trouvait avant d'être retiré. Plusieurs symboles sont marqués sur les côtés des balais de - Dewalt DW715 | Instruction Manual - Page 26
avec le bras d'onglet en position de zéro degré. Régler et verrouiller le bras d'onglet à zéro, maintenir fermement le bois en place sur la table et contre le guide. Mettre la scie en marche en pressant la détente. Lorsque la scie atteint son plein régime (en environ 1 seconde), baisser doucement et - Dewalt DW715 | Instruction Manual - Page 27
différentes applications de coupe, consulter la liste de lames de scie recommandées pour votre 15 cm (6 po) de la lame Maintenir fermement la pièce en place contre la table et le guide sultat, utiliser le support DW7080 de travail en extension afin d'augmenter la largeur de votre table à scier. Il - Dewalt DW715 | Instruction Manual - Page 28
table et l'arête étroite contre le guide. Les deux diagrammes de la figure 12 correspondent à des objets à quatre côtés. Lorsque le nombre de côtés change simultanément un angle d'onglet et un angle de biseau. C'est le type de coupe utilisé pour fabriquer des cadres ou des boîtes dont les côtés sont - Dewalt DW715 | Instruction Manual - Page 29
de 91 mm (3-5/8 po) tenue à la verticale contre le guide, comme le montre la figure 15, la scie ne peut couper une planche d'une épaisseur maximale de côté gauche de la coupe REMARQUE: Si la coupure doit être faite quelque part autrement que 1" de la fin de la moulure : couper la moulure à 90 - Dewalt DW715 | Instruction Manual - Page 30
des angles de 52° et 38°. 28 RÉGLAGE DU BISEAU 33,85° 33,85° 33,85° 33,85° TYPE DE COUPE CÔTÉ GAUCHE, COIN INTÉRIEUR : 1. Partie supérieure de la moulure contre le guide 2. Table d'onglet définie à 31,62° 3. Conserver le côté gauche de la coupe CÔTÉ DROIT, COIN INTÉRIEUR : 1. Partie inférieure de - Dewalt DW715 | Instruction Manual - Page 31
EN PLACE SUR LA TABLE ET CONTRE LE GUIDE. DÉCOUPE D'ALUMINIUM TOUJOURS UTILISER DES LAMES DE SCIE APPROPRIÉES SPÉCIALEMENT CONÇUES POUR LA DÉCOUPE D'ALUMINIUM. Elles sont disponibles auprès du détaillant DEWALT de votre région ou d'un centre de réparation DEWALT - Dewalt DW715 | Instruction Manual - Page 32
ET SOUS la base et la table rotative. Même si des emplacements instructions de la page 23 ou retourner l'outil au centre de réparation le plus proche pour réparation. Une liste DEWALT sont couverts par notre : SERVICE D'ENTRETIEN GRATUIT DE 1 ANS DEWALT , laser ou de votre marteau-cloueur DEWALT pour - Dewalt DW715 | Instruction Manual - Page 33
domestique. 4. Lame inadéquate pour le travail effectué 4. Changer de type de lame. Voir page 20. PROBLÈME! LA LAME N'ATTEINT PAS table 3. Vérifier et régler le guide. Voir page 23. 4. La pièce à découper se déplace 4. La fixer au guide ou coller du papier abrasif de calibre 120 sur le guide - Dewalt DW715 | Instruction Manual - Page 34
RÉGLER CET ANGLE D'ONGLETS SUR LA SCIE TABLEAU 1 COUPE À ONGLETS MIXTES (positionner le morceau de bois avec le large côté plat contre la table et l'arête étroite contre le guide). 10 20 30 40 10 20 10 20 30 30 40 BOÎTE 50 À 6 FACES 40 BOÎTE 50 À 8 FACES 60 50 - Dewalt DW715 | Instruction Manual - Page 35
ÍNDICE DE TEMAS INSTRUCCIONES SOBRE DOBLE AISLAMIENTO/ENCHUFE POLARIZADO ........34 INSTRUCCIONES DE SEGURIDAD PARA TODAS LAS HERRAMIENTAS 34 NORMAS DE SEGURIDAD ADICIONALES 35 CONEXIÓN ELÉCTRICA 36 ACCESORIOS ...36 DESCRIPCIONES DE LAS HOJAS 37 CÓMO DESEMBALAR LA SIERRA 37 ESPECIFICACIONES 37 - Dewalt DW715 | Instruction Manual - Page 36
mano queda muy cerca de la hoja (a menos de 15 cm ó 6"). • NO SE ESTIRE. Conserve el ACCESORIOS RECOMENDADOS. Consulte el manual de instrucciones para obtener Longitud total del cable en metros 120V 0-7,6 7,6-15,2 15,2-30,4 30,4-45,7 240V 0-15,2 15,2-30,4 30,4-60,9 60,9-91,4 Amperaje - Dewalt DW715 | Instruction Manual - Page 37
15 amperios mínimo o un fusible de acción retardada de 15 amperios. • SÍ - Asegúrese de que la hoja gire en la dirección adecuada y que los dientes de la parte inferior de la hoja apunten hacia la parte ADVERTENCIA: POR SU PROPIA SEGURIDAD, LEA EL MANUAL DE INSTRUCCIONES ANTES DE OPERAR LA SIERRA. AL - Dewalt DW715 | Instruction Manual - Page 38
precisión. Bolsa para polvo: DW7053 (Incluida en algunos modelos) Equipada con cierre para permitir su práctico vaciado, la bolsa para polvo recoge la mayor parte del aserrín generado (no se muestra). NOTA: Deflector en el tubo de descarga de polvo que canaliza el polvo hacia el piso. El tubo de - Dewalt DW715 | Instruction Manual - Page 39
manual de instrucciones, la caja debe contener: 1. Una sierra ingletadora N° DW715. 2. Una hoja de sierra DEWALT de 305 mm (12") éctrico automático Motor de 15 amperios Engranajes fresados helicoidales Hoja de trabajo, coloque un trozo delgado de material bajo una de las patas de la sierra - Dewalt DW715 | Instruction Manual - Page 40
MANGO DE OPERACIÓN GUARDA FIG. 2 TAPA DE EXTREMO DEL MOTOR INTERRUPTOR DISPARADOR MANGO DE TRANSPORTE MANGO DE OPERACIÓN CLAVIJA DE SEGURIDAD CAJA DEL MOTOR ESCALA DE BISEL CLAVIJA DE SEGURIDAD TUBO DE DESCARGA DE POLVO PERILLA DE BLOQUEO DE BISEL ORIFICIOS DE MONTAJE DE BANCO ESCALA DE - Dewalt DW715 | Instruction Manual - Page 41
reloj, roscas de mano izquierda) NOTA: Cuando se utilizan hojas con un orificio de 15,88 mm (5/8") de diámetro, no se utiliza el adaptador de hoja, que debe indicador tanto como sea necesario. No retire la placa de acero en la parte frontal del indicador de bisel. Esta placa evita que la resina de la - Dewalt DW715 | Instruction Manual - Page 42
de sierra, o al realizar inspecciones, usted puede elevar la guarda en forma manual. NUNCA ELEVE LA GUARDA DE LA HOJA MANUALMENTE A MENOS QUE LA SIERRA aproximadamente 12 mm (1/2 pulgada) del resorte, dejará de ejercer presión, por lo que habrá que reemplazarlo. Utilice solamente cepillos DEWALT idé - Dewalt DW715 | Instruction Manual - Page 43
hacia la izquierda. Para ajustarlo, gire el mango en el sentido de las agujas del reloj. Las marcas de grado del bisel están en la parte frontal inferior del brazo de la sierra (Figura 7, M). BLOQUEO DE BISEL A 0˚/45˚ (FIG. 8) Las anulaciones del tope de bisel (N) se fijan con el tornillo de - Dewalt DW715 | Instruction Manual - Page 44
lograr los resultados deseados. Asegúrese de que el material no se deslice mientras lo corta; sujételo firmemente. aun así se desprenden pequeñas fibras de la parte trasera de la pieza de trabajo, pegue un etc.), o si su mano quedara a menos de 15 cm (6") de la hoja, debe utilizar una abrazadera - Dewalt DW715 | Instruction Manual - Page 45
Figura 13. El esquema A de la Figura 12 muestra un empalme hecho con la regulación ángulo de inglete (si el material se corta en forma vertical) o bisel (si el material se corta en posición horizontal). la línea de intersección vertical hacia la parte superior o inferior para obtener la regulación - Dewalt DW715 | Instruction Manual - Page 46
DE ANCHO VERTICALMENTE CONTRA EL REBORDE • Coloque la moldura como se muestra en la Figura 15 • Todos los cortes se realizan con la parte posterior de la moldura contra el reborde y la parte inferior de la moldura contra la base ESQUINA INTERIOR: Lado izquierdo 1. Inglete izquierdo a 45° 2. Conserve - Dewalt DW715 | Instruction Manual - Page 47
grados, deberá afinar las regulaciones de todos modos. HACER PRUEBAS CON MATERIAL DE DESCARTE ES MUY IMPORTANTE! FIG. 18 REBORDE MESA MOLDURA DE CORONA el extremo derecho del corte LADO DERECHO, ESQUINA EXTERIOR: 33,85° 1. Parte superior de la moldura contra el reborde 2. Mesa de inglete a 31 - Dewalt DW715 | Instruction Manual - Page 48
de su localidad o en el centro de mantenimiento DEWALT. Determinadas piezas de trabajo, debido a su tamaño, forma o acabado de superficie, pueden requerir el uso de una abrazadera o sujeción para evitar movimientos durante el corte. Coloque el material de manera de cortar la sección más delgada - Dewalt DW715 | Instruction Manual - Page 49
herramienta eléctrica, el láser o la clavadora DEWALT, no tiene más que devolver el producto dentro de Bravo #1063 Sur Col. Industrial Bravo (667) 7 12 42 11 GUADALAJARA, JAL Av. La Paz #1779 Col . Especificaciones DW715 Tensión de alimentación: 120 V AC Consumo de corriente: 15 A Frecuencia - Dewalt DW715 | Instruction Manual - Page 50
4. Sujete la pieza de trabajo al reborde o coloque cola en un papel de lija de 120 al reborde con cemento para caucho. PROBLEMA: EL MATERIAL NO MUERDE LA HOJA ¿QUÉ SUCEDE? 1. Cortes de material curvado QUÉ HACER... 1. Posicione el material curvado como se muestra en la página 46. Español 48 - Dewalt DW715 | Instruction Manual - Page 51
FIJE ESTE ÁNGULO DE INGLETE EN LA SIERRA TABLA 1: CORTE DE INGLETE COMPUESTO (ubique la madera con el lado plano ancho sobre la mesa y el borde angosto contra el reborde) 10 20 30 40 10 20 30 40 10 20 30 40 50 CAJA DE SEIS 50 LADOS 60 50 CAJA CUADRADA 60 70 60 70 80 70 80 80 Españ - Dewalt DW715 | Instruction Manual - Page 52
Industrial Tool Co., 701 East Joppa Road, Baltimore, MD 21286 (JUL05) Form No. 628948-00 DW715 Copyright © 2005 DEWALT The following are trademarks for one or more DEWALT power tools: the yellow and black color scheme; the "D" shaped air intake grill; the array of pyramids on the handgrip
-
 1
1 -
 2
2 -
 3
3 -
 4
4 -
 5
5 -
 6
6 -
 7
7 -
8
-
9
-
10
-
11
-
12
-
13
-
14
-
15
-
16
-
17
-
18
-
19
-
20
-
21
-
22
-
23
-
24
-
25
-
26
-
27
-
28
-
29
-
30
-
31
-
32
-
33
-
34
-
35
-
36
-
37
-
38
-
39
-
40
-
41
-
42
-
43
-
44
-
45
-
46
-
47
-
48
-
49
-
50
-
51
-
52
 |
 |
DW715 (120 Volt), DW715 (230 Volt)
12" Compound Miter Saw
Scie à onglets mixtes, 305 mm (12 po)
Sierra ingletadora de 305 mm (12")
INSTRUCTION MANUAL
GUIDE D’UTILISATION
MANUAL DE INSTRUCCIONES
INSTRUCTIVO DE OPERACIÓN, CENTROS DE SERVICIO Y PÓLIZA
DE GARANTÍA.
ADVERTENCIA:
LÉASE ESTE INSTRUCTIVO ANTES
DE USAR EL PRODUCTO.
Questions? See us on the World Wide Web at www.dewalt.com
Before returning this product call
1-800-4-D
E
WALT
IF YOU SHOULD EXPERIENCE A PROBLEM WITH YOUR DEWALT PURCHASE,
CALL 1-800-4 D
E
WALT
IN MOST CASES, A D
E
WALT REPRESENTATIVE CAN RESOLVE YOUR
PROBLEM OVER THE PHONE.
IF YOU HAVE A SUGGESTION OR COMMENT, GIVE US A CALL.
YOUR FEEDBACK IS VITAL TO THE SUCCESS OF D
E
WALT’S QUALITY
IMPROVEMENT PROGRAM.