Dymo LabelWriter® 450 Duo Label Printer User Guide 3 - Page 75
Using the Address Book, Creating a New Address Book
 |
View all Dymo LabelWriter® 450 Duo Label Printer manuals
Add to My Manuals
Save this manual to your list of manuals |
Page 75 highlights
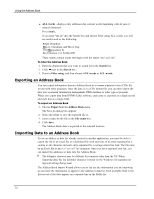
Chapter 11 Using the Address Book DYMO Label software includes the DYMO Address Book where you can save addresses or other information that you commonly use. You can create as many Address Books as you like. The default Address Book installed with the software is named Sample Address Book. You can edit this Address Book or you can delete this Address Book and create your own. From the Address Book tab, you can do the following: n Insert information from your Address Book to a label with a click of the mouse. n Create as many Address Books as you want. n Print labels using addresses from your Outlook contacts or Mac OS Address Book (Mac OS v10.2 or later). n Import a list of addresses or data created in another application. n Quickly find the addresses you want by searching the Address Book. n Easily switch from one Address Book to another. Creating a New Address Book You can create multiple Address Books to hold addresses or other data. If you want to import addresses or data into the Address Book, you must first create the Address Book into which you want to import the information. The default Address Book installed with DYMO Label software is named Sample Address Book. To create a new Address Book 1. Choose New from the Address Book menu. The New Address Book dialog box appears. 2. Enter a name for the new Address Book in the Name box. 3. Accept the default location to save the Address Book to, or click Browse to choose a different location. 4. Choose one of the following from the Contents list: l Address List - to create a new Address Book that contains address data. l Data List - to create a new Address Book that contains non-address data. 5. Click OK. A prompt appears, asking if you want to import data from an existing file. 67
-
 1
1 -
2
-
3
-
4
-
5
-
6
-
7
-
8
-
9
-
10
-
11
-
12
-
13
-
14
-
15
-
16
-
17
-
18
-
19
-
20
-
21
-
22
-
23
-
24
-
25
-
26
-
27
-
28
-
29
-
30
-
31
-
32
-
33
-
34
-
35
-
36
-
37
-
38
-
39
-
40
-
41
-
42
-
43
-
44
-
45
-
46
-
47
-
48
-
49
-
50
-
51
-
52
-
53
-
54
-
55
-
56
-
57
-
58
-
59
-
60
-
61
-
62
-
63
-
64
-
65
-
66
-
67
-
68
-
69
-
 70
70 -
 71
71 -
 72
72 -
 73
73 -
 74
74 -
 75
75 -
 76
76 -
 77
77 -
 78
78 -
 79
79 -
 80
80 -
81
-
82
-
83
-
84
-
85
-
86
-
87
-
88
-
89
-
90
-
91
-
92
-
93
-
94
-
95
-
96
-
97
-
98
-
99
-
100
-
101
-
102
-
103
-
104
-
105
-
106
-
107
-
108
-
109
-
110
-
111
-
112
-
113
-
114
-
115
-
116
-
117
-
118
-
119
-
120
-
121
-
122
 |
 |
