Dymo LabelWriter® 450 Duo Label Printer User Guide 3 - Page 87
Using the ACT! Add-In (Windows Only), Print DYMO Label
 |
View all Dymo LabelWriter® 450 Duo Label Printer manuals
Add to My Manuals
Save this manual to your list of manuals |
Page 87 highlights
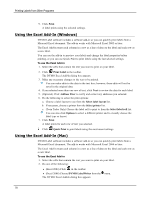
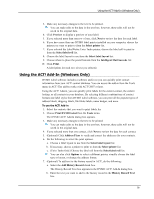
Using the ACT! Add-In (Windows Only) 3. Make any necessary changes to the text to be printed. You can make edits to the data in the text box; however, these edits will not be saved in the original data. 4. Click Preview to display a preview of your label. 5. If you selected more than one row of text, click Next to review the data for each label. 6. If you have more than one DYMO label printer installed on your computer, choose the printer you want to print to from the Select printer list. 7. If you selected the LabelWriter Twin Turbo printer, choose the label roll to print to from the Select label roll list. 8. Choose the label layout to use from the Select label layout list. 9. Choose where to place the postal barcode from the Intelligent Mail barcode list. 10. Click Print. A label prints for each row of text you selected. Using the ACT! Add-In (Windows Only) DYMO Label software includes a software add-in so you can quickly print contact information from your ACT! contact database. You can access the add-in from the Tools menu in ACT! The add-in works with ACT! 2007 or later. Using the ACT! Add-in, you can quickly print labels for the current contact, the current lookup, or all contacts in your database. By selecting different combinations of contact formats and label styles from DYMO Label software, you can print all the popular types of address labels, shipping labels, file folder labels, name badges, and more. To use the ACT! Add-in 1. Select the contacts that you want to print labels for. 2. Choose Print DYMO Label from the Tools menu. The DYMO ACT! Add-In dialog box appears. 3. Make any necessary changes to the text to be printed. You can make edits to the data in the text box; however, these edits will not be saved in the original data. 4. If you selected more than one contact, click Next to review the data for each contact. 5. (Optional) Click Address Fixer to verify and correct the addresses for your contacts. 6. Do the following to select the print options: a. Choose a label layout to use from the Select label layout list. b. If necessary, choose a printer to print to from the Select printer list. c. (Twin Turbo Only) Choose the label roll from the Select label roll list. You can also click Options to select a different printer, visually choose the label type or layout, or change the address format. 7. (Optional) To add text to the history record in ACT!, do the following: a. Select the Add History Record check box. The History Record Text box appears in the DYMO ACT! Add-In dialog box. b. Enter the text you want to add to the history record in the History Record Text box. 79
-
 1
1 -
2
-
3
-
4
-
5
-
6
-
7
-
8
-
9
-
10
-
11
-
12
-
13
-
14
-
15
-
16
-
17
-
18
-
19
-
20
-
21
-
22
-
23
-
24
-
25
-
26
-
27
-
28
-
29
-
30
-
31
-
32
-
33
-
34
-
35
-
36
-
37
-
38
-
39
-
40
-
41
-
42
-
43
-
44
-
45
-
46
-
47
-
48
-
49
-
50
-
51
-
52
-
53
-
54
-
55
-
56
-
57
-
58
-
59
-
60
-
61
-
62
-
63
-
64
-
65
-
66
-
67
-
68
-
69
-
70
-
71
-
72
-
73
-
74
-
75
-
76
-
77
-
78
-
79
-
80
-
81
-
 82
82 -
 83
83 -
 84
84 -
 85
85 -
 86
86 -
 87
87 -
 88
88 -
 89
89 -
 90
90 -
 91
91 -
 92
92 -
93
-
94
-
95
-
96
-
97
-
98
-
99
-
100
-
101
-
102
-
103
-
104
-
105
-
106
-
107
-
108
-
109
-
110
-
111
-
112
-
113
-
114
-
115
-
116
-
117
-
118
-
119
-
120
-
121
-
122
 |
 |
