Epson ActionLaser 1100 User Setup Information - Page 14
Attaching the Power Cord - supplies
 |
View all Epson ActionLaser 1100 manuals
Add to My Manuals
Save this manual to your list of manuals |
Page 14 highlights
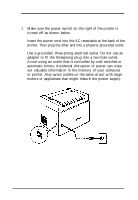
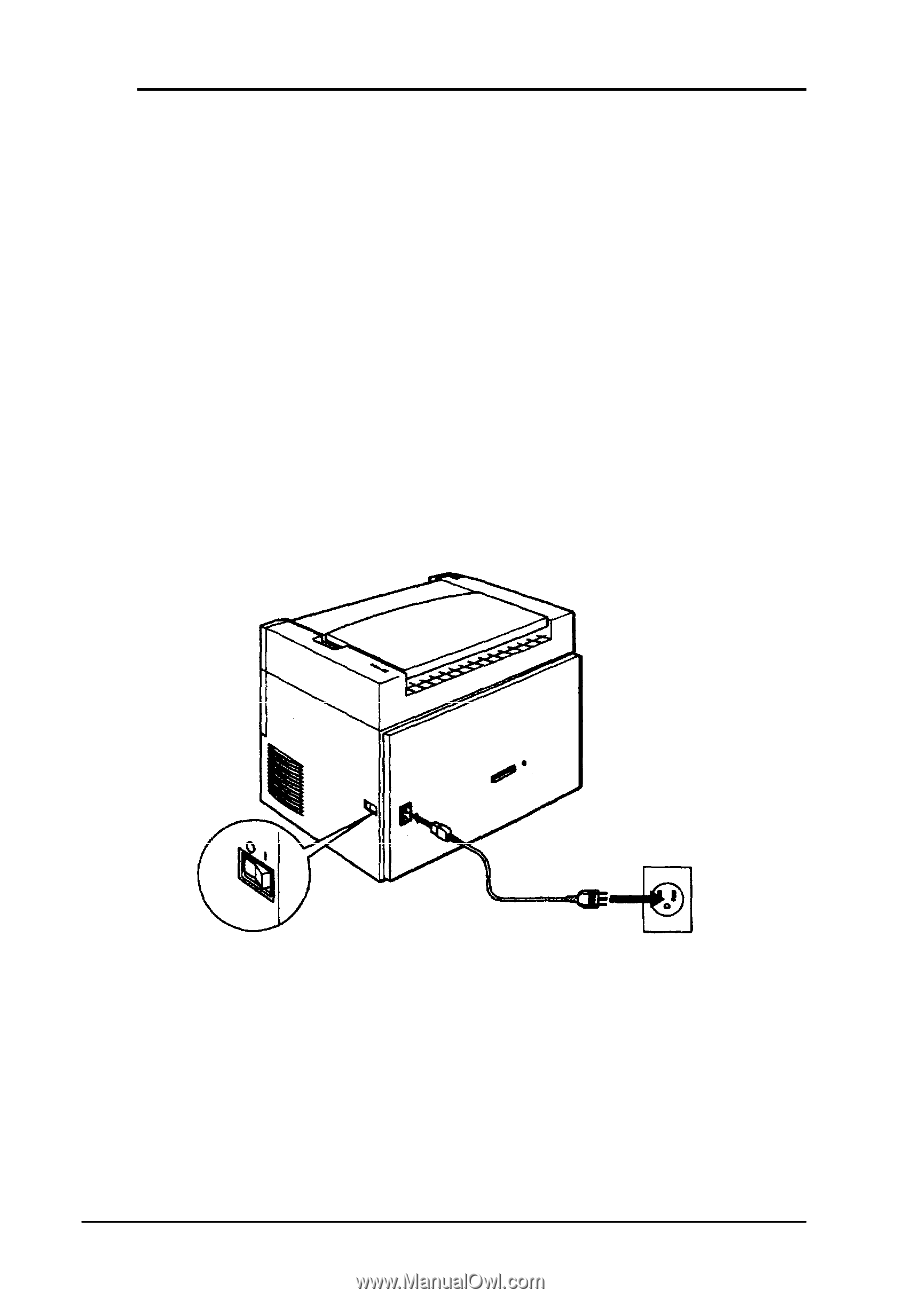
5 Attaching the power cord 1. Make sure the power switch on the right of the printer is turned off as shown below. 2. Insert the power cord into the AC receptacle at the back of the printer. Then plug the other end into a properly grounded outlet Use a grounded, three-prong electrical outlet. Do not use an adapter to fit the threeprong plug into a two-hole outlet. Avoid using an outlet that is controlled by wall switches or automatic timers. Accidental disruption of power can wipe out valuable information in the memory of your computer or printer. Also avoid outlets on the same circuit with large motors or appliances that might disturb the power supply. Setup 11
-
 1
1 -
2
-
3
-
4
-
5
-
6
-
7
-
8
-
 9
9 -
 10
10 -
 11
11 -
 12
12 -
 13
13 -
 14
14 -
 15
15 -
 16
16 -
 17
17 -
 18
18 -
 19
19 -
20
-
21
-
22
-
23
-
24
-
25
-
26
-
27
 |
 |
5
Attaching the power cord
1.
2.
Make sure the power switch on the right of the printer is
turned off as shown below.
Insert the power cord into the AC receptacle at the back of the
printer. Then plug the other end into a properly grounded outlet
Use a grounded, three-prong electrical outlet. Do not use an
adapter to fit the threeprong plug into a two-hole outlet.
Avoid using an outlet that is controlled by wall switches or
automatic timers. Accidental disruption of power can wipe
out valuable information in the memory of your computer
or printer. Also avoid outlets on the same circuit with large
motors or appliances that might disturb the power supply.
Setup 11