Epson ActionLaser 1100 User Setup Information - Page 16
Testing the Computer-to-Printer Connection, C:>
 |
View all Epson ActionLaser 1100 manuals
Add to My Manuals
Save this manual to your list of manuals |
Page 16 highlights
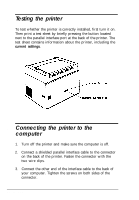
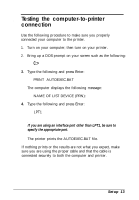
8 Testing the computer-to-printer connection Use the following procedure to make sure you properly connected your computer to the printer. 1. Turn on your computer; then turn on your printer. 2. Bring up a DOS prompt on your screen such as the following: C:> 3. Type the following and press Enter: PRINT AUTOEXEC.BAT The computer displays the following message: NAME OF LIST DEVICE (PRN): 4. Type the following and press Enter: LPT1 Note: If you are using an interface port other than LPT1, be sure to specify the appropriate port. The printer prints the AUTOEXEC.BAT file. If nothing prints or the results are not what you expect, make sure you are using the proper cable and that the cable is connected securely to both the computer and printer. Setup 13
-
 1
1 -
2
-
3
-
4
-
5
-
6
-
7
-
8
-
9
-
10
-
 11
11 -
 12
12 -
 13
13 -
 14
14 -
 15
15 -
 16
16 -
 17
17 -
 18
18 -
 19
19 -
 20
20 -
 21
21 -
22
-
23
-
24
-
25
-
26
-
27
 |
 |
