Epson AcuLaser CX11NF Product Information Guide - Page 11
Consumable Replacement Messages, Replacing a Toner Cartridge - fuser
 |
View all Epson AcuLaser CX11NF manuals
Add to My Manuals
Save this manual to your list of manuals |
Page 11 highlights
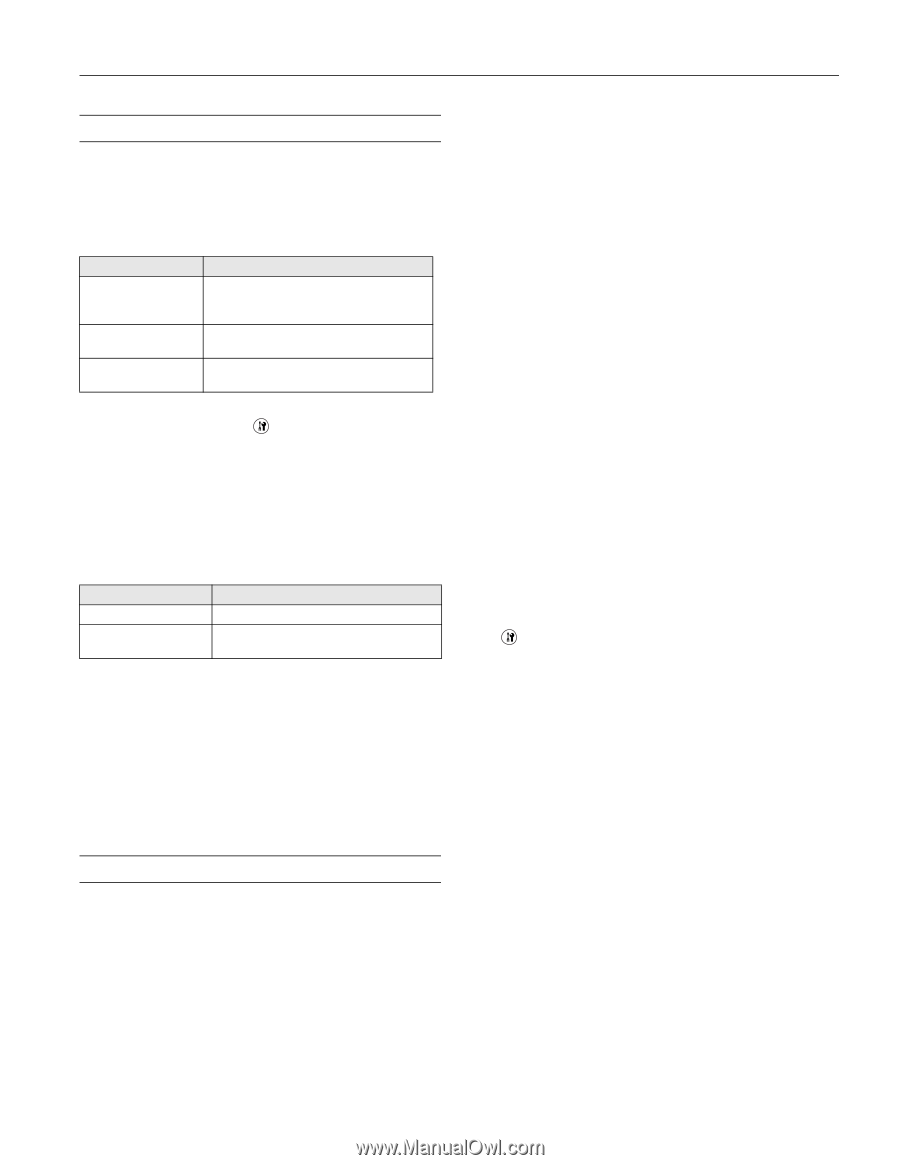
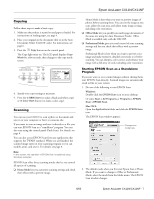
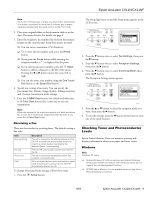
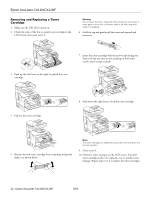
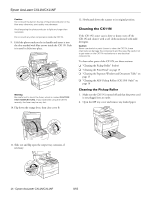
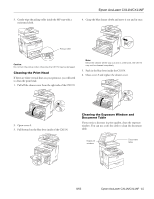
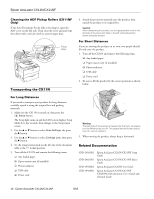
Epson AcuLaser CX11N/CX11NF Consumable Replacement Messages When you see the following messages in the LCD screen or in the EPSON Status Monitor 3 window, you need to replace the indicated unit. You can continue printing for a short time after a message appears, but Epson recommends replacement to maintain print quality and extend the life of your product. LCD screen message Worn Photoconductor Worn Fuser Worn uuuu Dev Unit Description The photoconductor is near the end of its service life. Replace the photoconductor with a new one. The fuser has reached the end of its service life. The developer has reached the end of its service life. Note: To clear the message, press the Setup button on the control panel, select Reset from Printer settings, then select Clear All Warnings. The CX11N stops printing if the worn consumable might damage the CX11N. You must replace the consumable product to continue. If a consumable product reaches the end of its service life, the product stops printing and displays the following messages on the LCD screen or in the EPSON Status Monitor 3 window. LCD screen message Replace Toner uuuu1 Replace Photocondctr2 Description The indicated toner cartridge is empty. The photoconductor is at the end of its service life. 1 The letters C, M, Y, and K appear in this position, indicating the color of the empty toner cartridge. 2 Even if this message is displayed in the LCD screen, you can continue to print for a short time by pressing the x B&W Start or x Color Start button on the control panel. The message in the LCD screen changes from Replace Photocondctr to Worn Photoconductor. Messages appear for one consumable product at a time. After replacing a part, check the LCD screen for replacement messages for other parts. Replacing a Toner Cartridge When a toner cartridge is empty, a message appears on the LCD screen indicating which toner cartridge needs to be replaced. If you are going to print a large document or make a large number of copies and one of the toner cartridges is low, you can change that cartridge so you won't run out of toner in the middle of the job. See: ❏ "Changing a Low Toner Cartridge" (next column) ❏ "Removing and Replacing a Toner Cartridge" on page 12 Handling Precautions Always follow these precautions when replacing a toner cartridge: ❏ Install a genuine Epson toner cartridge. Using a non-Epson toner cartridge may affect print quality. Other products may cause damage to your printer not covered by Epson's warranty. ❏ When handling toner cartridges, always place them on a clean smooth surface. ❏ If you move a toner cartridge from a cool to a warm environment, wait for at least one hour before installing it to prevent damage from condensation. Warning: Do not touch the toner and keep it away from your eyes. If toner gets on your skin or clothes, wash it off with soap and water immediately. ❏ Keep toner cartridges out of the reach of children. ❏ Do not dispose of toner cartridges in fire, as they may explode and cause injury. Dispose of them according to local regulations. ❏ If toner spills, use a broom and dustpan or a damp cloth with soap and water to clean it up. Because the fine particles can cause a fire or explosion if they come into contact with a spark, do not use a vacuum cleaner. Changing a Low Toner Cartridge 1. Make sure the CX11N is turned on, then press the Setup button. The Setup light turns on and the LCD screen displays Setup Mode for a few seconds, then changes to the Setup menu screen. 2. Use the u or d button to select Printer Settings, then press the r button. 3. Use the u or d button to select Reset Menu, then press the r button. 4. Use the u or d button to select Change Toner C/M/Y/K for the color of the toner cartridge you want to change, then press the r button. 5. Continue with the steps in the next section to remove and replace the toner cartridge. 8/05 Epson AcuLaser CX11N/CX11NF - 11
-
 1
1 -
2
-
3
-
4
-
5
-
 6
6 -
 7
7 -
 8
8 -
 9
9 -
 10
10 -
 11
11 -
 12
12 -
 13
13 -
 14
14 -
 15
15 -
 16
16
 |
 |