Epson AcuLaser CX11NF Product Information Guide - Page 13
Replacing the Photoconductor - drum
 |
View all Epson AcuLaser CX11NF manuals
Add to My Manuals
Save this manual to your list of manuals |
Page 13 highlights
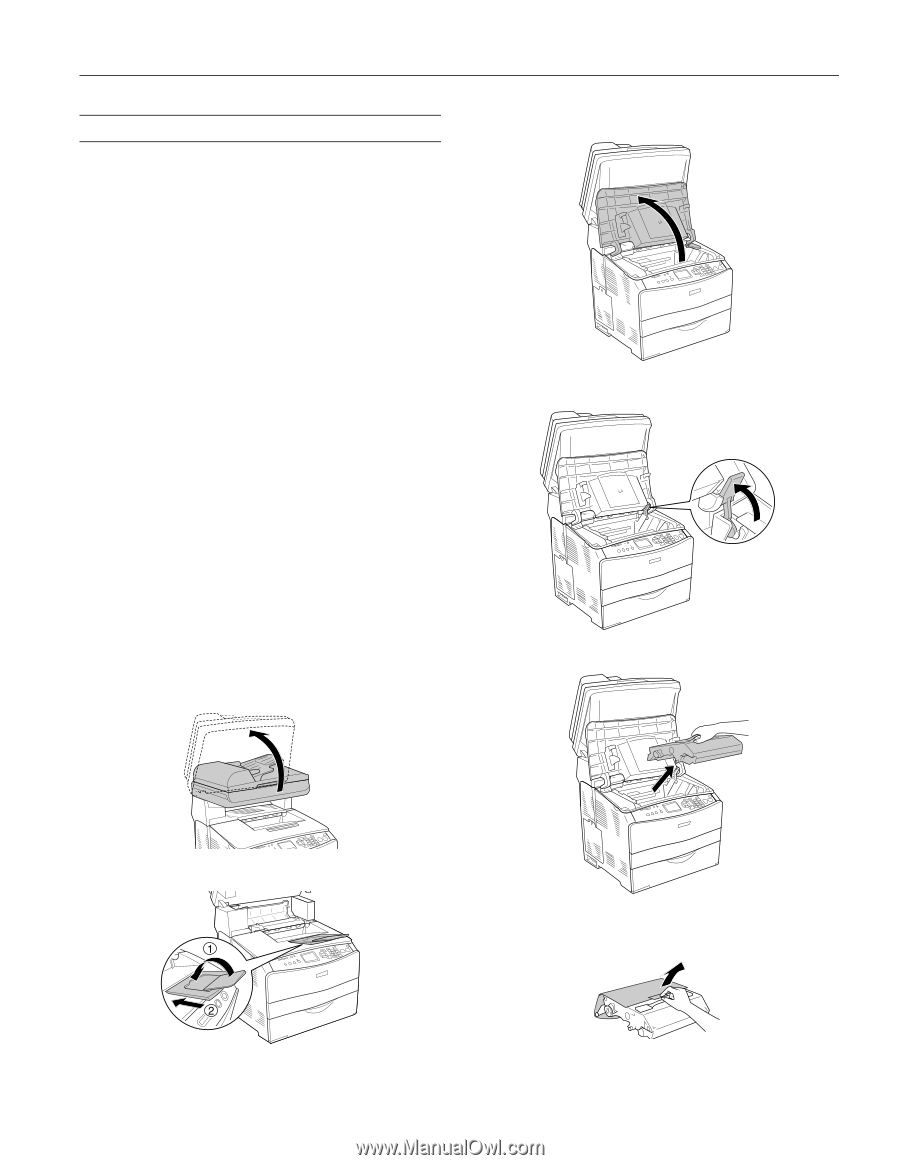
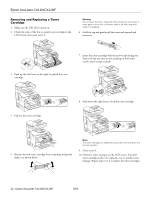
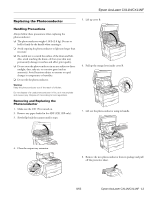
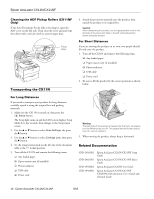
Epson AcuLaser CX11N/CX11NF Replacing the Photoconductor Handling Precautions Always follow these precautions when replacing the photoconductor: ❏ The photoconductor weighs 6.16 lb (2.8 kg). Be sure to hold it firmly by the handle when carrying it. ❏ Avoid exposing the photoconductor to light any longer than necessary. ❏ Be careful not to scratch the surface of the drum and belt. Also, avoid touching the drum; oil from your skin may permanently damage its surface and affect print quality. ❏ Do not store the photoconductor in an area subject to direct sunlight, dust, salty air, or corrosive gases (such as ammonia). Avoid locations subject to extreme or rapid changes in temperature or humidity. ❏ Do not tilt the photoconductor. Warning: Keep the photoconductor out of the reach of children. Do not dispose of a used photoconductor in fire, as it may explode and cause injury. Dispose of it according to local regulations. Removing and Replacing the Photoconductor 1. Make sure the CX11N is turned on. 2. Remove any paper loaded in the ADF (CX11NF only). 3. Slowly flip back the scanner until it stops. 5. Lift up cover B. 6. Pull up the orange lever inside cover B. 7. Lift out the photoconductor using its handle. 4. Close the output tray extension. 8. Remove the new photoconductor from its package and pull off the protective sheet. 8/05 Epson AcuLaser CX11N/CX11NF - 13
-
 1
1 -
2
-
3
-
4
-
5
-
6
-
7
-
 8
8 -
 9
9 -
 10
10 -
 11
11 -
 12
12 -
 13
13 -
 14
14 -
 15
15 -
 16
16
 |
 |