Epson BrightLink 695Wi Installation Guide - Control Pad and Touch Unit - Page 28
Installing the Touch Unit on a whiteboard
 |
View all Epson BrightLink 695Wi manuals
Add to My Manuals
Save this manual to your list of manuals |
Page 28 highlights
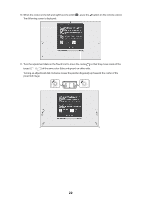
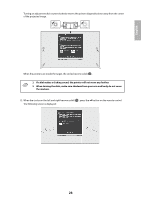
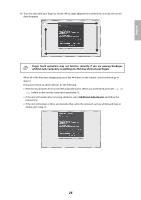
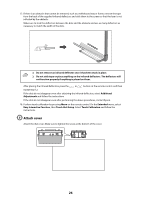
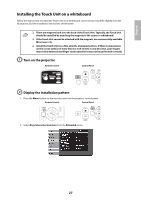
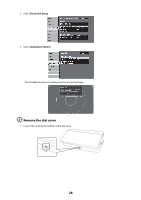
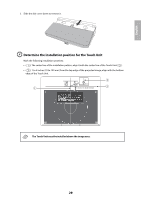
English Installing the Touch Unit on a whiteboard Follow the steps below to install the Touch Unit on a whiteboard. Some menus may differ slightly from the illustrations, but the installation instructions are the same. ❏ There are magnets built in to the back of the Touch Unit. Typically, the Touch Unit should be installed by attaching the magnets to the screen or whiteboard. ❏ If the Touch Unit cannot be attached with the magnets, use commercially available M4 screws (×3). ❏ Install the Touch Unit on a flat, smooth, unwarped surface. If there is unevenness on the screen surface of more than 0.2 inch (5 mm) in any direction, your fingers may not be detected and finger touch operations may not be performed correctly. A Turn on the projector Remote Control Control Panel B Display the installation pattern 1. Press the Menu button on the remote control or the projector control panel. Remote Control Control Panel 2. Select Easy Interactive Function from the Extended menu. 27
-
 1
1 -
2
-
3
-
4
-
5
-
6
-
7
-
8
-
9
-
10
-
11
-
12
-
13
-
14
-
15
-
16
-
17
-
18
-
19
-
20
-
21
-
22
-
 23
23 -
 24
24 -
 25
25 -
 26
26 -
 27
27 -
 28
28 -
 29
29 -
 30
30 -
 31
31 -
 32
32 -
 33
33 -
34
-
35
-
36
-
37
-
38
-
39
-
40
-
41
-
42
-
43
-
44
-
45
-
46
-
47
-
48
-
49
-
50
-
51
-
52
-
53
-
54
-
55
-
56
-
57
-
58
-
59
-
60
-
61
-
62
-
63
-
64
-
65
-
66
-
67
-
68
-
69
-
70
-
71
-
72
-
73
-
74
-
75
-
76
-
77
-
78
-
79
-
80
-
81
-
82
-
83
-
84
-
85
-
86
-
87
-
88
-
89
-
90
 |
 |
