GE DIGIA209-160 User Manual
GE DIGIA209-160 - Security Digia II Digital Video Recorder Manual
 |
UPC - 046188132263
View all GE DIGIA209-160 manuals
Add to My Manuals
Save this manual to your list of manuals |
GE DIGIA209-160 manual content summary:
- GE DIGIA209-160 | User Manual - Page 1
Digia II User Manual - GE DIGIA209-160 | User Manual - Page 2
be copied in whole or in part or otherwise reproduced without prior written consent from GE Security except where specifically permitted under US and patents GE and the GE monogram are registered trademarks of General Electric Company. Digia product and logo are trademarks of GE Security. Other - GE DIGIA209-160 | User Manual - Page 3
the sole discretion of GE Security. To obtain a repair or replacement of nonconforming Software, contact GE Security Customer Service toll free at 888 nor for any claim by any third party. 6. General. Any hardware provided to You by GE Security shall not be exported or reexported in violation of any - GE DIGIA209-160 | User Manual - Page 4
exclusive statement of the agreement between you and GE Security, and supersedes any proposal or prior agreement, oral for a Class A digital device, pursuant to part 15 of the FCC Rules. These limits are designed and used in accordance with the instruction manual, may cause harmful interference to - GE DIGIA209-160 | User Manual - Page 5
and directional buttons 27 Shuffle camera views 27 Freeze or zoom in on live video 28 Chapter 4. Troubleshooting, maintenance, support 31 Troubleshooting 32 Troubleshooting your Digia II 32 Contacting technical support 34 Online publication library 34 Appendix A. Defaults 35 Defaults 36 - GE DIGIA209-160 | User Manual - Page 6
vi Digia II User Manual - GE DIGIA209-160 | User Manual - Page 7
is the GE Digia II User Manual for models Digia 204, Digia 209, and Digia 216. This document includes an overview of the product and detailed instructions explaining: • how to install the unit; and • how to set up the unit. There is also information describing how to contact technical support if you - GE DIGIA209-160 | User Manual - Page 8
viii Digia II User Manual - GE DIGIA209-160 | User Manual - Page 9
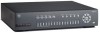
Chapter 1 Introduction This chapter provides an overview of your Digia II, including things you need to know to begin configuring and using your Digia II. In this chapter: Product overview 2 Features 2 Front panel 2 Back panel 3 Monitor display 4 - GE DIGIA209-160 | User Manual - Page 10
2 Digia II User Manual Product overview Digia II incorporates all of the benefits to-use control panel with common VCR and multiplexer functions. • Onscreen menu operations with multiple language support. • Real-time live display for all cameras. • Easy archiving of video and remote viewer through - GE DIGIA209-160 | User Manual - Page 11
on the model you have and how many channels of video it can support. L Directional buttons with enter button. Use these buttons to navigate through for more information. M USB port. Use this in the export and firmware upgrade processes. N Power indicator. O Record indicator. Indicates that the - GE DIGIA209-160 | User Manual - Page 12
4 Digia II User Manual C Monitor output BNC. Connect this to a monitor to view Digia II output. D SVGA connector. Connect a computer monitor to view a Digia II output. E Ethernet port. Use - GE DIGIA209-160 | User Manual - Page 13
5 Introduction Playback status bar. The playback status bar appears when you enable the OSD (onscreen display) in the Display menu. There are three parts to this display bar, which are: • Record date - Displays the date when the video was recorded. • P01 - Displays that video is currently playing - GE DIGIA209-160 | User Manual - Page 14
6 Digia II User Manual - GE DIGIA209-160 | User Manual - Page 15
Chapter 2 Installation This chapter provides the steps to begin installing your Digia II. In this chapter: Installation 8 - GE DIGIA209-160 | User Manual - Page 16
8 Digia II User Manual Installation Be sure to install your Digia II in an area that secure, away from water, heat, dust, dirt, and other substances that may damage the unit. To install Digia II, do the following: 1. Connect a camera to any - GE DIGIA209-160 | User Manual - Page 17
Chapter 3 Setup This chapter provides an description of your Digia II's main menu. In this chapter: Main menu 10 Camera 11 Record 12 Schedule 13 Alarms 15 Network 16 Display 19 System 20 Information 22 Search 24 Export 26 Enter and directional buttons 27 Shuffle camera views 27 Freeze - GE DIGIA209-160 | User Manual - Page 18
10 Digia II User Manual Main menu To access the main menu, press the Menu button. You will be asked for a passcode. Enter either your admin passcode, or your user - GE DIGIA209-160 | User Manual - Page 19
paste settings. Description Each camera has its own submenu. The number of submenus depends on how many cameras your Digia II is capable of supporting. Set the title for the camera (up to 12 characters). Set the recording method for this camera. Choose from Schedule, Disable, Continuous, or Alarms - GE DIGIA209-160 | User Manual - Page 20
12 Digia II User Manual Record Figure 6 shows the Record submenu. Figure 6. Record Digia II Menu - Record Resolution Pre-Alarm Audio Auto Delete Mode Disk Overwrite 2CIF Disable Continuous Table 2. - GE DIGIA209-160 | User Manual - Page 21
Chapter 3 13 Setup Schedule The Schedule submenu has submenus of its own. Those menus are Time periods and a schedule menu for each camera. Time periods Figure 7 shows the Time periods submenu. Figure 7. Time periods Digia II Menu - Schedule > # Schedule Start End 1 Disable - GE DIGIA209-160 | User Manual - Page 22
14 Digia II User Manual Camera # (1 - 16) Figure 8 shows the Camera submenu. Note: Your number of cameras will depend on which model of Digia II you have and how many - GE DIGIA209-160 | User Manual - Page 23
Chapter 3 15 Setup Alarms Figure 9 shows the Alarms submenu. Figure 9. Alarms Digia II Menu - Alarms > Alarm Disable Alarm Frame Rate 10 f/s Quality Level 6-Highest Alarm Duration 05 Sec(s) Sensor Type NC Event Buzzer Alarm to Full Screen eMail Notification Video Loss - GE DIGIA209-160 | User Manual - Page 24
16 Digia II User Manual Network The Network submenu has three of its own submenus. They are Network configuration, Network email, and Network DDNS. Network configuration Figure 10 shows the - GE DIGIA209-160 | User Manual - Page 25
Chapter 3 17 Setup Table 6. Network configuration submenu (continued) Menu item Gateway DNS server Description The IP address to the gateway router the unit is getting its network connection from. If you choose static as a network type, you can set the gateway the same was as you set the IP - GE DIGIA209-160 | User Manual - Page 26
18 Digia II User Manual Network DDNS Figure 12 shows the Network DDNS submenu. Figure 12. Network DDNS Digia II Menu - Network > DDNS Services DDNS Server tzo.com User Password Record ID FQDN Table 8. Network DDNS submenu Menu item DDNS services DDNS server User - GE DIGIA209-160 | User Manual - Page 27
display. Choose between Disable, Top, or Bottom to have the timestamping display. Note: If you enable timestamp, the timestamp becomes a permanent part of the recording and cannot be removed from recorded video. Check this box to enable sequencing. Sequencing will automatically switch the live - GE DIGIA209-160 | User Manual - Page 28
20 Digia II User Manual System The System submenu has two submenus of its own. They are System date&time and System admin. System date&time Figure 14 shows the - GE DIGIA209-160 | User Manual - Page 29
System Admin >> Language English OSD Color White Load/Save Setting NO Firmware Upgrade NO Delete HDD NO Admin Pass Code **** Confirm **** load other settings, or save settings. With a USB device that has the new firmware on it plugged in, press Enter, then up or down. Enter the passcode ( - GE DIGIA209-160 | User Manual - Page 30
22 Digia II User Manual Table 11. System admin submenu (continued) Menu item Admin passcode shows the Information submenu. Figure 16. Information Digia II Menu - Information DVR ID _ _ _ _ _ _ Firmware Version HDD Size IP Address MAC Address Model 0.9.28 76 GB 000.000.000.000 00:00:00:00:00:00 - GE DIGIA209-160 | User Manual - Page 31
Table 12. Information submenu (continued) Menu item Record time From To Chapter 3 23 Setup Description The date the unit started recording. Either the current date or the last date the unit was recording. - GE DIGIA209-160 | User Manual - Page 32
24 Digia II User Manual Search Digia II allows you to search through your recorded video by a multitude of search criteria. To search your video, do the following: 1. Press the - GE DIGIA209-160 | User Manual - Page 33
Chapter 3 25 Setup 13. When you are finished viewing the video, press the Search button to return to the Event list, or press the Live button to return to live video. Note: When you are in the Event list page, you must hit Menu to escape out to the Search menu. - GE DIGIA209-160 | User Manual - Page 34
26 Digia II User Manual Export You can export recorded video in a file to a USB device. To export recorded video, do the following: 1. Press the Export button on the front - GE DIGIA209-160 | User Manual - Page 35
Chapter 3 27 Setup Enter and directional buttons You can use the Enter and directional buttons for a variety of tasks. Shuffle camera views In a multiple-channel display mode, you can customize where each camera view is displayed. To shuffle the camera views, do the following: 1. Press Display - GE DIGIA209-160 | User Manual - Page 36
28 Digia II User Manual Figure 20. Shuffled view CH02 CH01 Select CH03 CH03 12-19-2006 TUE R01 01% FAN 10:39:32a 5. After you make your first switch, - GE DIGIA209-160 | User Manual - Page 37
Figure 22. Zoom in CH01 Zoom Chapter 3 29 Setup 12-19-2006 TUE R01 01% FAN 10:39:32a 4. Use the directional buttons to navigate through the zoomed in screen. 5. Press Enter again to exit back to regular live video. - GE DIGIA209-160 | User Manual - Page 38
30 Digia II User Manual - GE DIGIA209-160 | User Manual - Page 39
Chapter 4 Troubleshooting, maintenance, support This chapter provides information to help you contact technical support in case you need assistance with your GE equipment. In this chapter: Troubleshooting 32 Troubleshooting your Digia II 32 Contacting technical support 34 Online publication - GE DIGIA209-160 | User Manual - Page 40
Manual Troubleshooting This section provides information to help you diagnose and solve various problems that may arise while configuring or using your GE product and offers technical support contacts in case you need assistance. (See Contacting technical support happens, the firmware upgrade process - GE DIGIA209-160 | User Manual - Page 41
Chapter 4 33 Troubleshooting, maintenance, support • The Digia II boots up to a Ethernet, the unit may not boot completely. Contact technical support. • DVR only records for a few hours If motion recording is not properly set up, this problem will arise. To set up motion recording, see (Alarms - GE DIGIA209-160 | User Manual - Page 42
34 Digia II User Manual Contacting technical support For assistance installing, operating, maintaining, and troubleshooting this product, refer to this document and any other documentation provided. If you still have questions, you may contact technical support during normal business hours (Monday - GE DIGIA209-160 | User Manual - Page 43
Appendix A Defaults This appendix provides a list of the default settings for the Digia II. In this appendix: Defaults 36 - GE DIGIA209-160 | User Manual - Page 44
36 Digia II User Manual Defaults Table 14 lists the default settings for each property in the Digia II. Table 14. Default settings Camera settings T itle Recording mode FPS Quality - GE DIGIA209-160 | User Manual - Page 45
Motion sensitivity Network settings Data port HTTP port Control port Client access Bandwidth savings Network type SMTP port Authentication DDNS services DDNS server Display settings OSD T imeStamp Sequence Alarm display Disabled 10 fps 6 5 secs NC Disabled Disabled Disabled Disabled Disabled - GE DIGIA209-160 | User Manual - Page 46
38 Digia II User Manual Table 14. Default settings (continued) System settings Date format Time format Daylight savings Time sychronize Language OSD color Admin passcode User passcode Network passcode Information DVR ID MM/DD/YYYY 12 HR Disabled Disabled English White 4444 1234 33333333 ________
-
 1
1 -
 2
2 -
 3
3 -
 4
4 -
 5
5 -
 6
6 -
 7
7 -
8
-
9
-
10
-
11
-
12
-
13
-
14
-
15
-
16
-
17
-
18
-
19
-
20
-
21
-
22
-
23
-
24
-
25
-
26
-
27
-
28
-
29
-
30
-
31
-
32
-
33
-
34
-
35
-
36
-
37
-
38
-
39
-
40
-
41
-
42
-
43
-
44
-
45
-
46
 |
 |

Digia II
User Manual