GE DIGIA209-160 User Manual - Page 16
Digia2RK separately.
 |
UPC - 046188132263
View all GE DIGIA209-160 manuals
Add to My Manuals
Save this manual to your list of manuals |
Page 16 highlights
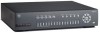
8 Digia II User Manual Installation Be sure to install your Digia II in an area that secure, away from water, heat, dust, dirt, and other substances that may damage the unit. To install Digia II, do the following: 1. Connect a camera to any one of the camera BNC connections. 2. Connect a microphone or another audio input device to the audio input connector. 3. Connect speakers or another audio output device to the audio output connector of the unit. 4. Connect an Ethernet cable from a computer network to the LAN port. 5. Connect a monitor to the main monitor BNC connector. 6. Connect any alarm inputs to the alarm input connectors. The alarm inputs can be: • Normally open (NO), where the relay contact is in an open state. When the contact is closed, an alarm is triggered from 1 to 60 seconds in duration. • Normally closed (NC), where the relay contact is in a closed state. When the contact is open, an alarm is triggered from 1 to 60 seconds in duration. • NO trans, where a relay is in an open state. When the contact is closed, an alarm is triggered and will remain until the contact is opened again. • NC trans, where a relay is in a closed state. When the contact is opened, an alarm is triggered and will remain until the contact is closed again. 7. Connect any alarm outputs to the alarm output connectors. The alarm output is a built-in relay offering three modes: • ALM-COM (common) • ALM-NO (normally open) • ALM-NC (normally closed) These can be used to trigger an external device such as an alarm panel or a siren. 8. Connect the 19 VDC power supply to the unit, and then connect it to the wall outlet. If you'd like to install your Digia II in a standard 19-inch rack, you will need to order the rack mount kit (Digia2RK) separately.
-
 1
1 -
2
-
3
-
4
-
5
-
6
-
7
-
8
-
9
-
10
-
 11
11 -
 12
12 -
 13
13 -
 14
14 -
 15
15 -
 16
16 -
 17
17 -
 18
18 -
 19
19 -
 20
20 -
 21
21 -
22
-
23
-
24
-
25
-
26
-
27
-
28
-
29
-
30
-
31
-
32
-
33
-
34
-
35
-
36
-
37
-
38
-
39
-
40
-
41
-
42
-
43
-
44
-
45
-
46
 |
 |
