Harman Kardon AVR 354 Owners Manual - Page 37
Set Up Sources - no picture
 |
View all Harman Kardon AVR 354 manuals
Add to My Manuals
Save this manual to your list of manuals |
Page 37 highlights
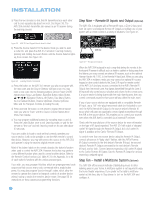
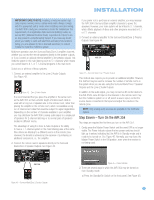
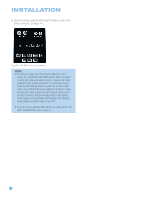
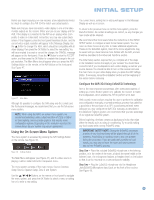
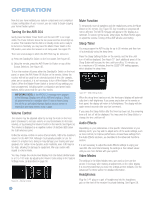
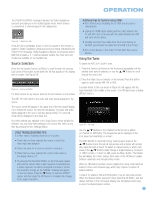
INITIAL SETUP Step Five - During the next portion of the test, the EzSet/EQ procedure equalizes the AVR 354's audio circuitry to compensate for the specific room characteristics and the performance capabilities of each individual speaker. To do this successfully, the EzSet/EQ microphone must be placed about two feet from each speaker in the direction toward the listening position. Wait until the on-screen instructions prompt you before moving the microphone. When the EzSet/EQ process has finished, a screen will appear with its results. See the Advanced Functions section for instructions on how to manually configure the speakers or manually adjust the settings established by the EzSet/EQ process. Set Up Sources The Source Info menu is used to assign the correct physical audio and video connections to each source. It also provides access to a variety of other settings, many of which may be adjusted later as you become more familiar with the AVR. The following settings are not optional and must be adjusted now to enable playback of each source: Video Input from source, Audio Input from Source and Resolution to Display. The other settings may be adjusted at any time to improve performance. To display the Source Info menu, press the Info Settings Button (front panel or remote). A screen similar to the one shown in Figure 54 will appear. This screen may also be accessed from the Main Menu by selecting the Setup Source line and selecting a source from the slide-in menu. Figure 54 - Setup Source Menu Audio Effects: Select this line to display the Audio Effects submenu, where you may: adjust the bass and treble tone controls; adjust the LFE trim; or adjust the Night Mode setting. It is recommended that you leave this submenu at its default settings, and return to it later if your system requires any fine-tuning. See the Advanced Functions section for more information. Video Modes: Select this line to display the Video Modes submenu, to select from preprogrammed or custom picture settings and make picture adjustments. It is recommended that you leave the settings at their factory defaults. Picture adjustments should be made to your video display first, with this menu used only for fine-tuning. See the Advanced Functions section for more information. Surround Modes: Select this line to display the Surround Modes submenu, where you may program the desired surround mode for various types of analog programs, including movies, music and games. You may also specify a stereo mode (depending on the number of channels desired) and a virtual surround mode if your system uses fewer than the full complement of seven main speakers (plus a subwoofer). Digital surround signals, such as Dolby Digital and DTS, are automatically played in their native formats, although you may change the surround mode at any time. See the Advanced Functions section for information on surround modes available with digital programs. In the factory default Auto Select mode, the AVR will analyze the source signal and select the optimum playback mode. The AVR's default is to use the Logic 7 Movie mode for optimal playback of movies, including television programs; the Logic 7 Music mode for music recordings, such as CDs; and the Logic 7 Game mode when a video game console is in use. Select a surround mode corresponding to your selection, i.e. a movie, music or a video game. To reprogram any of the lines in the Surround Modes menu, select it and choose from the list of available surround modes. Whenever you manually select the mode during playback, the AVR will use the new surround mode. Selecting a surround mode is a matter of taste, although the available modes depend on the number of speakers in your system and the format of the incoming signal. Feel free to experiment by selecting any available mode at any time until you find a few modes that you prefer. See the Advanced Functions section for more information. Audio Format From Source: This line is informational only. When a digital program is playing, its format will be identified here. When analog audio programs are playing, this line indicates NO AUDIO INPUT, referring to digital inputs only. Audio and Video Input Selection Please see Table A2 in the appendix for the factory default input assignments for each source. You may assign any available input to any source using the Source Info menu, accessible either by pressing the AVR Settings Button and selecting the Setup Source line, or by pressing the Info Settings Button for direct access. When a source is selected, the AVR will check the assigned digital audio input for a signal. If one is present, the digital input will be selected. If not, the AVR will select the analog audio input specified at the Audio Auto Polling line of the Setup Source menu. If you don't want the AVR to select an analog audio input for the source, change this setting to Off. The AVR will also select the assigned video source. There are no "audioonly" sources on the AVR 354, other than the Radio, which uses a special on-screen menu. If no video signal is present, the display will remain black. You may pair an audio device with an A/V device's video signal using the Source Info menu. Sources may share audio or video inputs to suit your application. NOTE: The Bridge II obtains its audio and video signals (when available) from the iPod docked in it, and it may not be used with other audio or video sources. 37
-
 1
1 -
2
-
3
-
4
-
5
-
6
-
7
-
8
-
9
-
10
-
11
-
12
-
13
-
14
-
15
-
16
-
17
-
18
-
19
-
20
-
21
-
22
-
23
-
24
-
25
-
26
-
27
-
28
-
29
-
30
-
31
-
 32
32 -
 33
33 -
 34
34 -
 35
35 -
 36
36 -
 37
37 -
 38
38 -
 39
39 -
 40
40 -
 41
41 -
 42
42 -
43
-
44
-
45
-
46
-
47
-
48
-
49
-
50
-
51
-
52
-
53
-
54
-
55
-
56
-
57
-
58
-
59
-
60
-
61
-
62
-
63
-
64
-
65
-
66
-
67
-
68
-
69
-
70
-
71
-
72
-
73
-
74
-
75
-
76
 |
 |
