Harman Kardon AVR 354 Owners Manual - Page 41
Source Selection, Using the Tuner - no picture no sound
 |
View all Harman Kardon AVR 354 manuals
Add to My Manuals
Save this manual to your list of manuals |
Page 41 highlights
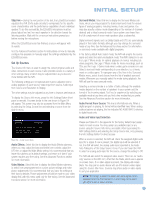
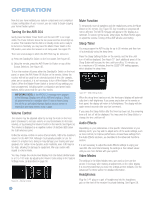
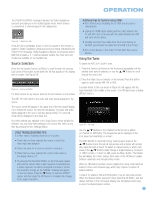
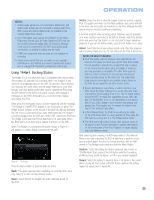
OPERATION The DOLBY H:BYPASS message indicates that Dolby Headphone surround processing is in the default bypass mode, which delivers a conventional 2-channel signal to the headphones. Figure 58 - Headphone Jack Press the Surround Modes Button on the front panel or the remote, to switch to Dolby Headphone virtual surround processing, indicated by the DOLBY H:DH message. Dolby Headphone delivers an enhanced sound field that emulates a 5.1-channel speaker system. No other surround modes are available for the headphones. Source Selection Press the front-panel Source List Button to scroll through the sources. Each press of the button scrolls down the list that appears in the display and on screen. See Figure 59. Figure 59 - Source List Button For direct access to any source, press its Source Selector on the remote. The AVR 354 will switch to the audio and video inputs assigned to the source. The source name will appear in the upper line of the front-panel display. If you retitled the source, the new title will appear. The audio and video inputs assigned to the source will also appear briefly. The surround mode will be displayed on the lower line. Any other settings you adjusted in the Setup Source menu will also be selected. You may view these settings in the Source Info menu at any time by pressing the Info Settings Button. VIDEO TROUBLESHOOTING TIPS: If a video source is playing and there is no picture: • Check that you have selected the source to which the video input was assigned. • Check the wires for a loose or incorrect connection. • Check that you have selected the correct video input on the display device (TV). • Try pressing the Resolution Button on the front panel repeatedly until the correct video output resolution is selected and a picture appears. You will be prompted to accept or cancel the resolution change, as the CANCEL message will appear on the front panel. Press the ¤ Button to view the ACCEPT option, and then press the OK Button to complete the change to the output resolution. Additional Tips for Systems Using HDMI: • Turn off all devices (including the TV, AVR and any source components). • Unplug the HDMI cables starting with the cable between the TV and AVR, and continuing with the cables between the AVR and each source device. • Carefully reconnect the cables from the source devices to the AVR, and connect the cable from the AVR to the TV last. • Turn on the devices in this order: TV, then AVR, then source devices. Using the Tuner To select the AVR 354's built-in tuner: 1. Press the Source List Button on the front panel repeatedly until the desired tuner band is selected, or use the ⁄/¤ Buttons to scroll through the source list. 2. Press the Radio Source Selector on the remote. Press this button again to switch bands (AM, FM or XM). A screen similar to the one shown in Figure 60 will appear, with the band indicated in the middle of the screen. (The XM band uses a slightly different screen.) Figure 60 - FM Radio Use the ⁄/¤ Buttons or the Channel Control to tune a station (or channel for XM Radio). The frequencies will be displayed in the front panel and graphically on screen. The AVR defaults to automatic tuning, meaning each press of the ⁄/¤ Buttons scans through all frequencies until a station with acceptable signal strength is found. To switch to manual tuning, in which each press of the ⁄/¤ Buttons steps through a single frequency increment (0.1MHz for FM, or 10kHz for AM), press the Menu Button. The Modes line will display the current setting. Each press of the OK Button toggles between automatic and manual tuning modes. When an FM station has been tuned, toggling the tuning mode switches between stereo and monaural play, which may improve reception of weaker stations. A total of 30 stations (AM and FM together) may be stored as presets. When the desired station has been tuned, press the OK Button, and two dashes will flash in the front-panel display. Use the Alphanumeric Keys to enter the desired preset number. 41
-
 1
1 -
2
-
3
-
4
-
5
-
6
-
7
-
8
-
9
-
10
-
11
-
12
-
13
-
14
-
15
-
16
-
17
-
18
-
19
-
20
-
21
-
22
-
23
-
24
-
25
-
26
-
27
-
28
-
29
-
30
-
31
-
32
-
33
-
34
-
35
-
 36
36 -
 37
37 -
 38
38 -
 39
39 -
 40
40 -
 41
41 -
 42
42 -
 43
43 -
 44
44 -
 45
45 -
 46
46 -
47
-
48
-
49
-
50
-
51
-
52
-
53
-
54
-
55
-
56
-
57
-
58
-
59
-
60
-
61
-
62
-
63
-
64
-
65
-
66
-
67
-
68
-
69
-
70
-
71
-
72
-
73
-
74
-
75
-
76
 |
 |
