Harman Kardon AVR 645 Owners Manual - Page 30
Manual Setup
 |
View all Harman Kardon AVR 645 manuals
Add to My Manuals
Save this manual to your list of manuals |
Page 30 highlights
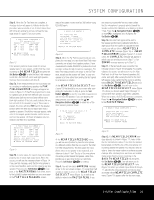
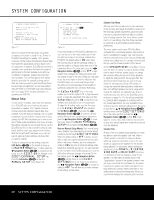
SYSTEM CONFIGURATION * NEAR FIELD ERROR * Near Field EQ was not successful. Please check mic placement and volume setting →BACK TO NEAR FIELD BACK TO MASTER MENU Figure 17 When the measurements have been successfully completed, your system is ready for use. Thanks to EzSet/EQ, the settings for speaker "size," speaker crossover, channel output and individual channel delay time have been automatically set and require no further adjustment. In addition, EzSet/EQ also performs a complete room equalization that tailors the system's performance for the best possible sound with your combination of speakers, speaker placement and room acoustics. The next few pages in this manual detail the procedure for manually entering system data, but unless you want to view the setting information and make an adjustment, you are now ready to enjoy the finest in home theater and music reproduction. Go to page 36 for complete information on operating your AVR 645. Manual Setup In most cases it is simpler, easier and more accurate to let EzSet/EQ take care of entering the system parameters for speaker "size", speaker crossover, channel output and individual channel delay time. However, if you feel that your listening room or system components are best suited to manual entry of these settings, the AVR 645 also allows you to enter or trim any of these system parameters. Even if you do make the settings manually, we recommend that you run the EzSet/EQ tests first so that a baseline setting is established, and then make your adjustments from there. Note that once EzSet/EQ has been run you do not need to adjust all system settings, only those that you want to change. To view or change the current settings, press the OSD Button U∫ on the remote to bring up the MASTER MENU (Figure 1). Next, press the ¤ Navigation Button n© as needed until the cursor is on the EZSET/EQ line. Navigate to the EZSET/EQ MANUAL SETUP line. Press the Set Button pœ to view the MANUAL SETUP menu (Figure 18). * MANUAL SETUP * → EzSet EQ : OFF ON EzSet ADJUST SPEAKER SIZE DELAY ADJUST CHANNEL ADJUST BACK TO EZSET/EQ MAIN Figure 18 If you have already run the EzSet/EQ calibration system, the first line of the menu enables you to hear the difference between the settings established by EzSet/EQ. The default setting is ON, which plays the incoming source with the EzSet/EQ settings. To hear the system in a Bypass mode, with none of the equalization filters in the circuit path, press the ‹/› Navigation Button n© so that OFF is highlighted. Once changed, this setting will remain until you change it again in this menu. While you may want to use this menu option to hear the difference that EzSet/EQ makes, we recommend that you leave the setting on to take advantage of the benefits of EzSet/EQ's advanced room correction technology. The EzSet ADJUST line on the menu enables you to set the system's Tilt, or high-frequency boost. To make this adjustment, first make sure that EzSet EQ line is set to ON, as this item is not available when EzSet/EQ is not in the signal path. To adjust the tilt setting, make sure that the cursor is on the EzSet ADJUST line, and press the Set Button pœ. Then press the ‹/› Navigation Button n© to enter the desired setting. When you have completed your adjustment, press the › Navigation Button n© to move the cursor down to the BACK TO MANUAL SETUP line and press the Set Button pœ. Note on Manual Setup Menus: Each manual setup menu (Speaker Size, Delay Adjust and Channel Adjust) includes a line that reads EZSET SETTINGS. When the default setting of OFF is shown, you are able to make any required adjustments that are available on that menu. However, you may change the setting to ON at any time to recall the settings established when EzSet/EQ was last run. It is also important to note that when the EzSet/EQ settings are in use, the AVR will not allow any changes to be made. To trim the settings, press the ‹/› Navigation Button n© until the cursor is on the EZSET SETTINGS line on the menu in use and press the ‹/› Navigation Button n© to change the setting to OFF. This will allow you to make changes to the settings on that menu. Speaker Size Menu Although most listeners will prefer to take advantage of the accuracy and speed of EzSet/EQ to make all of the necessary speaker adjustments, advanced users may wish to experiment with how different combinations of settings sound in their home theater environment or to use settings other than those calculated by EzSet/EQ, to accommodate personal listening preferences. The menu system used in your AVR 645 differs somewhat from conventional speaker setup menus in that it consolidates the speaker "size" and crossover into one convenient menu. Even if you are familiar with making these adjustments, it is strongly recommended that you read the following section of this manual. On the SPEAKER SIZE menu (Figure 19) you have the option to change the type of speaker configured for each of the four position groups, to change the crossover setting for any one of those speakers, to adjust the setting point for the low-pass filter that determines which frequencies are sent to the subwoofer for low-frequency effects (LFE) signals, to change the subwoofer bass redirection mode when the Front Left/Right speakers are set to Large and to change the setting for the subwoofer size. If, as recommended, you have first run the EzSet/EQ system, as shown on pages 27-30, the settings established by EzSet/EQ will be displayed as a starting point for any manual adjustments. You may reestablish those settings at any time during an adjustment on this menu by pressing the ⁄/¤ Navigation Button n© until the cursor is on the EZSET SETTINGS line of the menu and then pressing the ‹/› Navigation Button n© so that ON is highlighted in reverse video. Note, however, that once this is done, any manual adjustments made will be lost and must be reentered. Speaker Size At each of the four speaker group positions, you have the ability to select the speaker "size" and, when a "Small" speaker is selected, the frequency below which low-frequency information is sent to the subwoofer, as opposed to the speakers for the channel being adjusted. For that reason, before making the adjustments on the FRONT L/R, CENTER, SIDE SURR and BACK SURR menu lines, it is important to know the frequency range for the speaker. This information is typically found in the "Specifications" section of the speaker's owner's manual. If you cannot find the specification for the lowest frequency the speaker can handle, start with the settings entered by running EzSet/EQ and then try one setting above or below the existing entry. We do not recommend changing the crossover point more than 30 SYSTEM CONFIGURATION
-
 1
1 -
2
-
3
-
4
-
5
-
6
-
7
-
8
-
9
-
10
-
11
-
12
-
13
-
14
-
15
-
16
-
17
-
18
-
19
-
20
-
21
-
22
-
23
-
24
-
 25
25 -
 26
26 -
 27
27 -
 28
28 -
 29
29 -
 30
30 -
 31
31 -
 32
32 -
 33
33 -
 34
34 -
 35
35 -
36
-
37
-
38
-
39
-
40
-
41
-
42
-
43
-
44
-
45
-
46
-
47
-
48
-
49
-
50
-
51
-
52
-
53
-
54
-
55
-
56
-
57
-
58
-
59
-
60
-
61
-
62
-
63
-
64
-
65
-
66
-
67
-
68
 |
 |
