HP 5100 HP LaserJet 5100 Series - Printer Maintenance Kit - Page 10
Step 1 Replace the transfer roller, CAUTION,
 |
UPC - 808736092500
View all HP 5100 manuals
Add to My Manuals
Save this manual to your list of manuals |
Page 10 highlights
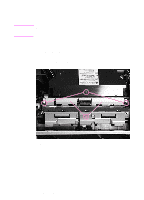
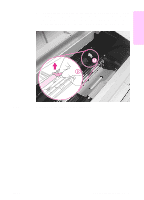
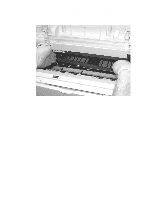
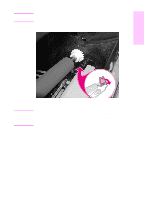
Step 1 Replace the transfer roller CAUTION When removing screws in the printer, use a magnetic screwdriver. Using a magnetic screwdriver can help to prevent screws from falling inside the printer, where they might damage the printer. 1 Face the front of the printer, open the top cover, and lift the small green handle on the right side of the registration assembly, exposing the metal plate that rests against the transfer roller (Figure 2, item 2). 2 While holding the green handle, remove the two self-tapping screws (item 1), and then carefully lift out the transfer guide. Figure 2 Removing the metal plate 8 Installing the printer maintenance kit ENWW
-
 1
1 -
2
-
3
-
4
-
 5
5 -
 6
6 -
 7
7 -
 8
8 -
 9
9 -
 10
10 -
 11
11 -
 12
12 -
 13
13 -
 14
14 -
 15
15 -
16
-
17
-
18
-
19
-
20
-
21
-
22
-
23
-
24
-
25
-
26
-
27
-
28
-
29
-
30
-
31
-
32
-
33
-
34
-
35
-
36
-
37
-
38
-
39
-
40
-
41
-
42
-
43
-
44
-
45
-
46
-
47
-
48
-
49
-
50
-
51
-
52
-
53
-
54
-
55
-
56
-
57
-
58
-
59
-
60
-
61
-
62
-
63
-
64
-
65
-
66
-
67
-
68
-
69
-
70
-
71
-
72
-
73
-
74
-
75
-
76
-
77
-
78
-
79
-
80
-
81
-
82
-
83
-
84
-
85
-
86
-
87
-
88
-
89
-
90
-
91
-
92
-
93
-
94
-
95
-
96
-
97
-
98
-
99
-
100
-
101
-
102
-
103
-
104
-
105
-
106
-
107
-
108
-
109
-
110
-
111
-
112
-
113
-
114
-
115
-
116
-
117
-
118
-
119
-
120
-
121
-
122
-
123
-
124
-
125
-
126
-
127
-
128
-
129
-
130
-
131
-
132
-
133
-
134
-
135
-
136
-
137
-
138
-
139
-
140
-
141
-
142
-
143
-
144
-
145
-
146
-
147
-
148
-
149
-
150
-
151
-
152
-
153
-
154
-
155
-
156
-
157
-
158
-
159
-
160
-
161
-
162
-
163
-
164
-
165
-
166
-
167
-
168
-
169
-
170
-
171
-
172
-
173
-
174
-
175
-
176
-
177
-
178
-
179
-
180
-
181
-
182
-
183
-
184
-
185
-
186
 |
 |
8
Installing the printer maintenance kit
ENWW
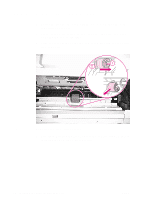
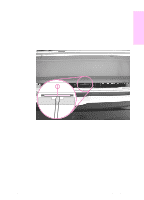
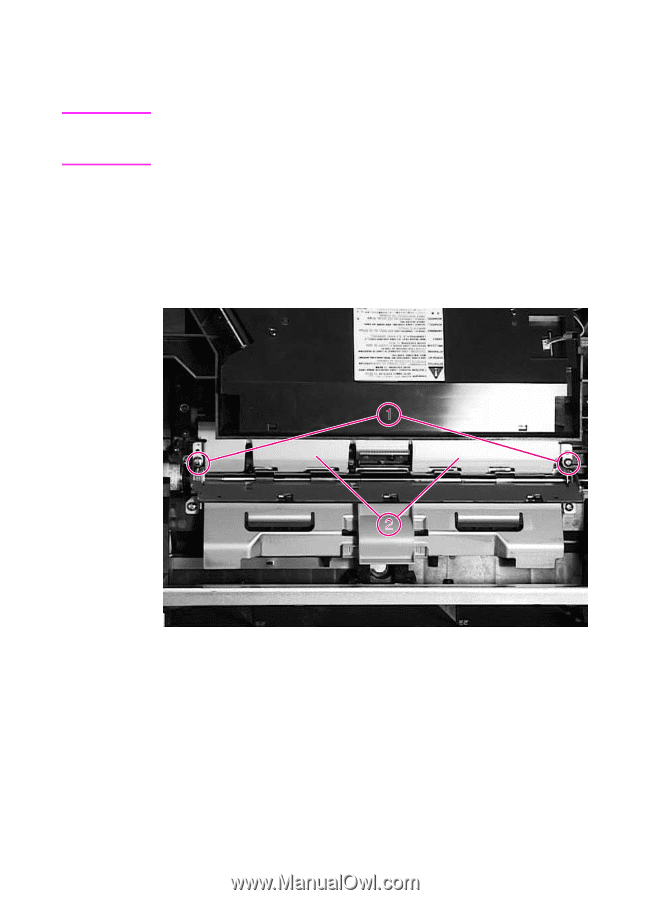
Step 1
Replace the transfer roller
CAUTION
When removing screws in the printer, use a magnetic screwdriver.
Using a magnetic screwdriver can help to prevent screws from falling
inside the printer, where they might damage the printer.
1
Face the front of the printer, open the top cover, and lift the small
green handle on the right side of the registration assembly,
exposing the metal plate that rests against the transfer roller
(Figure 2, item 2).
2
While holding the green handle, remove the two self-tapping
screws (item 1), and then carefully lift out the transfer guide.
Figure 2
Removing the metal plate