HP Dc5700 Hardware Reference Guide - dc5700 MT - Page 15
Replacing the Computer Access Panel,
 |
UPC - 882780819535
View all HP Dc5700 manuals
Add to My Manuals
Save this manual to your list of manuals |
Page 15 highlights
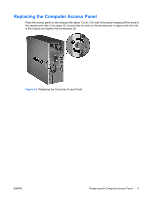
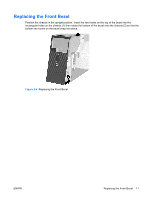
Replacing the Computer Access Panel Place the access panel on the chassis with about 1.3 cm (1/2 inch) of the panel hanging off the back of the chassis and slide it into place (1). Ensure that the hole for the thumbscrew is aligned with the hole in the chassis and tighten the thumbscrew (2). Figure 2-2 Replacing the Computer Access Panel ENWW Replacing the Computer Access Panel 9
-
 1
1 -
2
-
3
-
4
-
5
-
6
-
7
-
8
-
9
-
 10
10 -
 11
11 -
 12
12 -
 13
13 -
 14
14 -
 15
15 -
 16
16 -
 17
17 -
 18
18 -
 19
19 -
 20
20 -
21
-
22
-
23
-
24
-
25
-
26
-
27
-
28
-
29
-
30
-
31
-
32
-
33
-
34
-
35
-
36
-
37
-
38
-
39
-
40
-
41
-
42
-
43
-
44
-
45
-
46
-
47
-
48
-
49
-
50
-
51
-
52
 |
 |
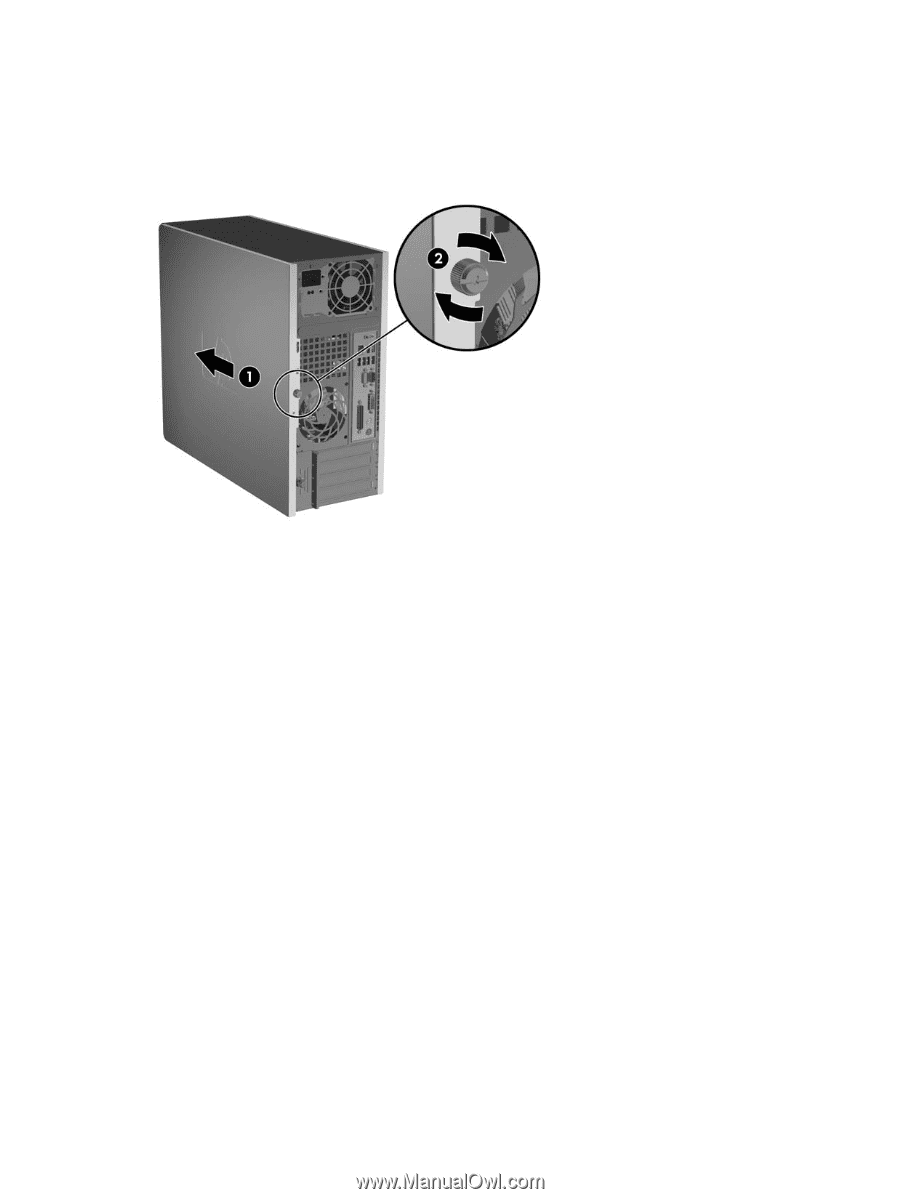
Replacing the Computer Access Panel
Place the access panel on the chassis with about 1.3 cm (1/2 inch) of the panel hanging off the back of
the chassis and slide it into place (1). Ensure that the hole for the thumbscrew is aligned with the hole
in the chassis and tighten the thumbscrew (2).
Figure 2-2
Replacing the Computer Access Panel
ENWW
Replacing the Computer Access Panel
9