HP ENVY dv6-7213nr HP ENVY dv6 Notebook PC Maintenance and Service Guide IMPOR - Page 108
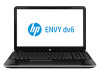
HD display assembly
 |
View all HP ENVY dv6-7213nr manuals
Add to My Manuals
Save this manual to your list of manuals |
Page 108 highlights
9. If it is necessary to replace the display panel cable: CAUTION: Be sure the work surface is clear of all tools, screws, and computer components before turning the display panel upside down on the work surface. a. Turn the display panel upside down, with the top edge toward you. b. Release the adhesive support strip (1) that secures the display panel cable connector to the display panel. c. Release the handle (2) that secures the display panel cable connector to the display panel. d. Disconnect the display panel cable (3) from the display panel. The display panel cable is available using the following spare part numbers: ● 682055-001-Display panel cable for use only on computer models equipped with an FHD display assembly ● 682057-001-Display panel cable for use only on computer models equipped with an FHD display assembly and an Intel processor ● 682054-001-Display panel cable for use only on computer models equipped with an HD display assembly ● 682056-001-Display panel cable for use only on computer models equipped with an HD display assembly and an Intel processor 10. If it is necessary to replace the webcamera/microphone module: a. Release the grounding strip (1) that secures the webcamera/microphone module to the display enclosure. 100 Chapter 4 Removal and replacement procedures
-
 1
1 -
2
-
3
-
4
-
5
-
6
-
7
-
8
-
9
-
10
-
11
-
12
-
13
-
14
-
15
-
16
-
17
-
18
-
19
-
20
-
21
-
22
-
23
-
24
-
25
-
26
-
27
-
28
-
29
-
30
-
31
-
32
-
33
-
34
-
35
-
36
-
37
-
38
-
39
-
40
-
41
-
42
-
43
-
44
-
45
-
46
-
47
-
48
-
49
-
50
-
51
-
52
-
53
-
54
-
55
-
56
-
57
-
58
-
59
-
60
-
61
-
62
-
63
-
64
-
65
-
66
-
67
-
68
-
69
-
70
-
71
-
72
-
73
-
74
-
75
-
76
-
77
-
78
-
79
-
80
-
81
-
82
-
83
-
84
-
85
-
86
-
87
-
88
-
89
-
90
-
91
-
92
-
93
-
94
-
95
-
96
-
97
-
98
-
99
-
100
-
101
-
102
-
 103
103 -
 104
104 -
 105
105 -
 106
106 -
 107
107 -
 108
108 -
 109
109 -
 110
110 -
 111
111 -
 112
112 -
 113
113 -
114
-
115
-
116
-
117
-
118
-
119
-
120
-
121
-
122
-
123
-
124
-
125
-
126
-
127
-
128
-
129
-
130
 |
 |
