HP EliteBook 700 Maintenance and Service Guide - Page 71
Remove the 4 Phillips PM2.5×5.0 screws
 |
View all HP EliteBook 700 manuals
Add to My Manuals
Save this manual to your list of manuals |
Page 71 highlights
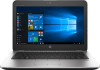
3. Release the WLAN antennas (1) and WWAN antennas (2) (if equipped) from the routing channel and clips built into the keyboard/top cover. CAUTION: When installing the display assembly, be sure that the wireless antenna cables are routed and arranged properly. Failure to properly route the antennas can result in degradation of the computer's wireless performance. 4. Remove the 4 Phillips PM2.5×5.0 screws (1) that secure the display assembly to the computer. 5. Swing the hinges (2) up and back. 6. Slide the keyboard/top cover (3) up and forward at and angle and separate the keyboard/top cover from the display assembly. NOTE: The following steps apply only to computer models equipped with non-TouchScreen display assemblies. Component replacement procedures 61
-
 1
1 -
2
-
3
-
4
-
5
-
6
-
7
-
8
-
9
-
10
-
11
-
12
-
13
-
14
-
15
-
16
-
17
-
18
-
19
-
20
-
21
-
22
-
23
-
24
-
25
-
26
-
27
-
28
-
29
-
30
-
31
-
32
-
33
-
34
-
35
-
36
-
37
-
38
-
39
-
40
-
41
-
42
-
43
-
44
-
45
-
46
-
47
-
48
-
49
-
50
-
51
-
52
-
53
-
54
-
55
-
56
-
57
-
58
-
59
-
60
-
61
-
62
-
63
-
64
-
65
-
 66
66 -
 67
67 -
 68
68 -
 69
69 -
 70
70 -
 71
71 -
 72
72 -
 73
73 -
 74
74 -
 75
75 -
 76
76 -
77
-
78
-
79
-
80
-
81
-
82
-
83
-
84
-
85
-
86
-
87
-
88
-
89
-
90
-
91
-
92
-
93
-
94
-
95
-
96
-
97
-
98
-
99
-
100
-
101
 |
 |
