HP Jetdirect 610n HP Jetdirect 610n EIO Print Server - (English) Hardware Inst - Page 16
Step 4. Turn Off Your Printer and Insert the Card, Step 4
 |
View all HP Jetdirect 610n manuals
Add to My Manuals
Save this manual to your list of manuals |
Page 16 highlights
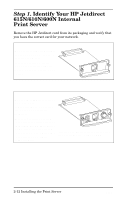
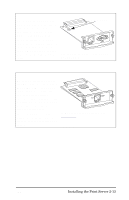
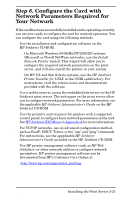
Step 4. Turn Off Your Printer and Insert the Card Figure 2-1 Typical Card Installation and Network Connection RJ-45 BNC 1. Turn off the printer. 2. Identify an available HP Enhanced I/O (EIO) slot (typically, in the back of the printer). Note You can install the card into any EIO slot in the HP printer. 3. If the slot has a cover plate, remove it. 4. Insert the card. Align the card with the guide rails in the slot. 5. Press the card into the slot until firmly seated and tighten each retaining screw a little at a time until both screws are secure. 6. Connect the network cable to the card. 2-16 Installing the Print Server ENWW
-
 1
1 -
2
-
3
-
4
-
5
-
6
-
7
-
8
-
9
-
10
-
 11
11 -
 12
12 -
 13
13 -
 14
14 -
 15
15 -
 16
16 -
 17
17 -
 18
18 -
 19
19 -
 20
20 -
 21
21 -
22
-
23
-
24
-
25
-
26
-
27
-
28
-
29
-
30
-
31
-
32
-
33
-
34
-
35
-
36
-
37
-
38
-
39
-
40
-
41
-
42
-
43
-
44
 |
 |

2-16 Installing the Print Server
ENWW
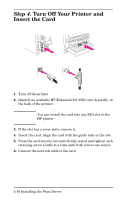
Step 4
. Turn Off Your Printer and
Insert the Card
Figure 2-1
Typical Card Installation and Network Connection
1.
Turn off the printer.
2.
Identify an available HP Enhanced I/O (EIO) slot (typically, in
the back of the printer).
Note
You can install the card into any EIO slot in the
HP printer.
3.
If the slot has a cover plate, remove it.
4.
Insert the card. Align the card with the guide rails in the slot.
5.
Press the card into the slot until firmly seated and tighten each
retaining screw a little at a time until both screws are secure.
6.
Connect the network cable to the card.
RJ-45
BNC