HP Mini CQ10-100 Compaq Mini CQ10 Notebook PC and Compaq Mini 102 Notebook PC - Page 49
Turn the computer right-side up, and then lift up on the top and left edges, of the keyboard until
 |
View all HP Mini CQ10-100 manuals
Add to My Manuals
Save this manual to your list of manuals |
Page 49 highlights
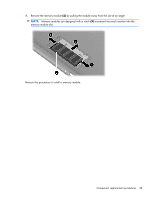
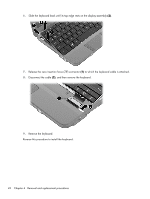
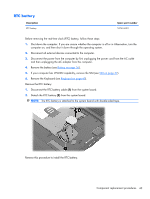
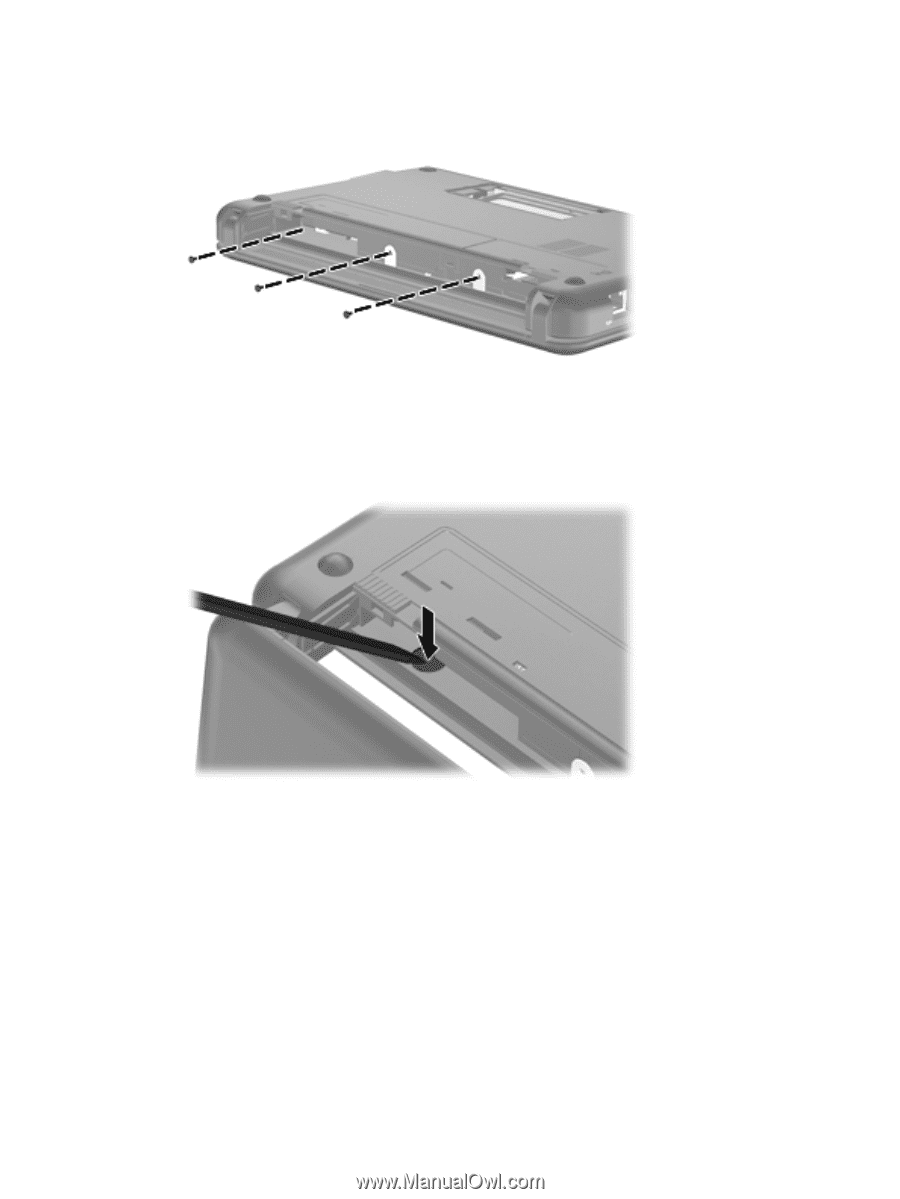
Remove the keyboard: 1. Remove the 3 Phillips PM2.0×3.0 screws that secure the keyboard to the computer. 2. Turn the computer right-side up, and then open the display as far as possible. 3. Turn the computer upside down, and locate the keyboard release access on the bottom of the computer, inside the battery bay. 4. Insert a flexible tool into the opening, and then press inward to release the keyboard. 5. Turn the computer right-side up, and then lift up on the top and left edges (1) of the keyboard until the keyboard releases completely. Component replacement procedures 41
-
 1
1 -
2
-
3
-
4
-
5
-
6
-
7
-
8
-
9
-
10
-
11
-
12
-
13
-
14
-
15
-
16
-
17
-
18
-
19
-
20
-
21
-
22
-
23
-
24
-
25
-
26
-
27
-
28
-
29
-
30
-
31
-
32
-
33
-
34
-
35
-
36
-
37
-
38
-
39
-
40
-
41
-
42
-
43
-
 44
44 -
 45
45 -
 46
46 -
 47
47 -
 48
48 -
 49
49 -
 50
50 -
 51
51 -
 52
52 -
 53
53 -
 54
54 -
55
-
56
-
57
-
58
-
59
-
60
-
61
-
62
-
63
-
64
-
65
-
66
-
67
-
68
-
69
-
70
-
71
-
72
-
73
-
74
-
75
-
76
-
77
-
78
-
79
-
80
-
81
-
82
-
83
-
84
-
85
-
86
-
87
-
88
-
89
-
90
-
91
-
92
-
93
-
94
-
95
-
96
-
97
-
98
-
99
-
100
-
101
-
102
-
103
-
104
-
105
-
106
-
107
-
108
-
109
-
110
-
111
-
112
-
113
-
114
-
115
-
116
-
117
-
118
-
119
 |
 |
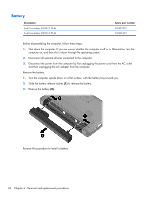
Remove the keyboard:
1.
Remove the 3 Phillips PM2.0×3.0 screws that secure the keyboard to the computer.
2.
Turn the computer right-side up, and then open the display as far as possible.
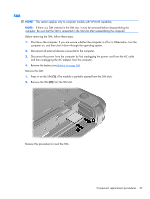
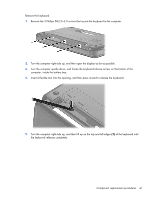
3.
Turn the computer upside down, and locate the keyboard release access on the bottom of the
computer, inside the battery bay.
4.
Insert a flexible tool into the opening, and then press inward to release the keyboard.
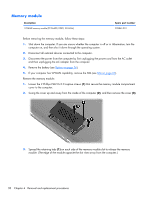
5.
Turn the computer right-side up, and then lift up on the top and left edges
(1)
of the keyboard until
the keyboard releases completely.
Component replacement procedures
41