HP Mini CQ10-100 Compaq Mini CQ10 Notebook PC and Compaq Mini 102 Notebook PC - Page 83
Displaying system information, Restoring default settings in the Setup Utility
 |
View all HP Mini CQ10-100 manuals
Add to My Manuals
Save this manual to your list of manuals |
Page 83 highlights
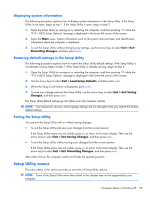
Displaying system information The following procedure explains how to display system information in the Setup Utility. If the Setup Utility is not open, begin at step 1. If the Setup Utility is open, begin at step 2. 1. Open the Setup Utility by turning on or restarting the computer, and then pressing f10 while the "F10 = BIOS Setup Options" message is displayed in the lower-left corner of the screen. 2. Select the Main menu. System information such as the system time and date, and identification information about the computer is displayed. 3. To exit the Setup Utility without changing any settings, use the arrow keys to select Exit > Exit Discarding Changes, and then press enter. Restoring default settings in the Setup Utility The following procedure explains how to restore the Setup Utility default settings. If the Setup Utility is not already running, begin at step 1. If the Setup Utility is already running, begin at step 2. 1. Open the Setup Utility by turning on or restarting the computer, and then pressing f10 while the "F10 = BIOS Setup Options" message is displayed in the lower-left corner of the screen. 2. Use the arrow keys to select Exit > Load Setup Defaults, and then press enter. 3. When the Setup Confirmation is displayed, press enter. 4. To save your change and exit the Setup Utility, use the arrow keys to select Exit > Exit Saving Changes, and then press enter. The Setup Utility default settings go into effect when the computer restarts. NOTE: Your password, security, and language settings are not changed when you restore the factory default settings. Exiting the Setup Utility You can exit the Setup Utility with or without saving changes. ● To exit the Setup Utility and save your changes from the current session: If the Setup Utility menus are not visible, press esc to return to the menu display. Then use the arrow keys to select Exit > Exit Saving Changes, and then press enter. ● To exit the Setup Utility without saving your changes from the current session: If the Setup Utility menus are not visible, press esc to return to the menu display. Then use the arrow keys to select Exit > Exit Discarding Changes, and then press enter. After either choice, the computer restarts and loads the operating system. Setup Utility menus The menu tables in this section provide an overview of Setup Utility options. NOTE: Some of the Setup Utility menu items listed in this chapter may not be supported by your computer. Computer Setup in Windows XP 75
-
 1
1 -
2
-
3
-
4
-
5
-
6
-
7
-
8
-
9
-
10
-
11
-
12
-
13
-
14
-
15
-
16
-
17
-
18
-
19
-
20
-
21
-
22
-
23
-
24
-
25
-
26
-
27
-
28
-
29
-
30
-
31
-
32
-
33
-
34
-
35
-
36
-
37
-
38
-
39
-
40
-
41
-
42
-
43
-
44
-
45
-
46
-
47
-
48
-
49
-
50
-
51
-
52
-
53
-
54
-
55
-
56
-
57
-
58
-
59
-
60
-
61
-
62
-
63
-
64
-
65
-
66
-
67
-
68
-
69
-
70
-
71
-
72
-
73
-
74
-
75
-
76
-
77
-
 78
78 -
 79
79 -
 80
80 -
 81
81 -
 82
82 -
 83
83 -
 84
84 -
 85
85 -
 86
86 -
 87
87 -
 88
88 -
89
-
90
-
91
-
92
-
93
-
94
-
95
-
96
-
97
-
98
-
99
-
100
-
101
-
102
-
103
-
104
-
105
-
106
-
107
-
108
-
109
-
110
-
111
-
112
-
113
-
114
-
115
-
116
-
117
-
118
-
119
 |
 |