HP P3410A HP NetRAID Series User Guide - Page 96
Stripes, StrpSz, Drive-State, Enter, Advanced, Stripe Size, Write Policy, Read-Ahead, Cache Policy
 |
UPC - 725184582783
View all HP P3410A manuals
Add to My Manuals
Save this manual to your list of manuals |
Page 96 highlights
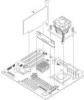
Chapter 4 HP NetRAID Express Tools 5. Press F10 to configure logical drives. The logical drive configuration window appears, as shown below: The window shows the logical drive that is currently being configured as well as any existing logical drives. The column headings are, from left to right: LD The logical drive number RAID The RAID level Size The logical drive size #Stripes The number of stripes (physical drives) in the associated physical array StrpSz The stripe size Drive-State The state of the logical drive 6. To set the RAID level for the logical drive, highlight RAID and press Enter. A list of the available RAID levels for the current logical drive appears. Select a RAID level and press Enter to confirm. 7. To set the logical drive size, move the cursor to Size and press Enter. By default, the logical drive size is set to all available space in the array(s) being associated with the current logical drive. • If you want to create more than one logical drive in an array, set a size of less than the actual capacity. • If you want the logical drive to span arrays, but you want it to span only two or three arrays, rather than the four-array maximum, set a size that reflects the number of arrays you want to span. 8. Open the Advanced menu to set the remaining options. • Stripe Size: This parameter specifies the size of the segments written to each disk in a RAID logical drive. • Write Policy: This option sets the caching method to Write-Back or Write-Through. • Read-Ahead: This option enables the SCSI Read-Ahead feature for the logical drive. You can set this parameter to Normal, Read-Ahead, or Adaptive. • Cache Policy: This parameter sets read cache operation during data transfers involving the selected logical drive. You can set this parameter to Cached IO or Direct IO. 90
-
 1
1 -
2
-
3
-
4
-
5
-
6
-
7
-
8
-
9
-
10
-
11
-
12
-
13
-
14
-
15
-
16
-
17
-
18
-
19
-
20
-
21
-
22
-
23
-
24
-
25
-
26
-
27
-
28
-
29
-
30
-
31
-
32
-
33
-
34
-
35
-
36
-
37
-
38
-
39
-
40
-
41
-
42
-
43
-
44
-
45
-
46
-
47
-
48
-
49
-
50
-
51
-
52
-
53
-
54
-
55
-
56
-
57
-
58
-
59
-
60
-
61
-
62
-
63
-
64
-
65
-
66
-
67
-
68
-
69
-
70
-
71
-
72
-
73
-
74
-
75
-
76
-
77
-
78
-
79
-
80
-
81
-
82
-
83
-
84
-
85
-
86
-
87
-
88
-
89
-
90
-
 91
91 -
 92
92 -
 93
93 -
 94
94 -
 95
95 -
 96
96 -
 97
97 -
 98
98 -
 99
99 -
 100
100 -
 101
101 -
102
-
103
-
104
-
105
-
106
-
107
-
108
-
109
-
110
-
111
-
112
-
113
-
114
-
115
-
116
-
117
-
118
-
119
-
120
-
121
-
122
-
123
-
124
-
125
-
126
-
127
-
128
-
129
-
130
-
131
-
132
-
133
-
134
-
135
-
136
-
137
-
138
-
139
-
140
-
141
-
142
-
143
-
144
-
145
-
146
-
147
-
148
-
149
-
150
-
151
-
152
-
153
-
154
-
155
-
156
-
157
-
158
-
159
-
160
-
161
 |
 |
