HP Pavilion Elite e9100 Upgrade and Service - Page 23
Replacing a Hard Disk Drive, the same as the original part, due to different
 |
View all HP Pavilion Elite e9100 manuals
Add to My Manuals
Save this manual to your list of manuals |
Page 23 highlights
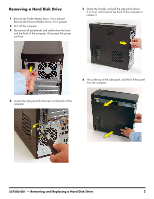
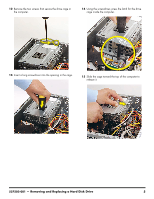
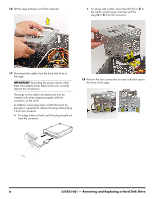
19 Slide the drive out of the cage. Replacing a Hard Disk Drive IMPORTANT: The new (replacement) part may not look the same as the original part, due to different manufacturers or models. Hewlett-Packard always provides quality parts that meet or exceed your original computer specifications. 1 Slide the replacement drive into the drive cage, with the label facing up and the connectors toward the right (the top of the cage). Align the four screw holes in the sides of the drive with the holes in the cage. 2 Insert and tighten the four screws that secure the drive in the cage. 537502-001 - Removing and Replacing a Hard Disk Drive 7
-
 1
1 -
2
-
3
-
4
-
5
-
6
-
7
-
8
-
9
-
10
-
11
-
12
-
13
-
14
-
15
-
16
-
17
-
 18
18 -
 19
19 -
 20
20 -
 21
21 -
 22
22 -
 23
23 -
 24
24 -
 25
25 -
 26
26 -
 27
27 -
 28
28 -
29
-
30
-
31
-
32
-
33
-
34
-
35
-
36
-
37
-
38
-
39
-
40
-
41
-
42
-
43
-
44
-
45
-
46
 |
 |
537502-001
— Removing and Replacing a Hard Disk Drive
7
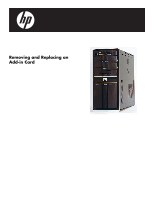
19
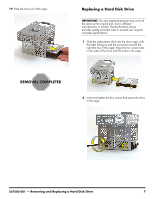
Slide the drive out of the cage.
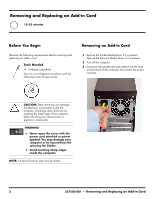
Replacing a Hard Disk Drive
1
Slide the replacement drive into the drive cage, with
the label facing up and the connectors toward the
right (the top of the cage). Align the four screw holes
in the sides of the drive with the holes in the cage.
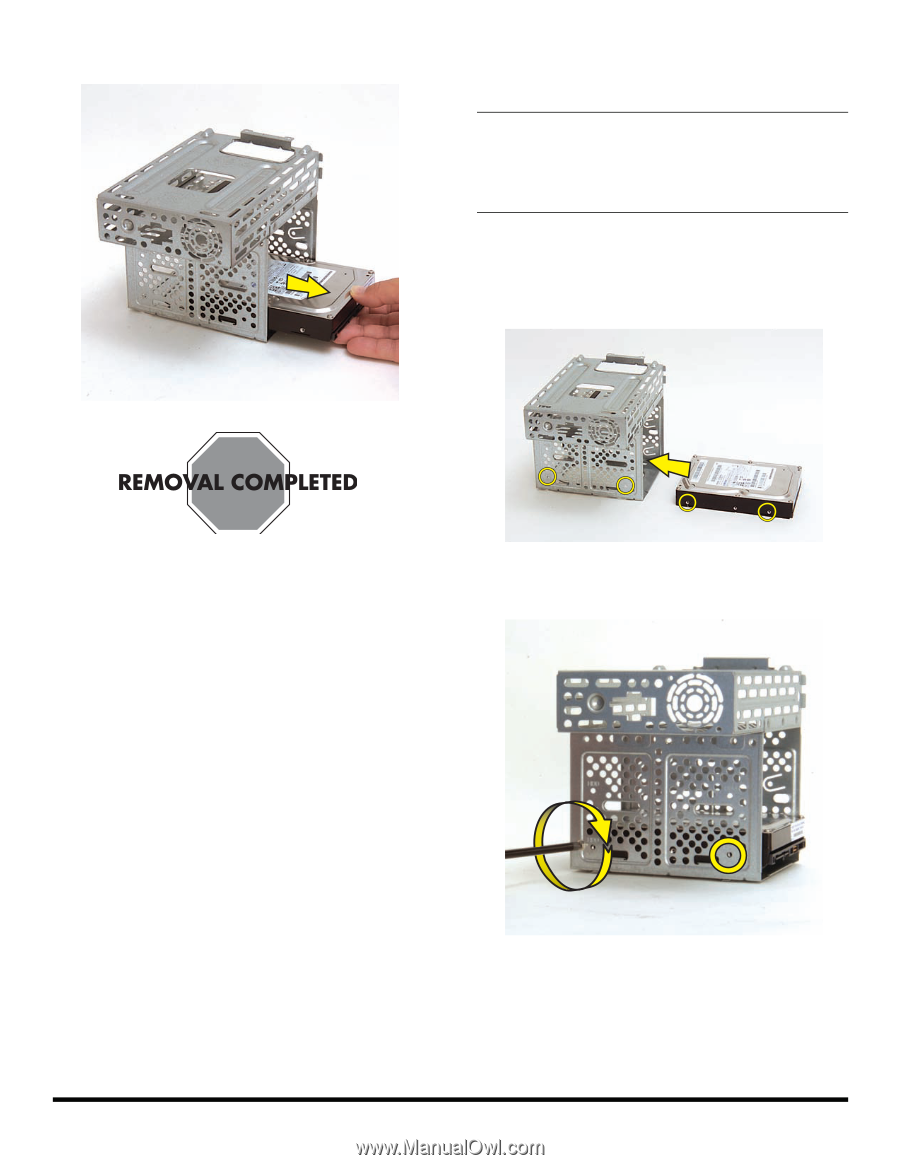
2
Insert and tighten the four screws that secure the drive
in the cage.
IMPORTANT:
The new (replacement) part may not look
the same as the original part, due to different
manufacturers or models. Hewlett-Packard always
provides quality parts that meet or exceed your original
computer specifications.