HP Pavilion Elite e9100 Upgrade and Service - Page 31
Replacing an Add-in Card, in the computer, and then press the card
 |
View all HP Pavilion Elite e9100 manuals
Add to My Manuals
Save this manual to your list of manuals |
Page 31 highlights
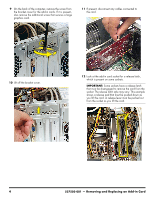
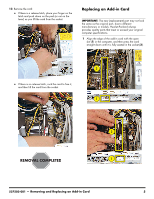
13 Remove the card: If there is a release latch, place your finger on the latch and push down on the pad (or out on the lever) as you lift the card from the socket. Replacing an Add-in Card IMPORTANT: The new (replacement) part may not look the same as the original part, due to different manufacturers or models. Hewlett-Packard always provides quality parts that meet or exceed your original computer specifications. 1 Align the edge of the add-in card with the open slot (1) in the computer, and then press the card straight down until it is fully seated in the socket (2). 2 If there is no release latch, rock the card to free it, and then lift the card from the socket. 1 2 1 537503-001 - Removing and Replacing an Add-in Card 5
-
 1
1 -
2
-
3
-
4
-
5
-
6
-
7
-
8
-
9
-
10
-
11
-
12
-
13
-
14
-
15
-
16
-
17
-
18
-
19
-
20
-
21
-
22
-
23
-
24
-
25
-
 26
26 -
 27
27 -
 28
28 -
 29
29 -
 30
30 -
 31
31 -
 32
32 -
 33
33 -
 34
34 -
 35
35 -
 36
36 -
37
-
38
-
39
-
40
-
41
-
42
-
43
-
44
-
45
-
46
 |
 |
537503-001
— Removing and Replacing an Add-in Card
5
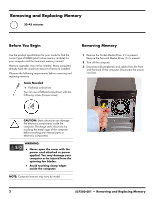
13
Remove the card:
±
If there is a release latch, place your finger on the
latch and push down on the pad (or out on the
lever) as you lift the card from the socket.
±
If there is no release latch, rock the card to free it,
and then lift the card from the socket.
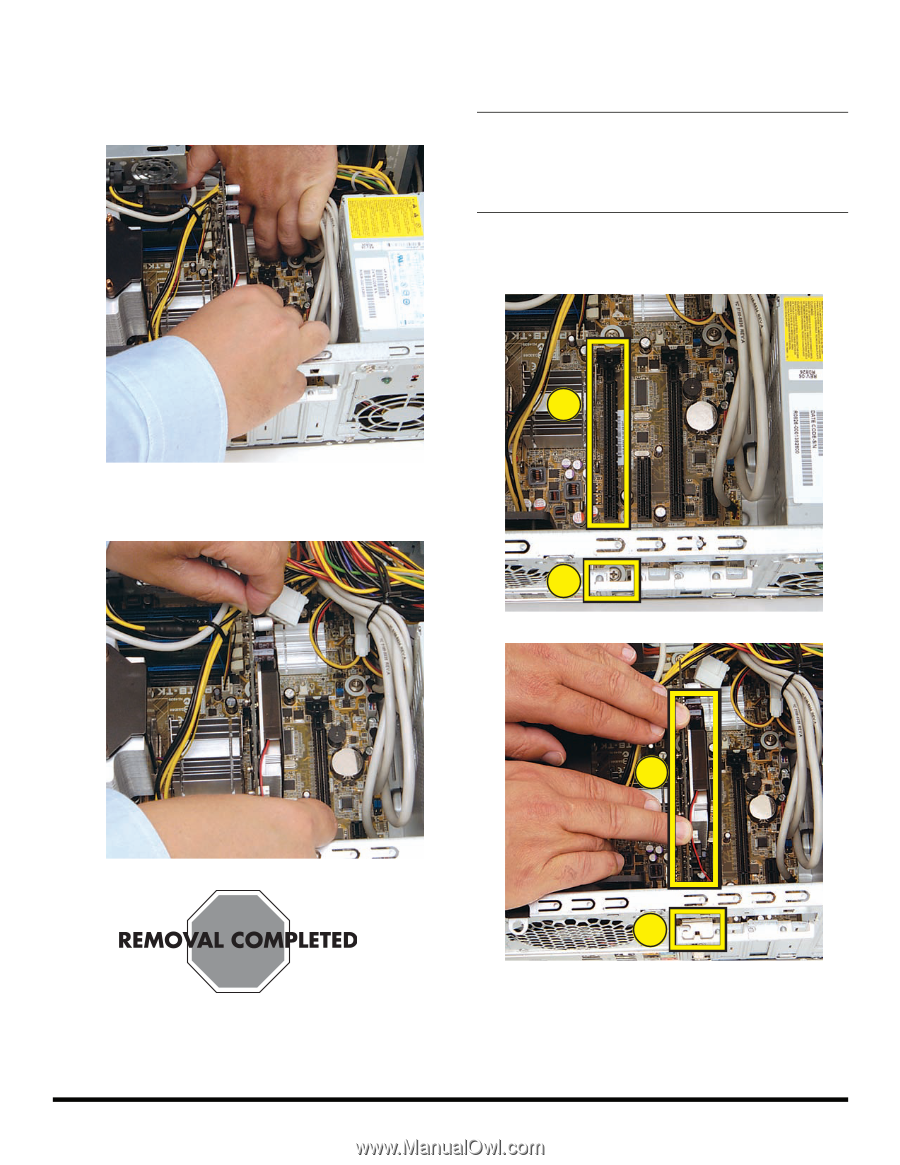
Replacing an Add-in Card
1
Align the edge of the add-in card with the open
slot (
1
) in the computer, and then press the card
straight down until it is fully seated in the socket (
2
).
IMPORTANT:
The new (replacement) part may not look
the same as the original part, due to different
manufacturers or models. Hewlett-Packard always
provides quality parts that meet or exceed your original
computer specifications.
1
2
1
2