HP Photosmart A430 User Guide - A430 Series - Page 21
Print from a docked camera, View photos to print - memory cards
 |
View all HP Photosmart A430 manuals
Add to My Manuals
Save this manual to your list of manuals |
Page 21 highlights
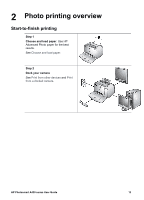
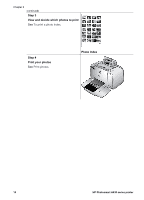
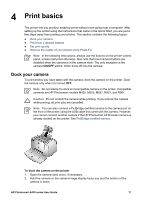
Chapter 4 3. Make sure the camera is turned off. 4. Press the camera into the dock so that the connector tab in the camera dock plugs into the connector slot on the bottom of the camera. 5. In most cases, docking the camera turns on both the printer and the camera. If it does not, press On on the printer control panel. Note While the camera is docked, the camera image display dims after eight minutes of inactivity. The camera image display turns back on if you send a print job from a connected computer or device with Bluetooth wireless technology, or if you press any button on the printer. After ten idle minutes, the camera image display turns off completely. Press On on the printer control panel to wake the display. Print from a docked camera Printing photos directly from the docked camera is the easiest and fastest way to turn your digital photos into outstanding prints. This section contains the following topics: ● View photos to print ● Print photos ● View photos to print ● Print photos View photos to print You can browse and print from the camera image display. You select the photos you want to print by using the printer control panel. Make sure the camera has photos on its internal memory or on an optional memory card and is in the camera dock. Note You can also view your photos on a television, after connecting the printer to the monitor with the supplied video cable. See View photos on a TV. To view photos one at a time ➔ Browse the photos on the camera by pressing or on the printer control panel. To view photos as thumbnails 1. View photos as thumbnails by pressing Zoom - on the printer control panel. 2. Browse the thumbnails by pressing the 4-way arrow button on the printer control panel. The current photo (1) is highlighted with a yellow frame. 18 HP Photosmart A430 series printer
-
 1
1 -
2
-
3
-
4
-
5
-
6
-
7
-
8
-
9
-
10
-
11
-
12
-
13
-
14
-
15
-
 16
16 -
 17
17 -
 18
18 -
 19
19 -
 20
20 -
 21
21 -
 22
22 -
 23
23 -
 24
24 -
 25
25 -
 26
26 -
27
-
28
-
29
-
30
-
31
-
32
-
33
-
34
-
35
-
36
-
37
-
38
-
39
-
40
-
41
-
42
-
43
-
44
-
45
-
46
-
47
-
48
-
49
-
50
-
51
-
52
-
53
-
54
-
55
-
56
-
57
-
58
-
59
-
60
-
61
-
62
 |
 |