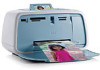
HP Photosmart A520 User Guide - Page 31
Create printing shortcuts - help
 |
View all HP Photosmart A520 manuals
Add to My Manuals
Save this manual to your list of manuals |
Page 31 highlights
Chapter 5 3. You can adjust the following settings: • Adjust the Brightness, Saturation, and Color Tone to affect how overall colors are printed. • Adjust the Cyan, Magenta, Yellow, and Black sliders to specify the level of each color that is used in printing. NOTE: When you adjust color settings, the changes are reflected in the Preview box. 4. After specifying the color settings, click OK. 5. Select any other print settings that you want, and then click OK. Use the What's This? help to learn about the features that you see on the Printer Properties dialog box. For more information, see "What's This? help" on page 24. Create printing shortcuts In addition to the printing shortcuts that are available in the Printing Shortcuts list in the print driver, you can create your own printing shortcuts to save time and ensure consistency between print jobs. If you frequently print on transparency film, for example, you can create a printing shortcut by selecting the Presentation Printing shortcut, changing the paper type to HP Premium Inkjet Transparency Film, and then saving the modified shortcut under a new name; for example, Transparency Presentations. After creating the printing shortcut, simply select it when printing on transparency film rather than changing the print settings each time. To create a printing shortcut 1. Open the Printer Properties dialog box. For more information, see "Printer Properties dialog box" on page 23. 2. Click the Printing Shortcuts tab. 3. In the Printing Shortcuts list, click a printing shortcut. The print settings for the selected printing shortcut are displayed. 4. Change the print settings to those you want in the new printing shortcut. 5. In the Type new shortcut name here box, type a name for the new printing shortcut, and then click Save. The printing shortcut is added to the list. To delete a printing shortcut 1. Open the Printer Properties dialog box. For more information, see "Printer Properties dialog box" on page 23. 2. Click the Printing Shortcuts tab. 3. In the Printing Shortcuts list, click the printing shortcut that you want to delete. 4. Click Delete. The printing shortcut is removed from the list. NOTE: Only the shortcuts that you have created can be deleted. The original HP shortcuts cannot be deleted. 30 Print from a computer
-
 1
1 -
2
-
3
-
4
-
5
-
6
-
7
-
8
-
9
-
10
-
11
-
12
-
13
-
14
-
15
-
16
-
17
-
18
-
19
-
20
-
21
-
22
-
23
-
24
-
25
-
 26
26 -
 27
27 -
 28
28 -
 29
29 -
 30
30 -
 31
31 -
 32
32 -
 33
33 -
 34
34 -
 35
35 -
 36
36 -
37
-
38
-
39
-
40
-
41
-
42
-
43
-
44
-
45
-
46
-
47
-
48
-
49
-
50
-
51
-
52
-
53
-
54
-
55
-
56
-
57
-
58
-
59
-
60
-
61
-
62
-
63
-
64
-
65
-
66
-
67
-
68
-
69
-
70
-
71
-
72
 |
 |
