HP Presario CQ58-100 User Guide - Page 54
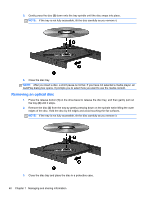
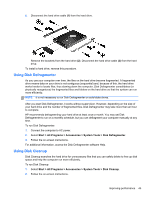
which hold the hard drive in place, to access the hard drive
 |
View all HP Presario CQ58-100 manuals
Add to My Manuals
Save this manual to your list of manuals |
Page 54 highlights
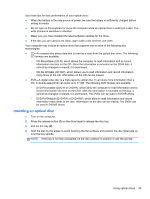
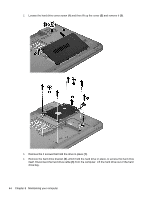
2. Loosen the hard drive cover screw (1) and then lift up the cover (2) and remove it (3). 3. Remove the 4 screws that hold the drive in place (1). 4. Remove the hard drive bracket (2), which hold the hard drive in place, to access the hard drive itself. Disconnect the hard drive cable (3) from the computer. Lift the hard drive out of the hard drive bay. 44 Chapter 8 Maintaining your computer
-
 1
1 -
2
-
3
-
4
-
5
-
6
-
7
-
8
-
9
-
10
-
11
-
12
-
13
-
14
-
15
-
16
-
17
-
18
-
19
-
20
-
21
-
22
-
23
-
24
-
25
-
26
-
27
-
28
-
29
-
30
-
31
-
32
-
33
-
34
-
35
-
36
-
37
-
38
-
39
-
40
-
41
-
42
-
43
-
44
-
45
-
46
-
47
-
48
-
 49
49 -
 50
50 -
 51
51 -
 52
52 -
 53
53 -
 54
54 -
 55
55 -
 56
56 -
 57
57 -
 58
58 -
 59
59 -
60
-
61
-
62
-
63
-
64
-
65
-
66
-
67
-
68
-
69
-
70
-
71
-
72
-
73
-
74
-
75
-
76
-
77
-
78
-
79
-
80
-
81
-
82
-
83
-
84
-
85
 |
 |
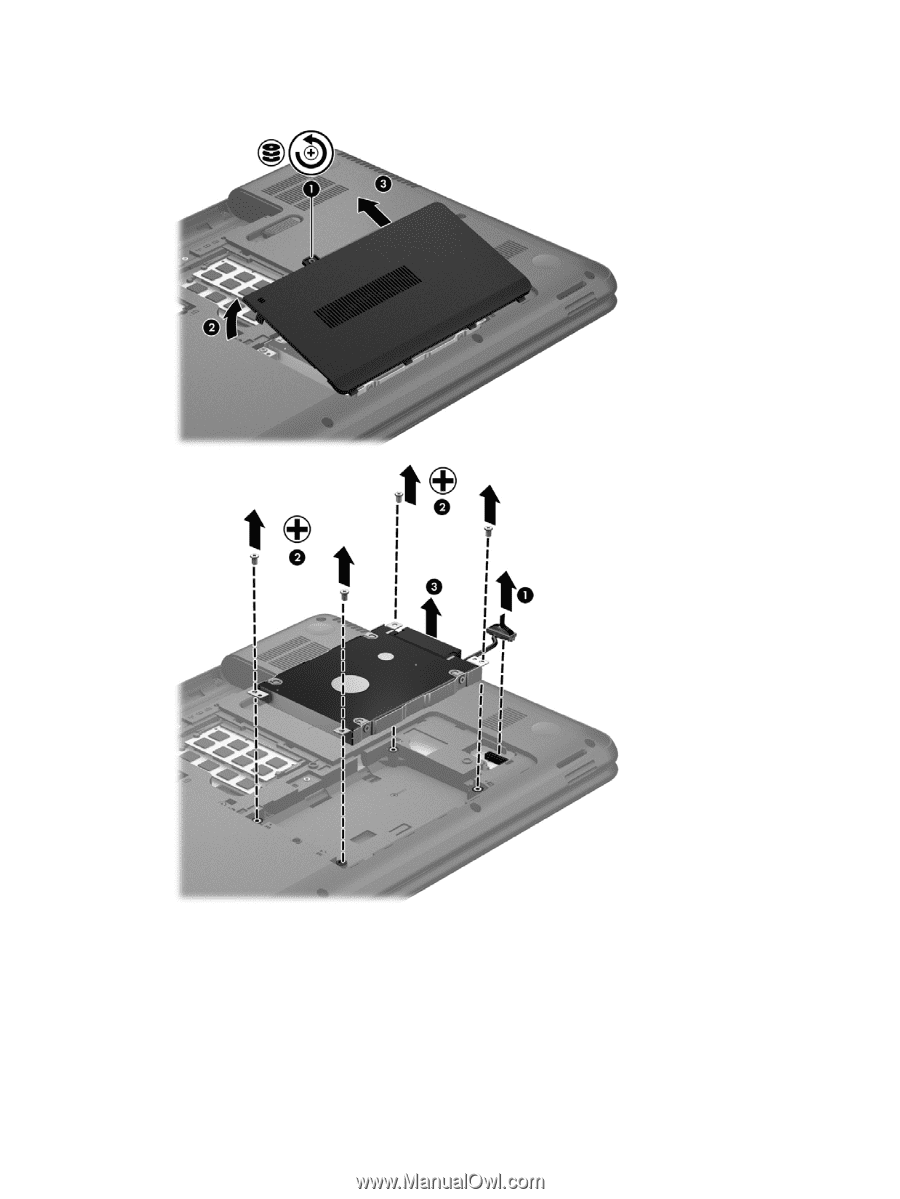
2.
Loosen the hard drive cover screw
(1)
and then lift up the cover
(2)
and remove it
(3)
.
3.
Remove the 4 screws that hold the drive in place
(1)
.
4.
Remove the hard drive bracket
(2)
, which hold the hard drive in place, to access the hard drive
itself. Disconnect the hard drive cable
(3)
from the computer. Lift the hard drive out of the hard
drive bay.
44
Chapter 8
Maintaining your computer