HP ProLiant DL380p HP ProLiant DL380p Gen8 Server User Guide - Page 23
Install the access panel, Access the product rear panel, Opening the cable management arm
 |
View all HP ProLiant DL380p manuals
Add to My Manuals
Save this manual to your list of manuals |
Page 23 highlights
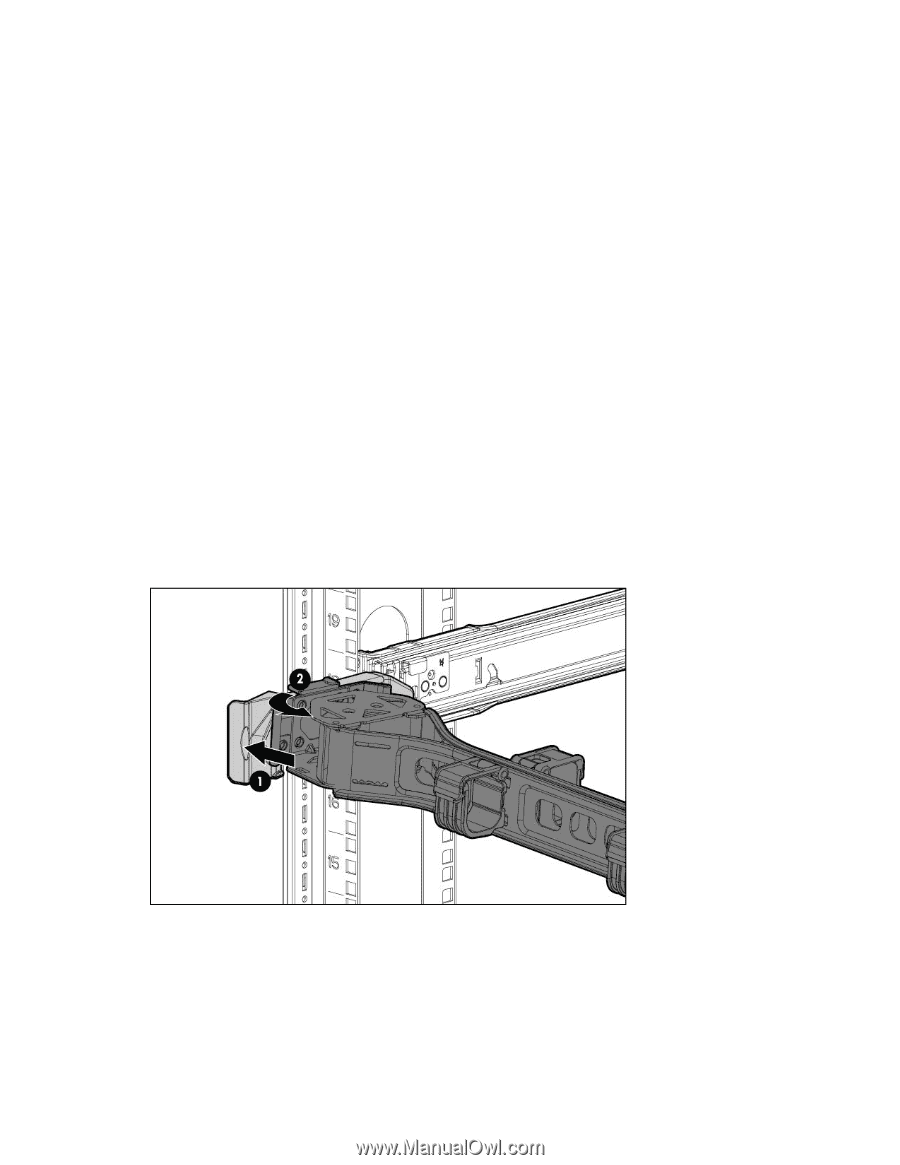
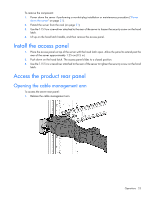
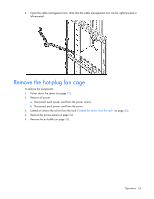
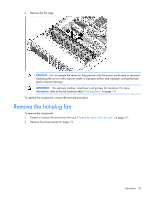
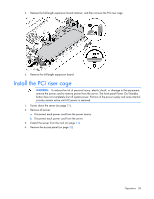
To remove the component: 1. Power down the server if performing a non-hot-plug installation or maintenance procedure ("Power down the server" on page 21). 2. Extend the server from the rack (on page 21). 3. Use the T-15 Torx screwdriver attached to the rear of the server to loosen the security screw on the hood latch. 4. Lift up on the hood latch handle, and then remove the access panel. Install the access panel 1. Place the access panel on top of the server with the hood latch open. Allow the panel to extend past the rear of the server approximately 1.25 cm (0.5 in). 2. Push down on the hood latch. The access panel slides to a closed position. 3. Use the T-15 Torx screwdriver attached to the rear of the server to tighten the security screw on the hood latch. Access the product rear panel Opening the cable management arm To access the server rear panel: 1. Release the cable management arm. Operations 23
-
 1
1 -
2
-
3
-
4
-
5
-
6
-
7
-
8
-
9
-
10
-
11
-
12
-
13
-
14
-
15
-
16
-
17
-
 18
18 -
 19
19 -
 20
20 -
 21
21 -
 22
22 -
 23
23 -
 24
24 -
 25
25 -
 26
26 -
 27
27 -
 28
28 -
29
-
30
-
31
-
32
-
33
-
34
-
35
-
36
-
37
-
38
-
39
-
40
-
41
-
42
-
43
-
44
-
45
-
46
-
47
-
48
-
49
-
50
-
51
-
52
-
53
-
54
-
55
-
56
-
57
-
58
-
59
-
60
-
61
-
62
-
63
-
64
-
65
-
66
-
67
-
68
-
69
-
70
-
71
-
72
-
73
-
74
-
75
-
76
-
77
-
78
-
79
-
80
-
81
-
82
-
83
-
84
-
85
-
86
-
87
-
88
-
89
-
90
-
91
-
92
-
93
-
94
-
95
-
96
-
97
-
98
-
99
-
100
-
101
-
102
-
103
-
104
-
105
-
106
-
107
-
108
-
109
-
110
-
111
-
112
-
113
-
114
-
115
-
116
-
117
-
118
-
119
-
120
-
121
-
122
-
123
-
124
-
125
-
126
-
127
-
128
 |
 |