HP ProLiant DL380p HP ProLiant DL380p Gen8 Server User Guide - Page 63
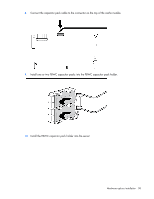
Tighten the thumbscrew., Firmly seat the FlexLOM in the slot.
 |
View all HP ProLiant DL380p manuals
Add to My Manuals
Save this manual to your list of manuals |
Page 63 highlights
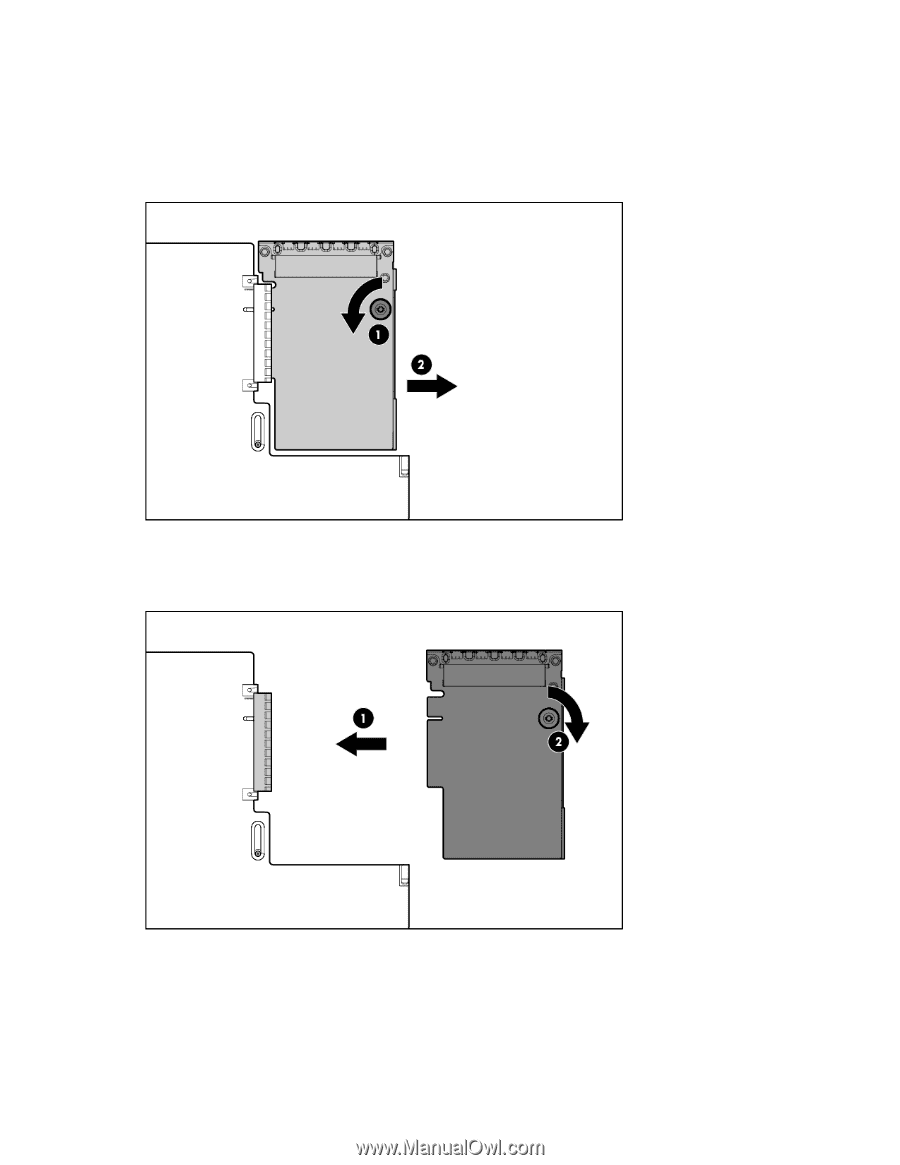
3. Remove any attached network cables. 4. Extend the server from the rack (on page 21). 5. Remove the access panel (on page 22). 6. Loosen the thumbscrew. 7. Remove the existing FlexLOM. 8. Install the component: a. Firmly seat the FlexLOM in the slot. b. Tighten the thumbscrew. 9. Install the access panel (on page 23). 10. Slide the server into the rack. 11. Connect the LAN segment cables. 12. Connect each power cord to the server. Hardware options installation 63
-
 1
1 -
2
-
3
-
4
-
5
-
6
-
7
-
8
-
9
-
10
-
11
-
12
-
13
-
14
-
15
-
16
-
17
-
18
-
19
-
20
-
21
-
22
-
23
-
24
-
25
-
26
-
27
-
28
-
29
-
30
-
31
-
32
-
33
-
34
-
35
-
36
-
37
-
38
-
39
-
40
-
41
-
42
-
43
-
44
-
45
-
46
-
47
-
48
-
49
-
50
-
51
-
52
-
53
-
54
-
55
-
56
-
57
-
 58
58 -
 59
59 -
 60
60 -
 61
61 -
 62
62 -
 63
63 -
 64
64 -
 65
65 -
 66
66 -
 67
67 -
 68
68 -
69
-
70
-
71
-
72
-
73
-
74
-
75
-
76
-
77
-
78
-
79
-
80
-
81
-
82
-
83
-
84
-
85
-
86
-
87
-
88
-
89
-
90
-
91
-
92
-
93
-
94
-
95
-
96
-
97
-
98
-
99
-
100
-
101
-
102
-
103
-
104
-
105
-
106
-
107
-
108
-
109
-
110
-
111
-
112
-
113
-
114
-
115
-
116
-
117
-
118
-
119
-
120
-
121
-
122
-
123
-
124
-
125
-
126
-
127
-
128
 |
 |
Hardware options installation 63
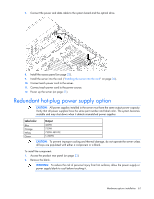
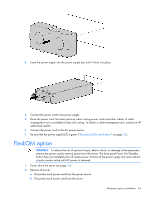
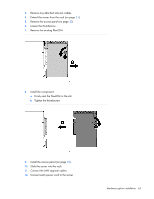
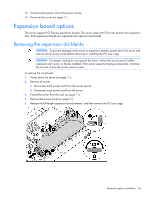
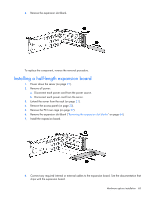
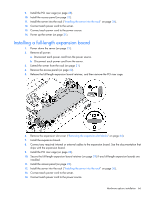
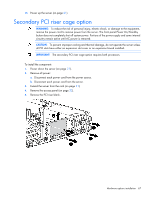
3.
Remove any attached network cables.
4.
Extend the server from the rack (on page
21
).
5.
Remove the access panel (on page
22
).
6.
Loosen the thumbscrew.
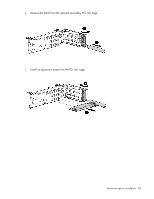
7.
Remove the existing FlexLOM.
8.
Install the component:
a.
Firmly seat the FlexLOM in the slot.
b.
Tighten the thumbscrew.
9.
Install the access panel (on page
23
).
10.
Slide the server into the rack.
11.
Connect the LAN segment cables.
12.
Connect each power cord to the server.