HP Scanjet G2710 User Guide - Page 6
Button Disable Utility, How to use the HP Photosmart software, Front panel and accessories overview - installation
 |
View all HP Scanjet G2710 manuals
Add to My Manuals
Save this manual to your list of manuals |
Page 6 highlights
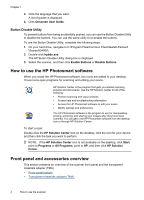
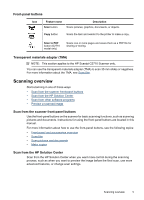
Chapter 1 3. Click the language that you want. A list of guides is displayed. 4. Click Onscreen User Guide. Button Disable Utility To prevent buttons from being accidentally pushed, you can use the Button Disable Utility to disable the buttons. You can use the same utility to re-enable the buttons. To use the Button Disable Utility, complete the following steps: 1. On your hard drive, navigate to C:\Program Files\Common Files\Hewlett-Packard \Scanjet\G4000\. 2. Double-click hpbdu.exe. The HP Button Disable Utility dialog box is displayed. 3. Select the scanner, and then click Enable Buttons or Disable Buttons. How to use the HP Photosmart software When you install the HP Photosmart software, two icons are added to your desktop. These icons open programs for scanning and editing your scans. HP Solution Center is the program that gets you started scanning pictures and documents. Use the HP Solution Center for all of the following: • Perform scanning and copy functions • Access help and troubleshooting information • Access the HP Photosmart software to edit your scans • Modify settings and preferences The HP Photosmart software is the program to use for manipulating, printing, archiving, and sharing your images after they have been scanned. You can get to the HP Photosmart software from the desktop icon or through HP Solution Center. To start a scan: Double-click the HP Solution Center icon on the desktop, click the icon for your device, and then click the task you want to perform. NOTE: If the HP Solution Center icon is not available on the desktop, click Start, point to Programs or All Programs, point to HP, and then click HP Solution Center. Front panel and accessories overview This section presents an overview of the scanner front panel and the transparent materials adapter (TMA). • Front-panel buttons • Transparent materials adapter (TMA) 4 How to use the scanner
-
 1
1 -
 2
2 -
 3
3 -
 4
4 -
 5
5 -
 6
6 -
 7
7 -
 8
8 -
 9
9 -
 10
10 -
 11
11 -
 12
12 -
13
-
14
-
15
-
16
-
17
-
18
-
19
-
20
-
21
-
22
-
23
-
24
-
25
-
26
-
27
-
28
-
29
-
30
 |
 |