HP Smart Tank 7300 User Guide
HP Smart Tank 7300 Manual
 |
View all HP Smart Tank 7300 manuals
Add to My Manuals
Save this manual to your list of manuals |
HP Smart Tank 7300 manual content summary:
- HP Smart Tank 7300 | User Guide - Page 1
User Guide HP Smart Tank 6000 series HP Smart Tank 7000 series HP Smart Tank 7300 series HP Smart Tank series - HP Smart Tank 7300 | User Guide - Page 2
- HP Smart Tank 7300 | User Guide - Page 3
. - Read and understand all instructions in the documentation that comes with the printer. - Observe all warnings and instructions marked on the product. - Unplug normally, see Solve a problem in this guide. - There are no user-serviceable parts inside. Refer servicing to qualified service personnel. - HP Smart Tank 7300 | User Guide - Page 4
- HP Smart Tank 7300 | User Guide - Page 5
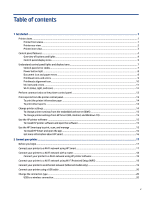
Table of contents 1 Get started ...1 Printer views ...1 Printer front views ...1 Printer rear view ...2 Printer inner view...3 Control panel features ...4 Overview of buttons and lights ...4 Control panel display icons...5 Understand control panel lights and display icons...7 Control panel error - HP Smart Tank 7300 | User Guide - Page 6
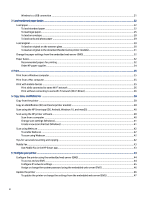
Wireless to a USB connection ...21 3 Load media and paper basics ...22 Load paper ...22 To load standard paper ...22 To load legal paper...25 To load an envelope ...28 To load cards and photo paper ...29 Load original ...30 To load an original on the scanner glass ...30 To load an original in the - HP Smart Tank 7300 | User Guide - Page 7
or print carriage jam ...56 Learn how to avoid paper jams...62 Solve paper-feed problems ...62 Printhead problem...64 To verify the printheads are installed properly...65 To clean printhead contacts...66 Printing settings from the embedded web server (EWS 72 Solve Web Services problems...72 vii - HP Smart Tank 7300 | User Guide - Page 8
exterior ...75 Clean the document feeder (some printer models 75 HP support ...77 Contact HP...77 Register printer ...77 Additional warranty options...78 notices...83 Regulatory Model Number...83 FCC statement...83 Power cord instructions...83 VCCI (Class B) compliance statement for users in Japan - HP Smart Tank 7300 | User Guide - Page 9
The Table of Hazardous Substances/Elements and their Content (China 91 Declaration of the Presence Condition of the Restricted Substances Marking (Taiwan 92 Restriction of hazardous substance (India)...93 Restriction on hazardous substances statement (Turkey 93 EPEAT ...93 SEPA Ecolabel User - HP Smart Tank 7300 | User Guide - Page 10
x - HP Smart Tank 7300 | User Guide - Page 11
/region. Table 1-1 Printer front view -1 Feature Description 1 Document feeder cover 2 Document feeder input tray 3 Document feeder output extender 4 Scanner lid 5 Ink tanks 6 Paper-width guides 7 Input tray 8 Removable tray cover (dust cover) (some printer models) Get started 1 - HP Smart Tank 7300 | User Guide - Page 12
Table 1-2 Printer front view -2 Feature Description 9 Scanner lid 10 Document feeder glass 11 Scanner glass 12 Control panel 13 Output tray 14 Output tray extender 15 Ink access door 16 Print carriage Printer rear view NOTE: The printer images and details may vary depending on - HP Smart Tank 7300 | User Guide - Page 13
the printheads in the carriage. Make sure the printhead cover is properly closed to avoid problems such as carriage jams. CAUTION: After you have set up the printer, do not open the printhead cover unless instructed to do so. 5 Printhead cover button Press to open the printhead cover. CAUTION - HP Smart Tank 7300 | User Guide - Page 14
Table 1-4 Printer inner view (continued) Feature Description Press to disconnect the ink tubes. To prevent ink leaks or printer damage, you must disconnect the ink tubes when moving the printer to a different location outside of your home or office after initial setup. 7 Printheads The - HP Smart Tank 7300 | User Guide - Page 15
an information page. The information page provides a summary of the printer information and its current status (including network, Wi-Fi Direct, Web Services, ink, and so on). Resume a job after a disruption (for example, after loading paper or clearing a paper jam). 9 Cancel button Stop the - HP Smart Tank 7300 | User Guide - Page 16
Table 1-6 Control panel display icons Feature Icon 1 Open Lid light 2 Attention light Description This light turns on in one of the following situations: ● ID Copy mode (some printer models): Open the scanner lid, flip the card, and then press the copy button that is blinking or lit to copy - HP Smart Tank 7300 | User Guide - Page 17
Table 1-6 Control panel display icons (continued) Feature Icon Description ● Blinks: The printer is connected to an active Ethernet cable, but is not connected to a network. See Fix Ethernet connection issues (some printer models). 10 Wi-Fi status icons Shows the Wi-Fi status and signal - HP Smart Tank 7300 | User Guide - Page 18
not working. Turn the printer off, and then on again. If the problem persists, contact HP. The printer can still print even if the scanner is and then plug the power cord back in. 4. Turn on the printer. If the problem persists, contact HP. E7 One or more ink tanks are out of ink. Refill the - HP Smart Tank 7300 | User Guide - Page 19
Document icon and paper errors For errors relating to paper mismatch or jams, see Control panel error codes. ● The Attention light and Document icon are blinking. The Resume light and Cancel light are on. Cause Solution The printer receives a printing job, and detects that there is no paper in - HP Smart Tank 7300 | User Guide - Page 20
. - Make sure that you are using the correct HP printheads for your printer. For more information, see Printhead problem. NOTE: Do not open the printhead cover unless instructed to do so. Printheads alignment icon ● The Number Counter icon shows an A or a blinking A, or a "racecourse animation - HP Smart Tank 7300 | User Guide - Page 21
Cause Printheads alignment failed. This occurs after you have scanned the alignment page. Solution Try one of the following: - Press one of the copy buttons to rescan the alignment page. - Press the Resume button alignment page. to reprint the If you do not do anything, printheads alignment gets - HP Smart Tank 7300 | User Guide - Page 22
Wi-Fi status, light, and icons The Wi-Fi light and the wireless status icons on the control panel display work together to indicate the status of a wireless connection. Table 1-8 Wi-Fi status, light, and icons Wi-Fi light Off On Wi-Fi icons Off Wi-Fi status The printer is not connected to the Wi- - HP Smart Tank 7300 | User Guide - Page 23
the Cancel button . All button lights will turn off if there are no printer errors. Table 1-9 Common tasks from the printer control panel Task Instructions (must be in support mode) Turn Wi-Fi Direct on or off Press the Wi-Fi button same time. and the Resume button at the Switch between - HP Smart Tank 7300 | User Guide - Page 24
following instructions to print the desired report. Table 1-10 Print reports Printer report Description How to print (must be in support Guide Provides instructions to help you set up and use Wi-Fi Direct. Press the Information button and the Cancel button at the same time. Web Services - HP Smart Tank 7300 | User Guide - Page 25
see Use the HP Smart app to print, scan, and manage. ● Each device must have the app or software installed in order to print. ● Windows 7 Service Pack 1 (SP1) is required to install HP printer software. To install HP printer software and open the software 1. Visit To install HP printer software and - HP Smart Tank 7300 | User Guide - Page 26
● HP Smart is supported on mobile devices and computers running on iOS, Android, Windows 10, and macOS (versions 10.14, 10.15, and 11.0). ● The HP Smart app might - HP Smart Tank 7300 | User Guide - Page 27
computer or mobile device is connected to your Wi-Fi network. On your mobile device, turn on Bluetooth and location services. NOTE: HP Smart uses Bluetooth for printer setup. It does not support print using Bluetooth. 2. If your printer Wi-Fi was previously turned off, make sure to turn it on. See - HP Smart Tank 7300 | User Guide - Page 28
network that includes a wireless router or access point. NOTE: The printer supports connections using 2.4GHz and 5GHz. ● A computer that is already connected a new device. 4. Select Manual Setup, select the wireless option, and then follow the on-screen instructions. 18 Chapter 2 Connect your - HP Smart Tank 7300 | User Guide - Page 29
scan, and manage. 5. Click or tap the Plus icon or Add Printer, and then choose the option to select or add a printer. Follow the instructions to add the printer to your network. 6. When prompted, create an HP account and register the printer. If prompted for a password during the process, enter - HP Smart Tank 7300 | User Guide - Page 30
, and then choose the option to select or add a printer. Follow the instructions to add the printer. 5. When prompted, create an HP account and register the Wi-Fi network. On your mobile device, turn on Bluetooth and location services. 3. If your printer Wi-Fi was previously turned off, make sure - HP Smart Tank 7300 | User Guide - Page 31
123.hp.com to download and install the printer software. NOTE: Windows 7 Service Pack 1 (SP1) is required to install HP printer software. 2. In , and then choose the option to select or add a printer. Follow the instructions to add the printer. 5. When prompted, create an HP account and register the - HP Smart Tank 7300 | User Guide - Page 32
to match the paper you are using. ● The printer images and details may vary depending on your printer model and country/region. ● For the media supported by your printer, refer to the printer software or the embedded web server (EWS). To open EWS, see To access and use EWS. To load - HP Smart Tank 7300 | User Guide - Page 33
2. Press and hold the button on the paper-width guide, and then slide the guides to the edges of the tray. 3. Insert the paper in portrait orientation and with the side to be printed facing down. Make sure the stack - HP Smart Tank 7300 | User Guide - Page 34
4. Adjust the paper-width guides until they touch the edges of the stack of paper. 5. Close the input tray. 24 Chapter 3 Load media and paper basics - HP Smart Tank 7300 | User Guide - Page 35
6. Pull out the output tray extender. To load legal paper 1. Open the input tray. 2. Press and hold the button on the paper-width guide, and then slide the guides to the edges of the tray. 3. Extend the input tray. NOTE: Printer models with an open input tray do not require the input tray - HP Smart Tank 7300 | User Guide - Page 36
4. Insert the paper in portrait orientation and with the side to be printed facing down. Make sure the stack of paper is aligned with the appropriate paper size lines in the tray. Also, make sure the stack of paper does not exceed the stack-height marking in the tray. 26 Chapter 3 Load media and - HP Smart Tank 7300 | User Guide - Page 37
5. Adjust the paper-width guides until they touch the edges of the stack of paper. 6. Close the input tray. NOTE: When you reinsert the tray, the extended part is expected to remain outside the printer. 7. Pull out the output tray extender. To load legal paper 27 - HP Smart Tank 7300 | User Guide - Page 38
lines in the tray. Also, make sure the stack of paper does not exceed the stack-height marking in the tray. 4. Adjust the paper-width guides until they touch the edges of the stack of paper. 5. Close the input tray. 6. Pull out the output tray extender. 28 Chapter 3 Load media and - HP Smart Tank 7300 | User Guide - Page 39
lines in the tray. Also, make sure the stack of paper does not exceed the stack-height marking in the tray. 4. Adjust the paper-width guides until they touch the edges of the stack of paper. 5. Close the input tray. 6. Pull out the output tray extender. To load cards and photo - HP Smart Tank 7300 | User Guide - Page 40
Load original This topic describes how to load an original into the printer. To load an original on the scanner glass 1. Lift the scanner lid. 2. Load the original print-side down on the scanner glass (aligned to the indicated corner). 3. Close the scanner lid. 30 Chapter 3 Load media and paper - HP Smart Tank 7300 | User Guide - Page 41
in the document feeder (some printer models) 1. Open the document feeder output tray extender. 2. Open the document feeder input tray. 3. Slide the paper-width guides outwards. 4. Load original print-side up in the document feeder. To load an original in the document feeder (some printer models) 31 - HP Smart Tank 7300 | User Guide - Page 42
5. Slide the paper-width guides inward until they stop at the edge of the paper. Change the paper settings from the embedded web server (EWS) NOTE: For your security, some - HP Smart Tank 7300 | User Guide - Page 43
Photo printing ● HP Advanced Photo Paper This glossy photo paper features an instant-dry finish for easy handling without smudging. It resists water, smears, fingerprints, and humidity. Your prints have a look and feel comparable to a store processed photo. It is available in several sizes, - HP Smart Tank 7300 | User Guide - Page 44
● HP Office Recycled Paper HP Office Recycled Paper is a high-quality multifunction paper made with 30% recycled fiber. Order HP paper supplies The printer is designed to work well with most types of office paper. Use HP paper for optimum print quality. To order HP papers and other supplies, go to - HP Smart Tank 7300 | User Guide - Page 45
4 Print This section describes how to print from different devices. This printer is designed to work with the HP Smart app, a software application that makes it easy to print, scan, and manage your printer from a smartphone, laptop, desktop computer, or other devices. You can print and manage the - HP Smart Tank 7300 | User Guide - Page 46
. NOTE: You can print using HP Smart or AirPrint/HP Print Service Plugin when the mobile device is on the same network as the printer Direct the first time, the printer automatically prints a Wi-Fi Direct guide. The guide provides instructions about how to use Wi-Fi Direct. See Print reports from the - HP Smart Tank 7300 | User Guide - Page 47
From the printer control panel, press the Information button to print the printer information page. NOTE: For other network details, print the network configuration page. See Print reports from the printer control panel. To change the Wi-Fi Direct connection security settings for the printer using - HP Smart Tank 7300 | User Guide - Page 48
5 Copy, Scan, and Mobile Fax This section describes the copy, scan, and use mobile fax features. Copy from the printer NOTE: All documents are copied in normal quality print mode. You cannot change the print mode quality when copying. 1. Load paper in the input tray. See Load paper. 2. Place the - HP Smart Tank 7300 | User Guide - Page 49
3. Close the scanner lid. 4. Press the ID Copy button to enter the ID Copy mode. The Color Copy button and the Black Copy button will blink or light up. 5. Press either copy button to copy one side of the card. To increase the number of copies, press and hold the button or press it multiple - HP Smart Tank 7300 | User Guide - Page 50
print, save your scans locally or in cloud storage, and share them via email, SMS, Facebook, Instagram, etc. To scan with HP Smart, follow the instructions provided in the appropriate URLs below, depending on the type of device you are using. ● iOS/Android: www.hp.com/go/hpsmart-help ● Windows 10 - HP Smart Tank 7300 | User Guide - Page 51
2. In the HP printer software, available from the Start menu, click Scan, and then click Scan a Document or Photo. 3. Select the type of scan you want, and then click Scan. NOTE: ● Click the More link at the top right corner of the Scan dialog to review and modify settings for any scan. See Change - HP Smart Tank 7300 | User Guide - Page 52
4. Enter a descriptive name, choose an existing shortcut on which to base your new shortcut, and then click Create. 5. Change the settings for your new shortcut to meet your needs, and then click the save icon to the right of the shortcut. NOTE: Click the More link at the top right corner of the - HP Smart Tank 7300 | User Guide - Page 53
a cover page toggle, and then type a subject and message. 5. Scan the item you want to fax using your printer or mobile device camera, or attach a supported file type. Send the fax when ready. Your fax will be securely delivered and you can track the status in the HP Smart app. Mobile - HP Smart Tank 7300 | User Guide - Page 54
6 Configure your printer This section describes how to configure your printer. Configure the printer using the embedded web server (EWS) Use the embedded web server (EWS) to manage printing functions from your computer. ● View printer status information ● Check the information and status of the - HP Smart Tank 7300 | User Guide - Page 55
, click HP, click the folder for the printer, select the icon with the printer's name, and then open HP Printer Assistant. NOTE: Windows 7 Service Pack 1 (SP1) is required to install HP printer software. 2. In the HP Printer Assistant, select Print tab. 3. Select Printer Home Page (EWS). Configure - HP Smart Tank 7300 | User Guide - Page 56
the left menu, click General. 4. Click Network Identification. 5. Make the necessary changes, and then click Apply. Manually configure IPv4 TCP/IP parameters Use the embedded web server (EWS) to manually set an IPv4 address, subnet mask, and default gateway. 1. Open EWS. See To access and use EWS - HP Smart Tank 7300 | User Guide - Page 57
web server (EWS) 1. Open EWS. See To access and use EWS. 2. Click the Web Services tab. 3. From the left menu, click Web Services Settings, click Remove Web Services, and then follow the on-screen instructions. To update the printer or change the settings from the embedded web server (EWS) 47 - HP Smart Tank 7300 | User Guide - Page 58
the Start menu), click Estimated Levels at the top of the window. 2. In the Toolbox, click the Estimated Levels tab. Refill ink tanks NOTE: Product service or repairs required as a result of filling the ink tanks improperly and/or using non-HP ink will not be covered under warranty. To refill - HP Smart Tank 7300 | User Guide - Page 59
2. Open the cap of the ink tank you plan to refill. 3. Depending on the type of ink bottles you have, do one of following: ● Screw-cap bottles: Twist open the cap on the ink bottle. ● Flip-cap bottles: Twist open the cap on the ink bottle, remove the seal from the bottle, screw back the cap and - HP Smart Tank 7300 | User Guide - Page 60
● Do not squeeze the ink bottles when filling ink. The ink bottles you have might vary. ● If there is leftover ink in the bottle, store the bottle in an upright position in a cool and dry location. 5. Let the ink drain into the tank until the tank is full. If the ink does not drain immediately, - HP Smart Tank 7300 | User Guide - Page 61
, choose your country/region, and then follow the prompts to find the right ink bottles for your printer. NOTE: Ordering ink bottles online is not supported in all countries/regions. If it is not available in your country/region, you may still view supplies information and print a list for reference - HP Smart Tank 7300 | User Guide - Page 62
& Scan at the top of the window. 3. In the Print section, click Maintain Your Printer to access the Toolbox. 4. In the Toolbox, click the Device Services tab, and then click the option to print the page. 52 Chapter 7 Manage ink and printheads - HP Smart Tank 7300 | User Guide - Page 63
the printheads, then automatically align the printheads. See Align and clean printheads. 4. If print quality problems persist after cleaning and aligning printheads, contact HP support. Align and clean printheads The printer has a feature to automatically align or clean the printheads. Understand - HP Smart Tank 7300 | User Guide - Page 64
In the Print section, click Maintain Your Printer to access the Toolbox. 4. In the Toolbox, click the Device Services tab, click the desired option, and then follow the on-screen instructions. Clean printer You can run a cleaning routine from the printer software to prevent back of page smearing. To - HP Smart Tank 7300 | User Guide - Page 65
time. HP cannot guarantee the quality or reliability of non-HP supplies. Product service or repairs required as a result of using a non-HP supply will not be home or office, see the instructions provided inbox for moving printer, or visit hp.com/support. Tips for working with ink and printheads 55 - HP Smart Tank 7300 | User Guide - Page 66
. If the suggestions do not solve the problems, try getting help using one of the support services, see HP support. You can also get help from the HP Smart app and printer control panel: ● HP Smart: Provides alerts for printer issues (jams and other problems), links to help content, and options to - HP Smart Tank 7300 | User Guide - Page 67
3. Remove the duplexer plate. Do this by carefully reaching inside the gap where the trays were and pulling out the plate. 4. Remove any jammed paper. 5. Reinsert the duplexer plate, the output tray, and then the input tray. To clear paper jams from the tray 57 - HP Smart Tank 7300 | User Guide - Page 68
To clear paper jams from the inside of the printer 1. Lift the ink access door. 2. Remove any jammed paper. 58 Chapter 8 Solve a problem - HP Smart Tank 7300 | User Guide - Page 69
3. Close the ink access door. To clear paper jams from the rear of the printer 1. Open the door at the rear of the printer. To clear paper jams from the rear of the printer 59 - HP Smart Tank 7300 | User Guide - Page 70
, try cleaning the document feeder glass area using a dry, lint-free cloth. See Clean the document feeder glass area (some printer models). 60 Chapter 8 Solve a problem - HP Smart Tank 7300 | User Guide - Page 71
1. Open the document feeder cover. 2. Remove any jammed paper. To clear paper jams from the document feeder (some printer models) 61 - HP Smart Tank 7300 | User Guide - Page 72
printer to prompt before loading paper. Solve paper-feed problems What kind of problem are you having? ● Paper is not picked up from the input tray - Make sure paper is loaded in the input tray. See Load paper. - Adjust the paper-width guides in the input tray to fit snugly against all paper - HP Smart Tank 7300 | User Guide - Page 73
-width guides do not bend the paper in the input tray. - Make sure the input tray is not overloaded with paper. - Make sure the pieces of the loaded paper are not sticking together. - Use HP paper for optimum performance and efficiency. - Clean the paper rollers. To clean the paper rollers manually - HP Smart Tank 7300 | User Guide - Page 74
. 13. Reconnect any other cable to the printer if necessary. 14. Press the Power button to turn on the printer. Printhead problem This topic helps you troubleshoot printhead problems. 1. Verify that the indicated printhead is correctly installed. 2. Clean the printhead contacts. 64 Chapter 8 Solve - HP Smart Tank 7300 | User Guide - Page 75
for assistance. Go to hp.com/support. To verify the printheads are installed properly NOTE: ● The instructions here are only applicable in this section. After you have set up the printer, do not open the printhead cover unless instructed to do so. ● Handle printheads with care. Do not drop the - HP Smart Tank 7300 | User Guide - Page 76
e. Close the printhead cover. Make sure it is properly closed to avoid problems such as carriage jams. 4. Close the ink access door. To clean printhead when necessary; for example, if a printhead cannot be detected. The instructions here are only applicable in this section. After you have set up - HP Smart Tank 7300 | User Guide - Page 77
4. Remove the printhead indicated in the error message. 5. Clean the printhead contacts and printer contacts. a. Hold the printhead by its sides and locate the electrical contacts on the printhhead. The electrical contacts are the small gold-colored dots on the printhead. NOTE: Do not touch the - HP Smart Tank 7300 | User Guide - Page 78
then on. Printing issues This topic helps you troubleshoot printing issues. ● Use the HP Print and in some languages. ● To avoid print quality problems, always turn the printer off using the Power and resolve them by following the on-screen instructions. 2. If your computer is connected to the - HP Smart Tank 7300 | User Guide - Page 79
Panel. ● Windows 7: From the Windows Start menu, click Control Panel. b. Click System and Security, and then click Administrative Tools. c. Double-click Services. d. Right-click the Print Spooler, and then click Properties. e. On the General tab, make sure Automatic is selected from the Startup type - HP Smart Tank 7300 | User Guide - Page 80
is running, click Stop, and then click Start to restart the service. Then click OK. 6. Restart the computer. 7. Clear the print queue. Restart the computer. Copy and scan issues This topic helps you troubleshoot copy and scan issues. ● See Tips for successful scanning and copying. 70 Chapter 8 Solve - HP Smart Tank 7300 | User Guide - Page 81
helps you troubleshoot network and connection issues. Fix network connection issues Choose one of the following troubleshooting options: issues (some printer models) This topic describes how to solve Ethernet connection problems. Check the following: ● The network is operational and the network hub, - HP Smart Tank 7300 | User Guide - Page 82
settings. The setup mode will last for 2 hours. ● You can also troubleshoot network connection issues by restoring the printer network settings. ● If you restore the to continue. Solve Web Services problems If you are having problems using Web Services, check the following: 72 Chapter 8 Solve - HP Smart Tank 7300 | User Guide - Page 83
supported network connection. ● Make sure the latest product updates have been installed on the printer. ● Make sure Web Services is enabled on the printer. See Use Web Services Web Services. For more information, see Use Web Services. Printer hardware issues This topic helps you troubleshoot printer - HP Smart Tank 7300 | User Guide - Page 84
help reduce energy use. For more information, see Auto-Off. Resolve printer failure ● Turn the printer off, then on. If that does not resolve the problem, contact HP. Maintain the printer This topic describes how to maintain the printer. Clean the scanner glass Dust or dirt on the scanner glass - HP Smart Tank 7300 | User Guide - Page 85
CAUTION: ● Do not clean the scanner lid backing with anything wet to avoid damaging the protection layer. ● Use only glass cleaner to clean the scanner glass. Avoid cleaners that contain abrasives, acetone, benzene, and carbon tetrachloride, all of which can damage the scanner glass. Avoid isopropyl - HP Smart Tank 7300 | User Guide - Page 86
cover. , and unplug This provides easy access to the rollers (1) and separator pad (2). Table 8-1 Rollers and separators Feature Description 1 Rollers 2 Separator pad 76 Chapter 8 Solve a problem - HP Smart Tank 7300 | User Guide - Page 87
troubleshooting assistance. For information about this app, see Use the HP Smart app to print, scan, and manage. Contact HP If you need help from an HP technical support representative to solve a problem, visit the Contact Support quicker service, more efficient support, and product support alerts. - HP Smart Tank 7300 | User Guide - Page 88
Additional warranty options Extended service plans are available for the printer at additional costs. Go to hp.com/support, select your country/region and language, then explore the extended warranty options available for your printer. 78 Chapter 8 Solve a problem - HP Smart Tank 7300 | User Guide - Page 89
use. Auto-Off turns the printer off completely, so you must use the Power button to turn the printer back on. If your printer supports this energy saving feature, Auto-Off is automatically enabled or disabled depending on printer capabilities and connection options. Even when Auto-Off is disabled - HP Smart Tank 7300 | User Guide - Page 90
Schedule On and Off Use this feature to automatically turn the printer on or off on selected days. For example, you can schedule the printer to turn on at 8 a.m. and turn off at 8 p.m. from Monday to Friday. In this way, you save energy during the night and weekends. To schedule the days and time to - HP Smart Tank 7300 | User Guide - Page 91
For more information about the product specifications (including acoustic information, print resolutions, system requirements), visit hp.com/support. Environmental specifications ● Recommended operating temperature range: 15°C to 30°C (59°F to 86°F) ● Recommended and operating humidity range - HP Smart Tank 7300 | User Guide - Page 92
to 24 lb]): Up to 35 Paper type and size ● For a complete list of supported media, refer to the printer software or the embedded web server (EWS). To open PCL3 GUI ● For the print resolutions and margins, visit the product support website for details. Copy specifications ● Resolution: up to 600 dpi - HP Smart Tank 7300 | User Guide - Page 93
not cause harmful interference, and (2) this device must accept any interference received, including interference that may cause undesired operation. Power cord instructions Make sure your power source is adequate for the product voltage rating. The voltage rating is on the product. The product uses - HP Smart Tank 7300 | User Guide - Page 94
VCCI (Class B) compliance statement for users in Japan Notice to users in Japan about the power cord Visual display workplaces statement for Germany GS-Erklärung (Deutschland) Das Gerät ist nicht für die Benutzung im unmittelbaren Gesichtsfeld am Bildschirmarbeitsplatz vorgesehen. Um störende - HP Smart Tank 7300 | User Guide - Page 95
application outdoor might lead to interference issues with existing radio services. Exposure to radio frequency radiation CAUTION: The radiated output operation is minimized. This product and any attached external antenna, if supported, shall be placed in such a manner to minimize the potential for - HP Smart Tank 7300 | User Guide - Page 96
Notice to users in Canada Under Innovation, Science and Economic Development Canada regulations, this radio transmitter may only operate using an antenna of a type and maximum (or lesser) gain approved for the transmitter by Innovation, Science and Economic Development Canada. To reduce potential - HP Smart Tank 7300 | User Guide - Page 97
Notice to users in Thailand (Wi-Fi) Notice to users in Brazil Este equipamento não tem direito à proteção contra interferência prejudicial e não pode causar interferência em sistemas devidamente autorizados. Para maiores informações consulte o site da ANATEL www.anatel.gov.br. Notice to users in - HP Smart Tank 7300 | User Guide - Page 98
od 5150-5350 MHz. Accessibility Learn more about our efforts to create accessible products, share your story, or connect with customer support for accessibility help-all at hp.com/accessibility. For more information about the accessibility of your printer, please visit Accessibility for HP - HP Smart Tank 7300 | User Guide - Page 99
proper functionality and reliability. Dissimilar materials have been designed to separate easily. Fasteners and other connections are easy to locate, access, and remove using common tools. High priority parts have been designed to access quickly for efficient disassembly and repair. For more - HP Smart Tank 7300 | User Guide - Page 100
your waste equipment to a designated collection point for the recycling of waste electrical and electronic equipment. For more information, please contact your household waste disposal service, or go to hp.com/recycle. Waste disposal for Brazil 90 Appendix A Technical information - HP Smart Tank 7300 | User Guide - Page 101
Este produto eletrônico e seus componentes não devem ser descartados no lixo comum, pois embora estejam em conformidade com padrões mundiais de restrição a substâncias nocivas, podem conter, ainda que em quantidades mínimas, substâncias impactantes ao meio ambiente. Ao final da vida útil deste - HP Smart Tank 7300 | User Guide - Page 102
) Taiwan Declaration of the Presence Condition of the Restricted Substances Marking hp.com/support To access the latest user guides or manuals for your product, go to hp.com/support. Select Find your product, and then follow the on-screen instructions. 92 Appendix A Technical information - HP Smart Tank 7300 | User Guide - Page 103
Restriction of hazardous substance (India) This product, as well as its related consumables and spares, complies with the reduction in hazardous substances provisions of the "India E-waste (Management and Handling) Rule 2016." It does not contain lead, mercury, hexavalent chromium, polybrominated - HP Smart Tank 7300 | User Guide - Page 104
time clock or product settings and is designed to last the life of the product. Any attempt to service or replace this battery should be performed by a qualified service technician. Battery notice for Brazil A bateria deste equipamento nao foi projetada para ser removida pelo cliente. California
-
 1
1 -
 2
2 -
 3
3 -
 4
4 -
 5
5 -
 6
6 -
 7
7 -
8
-
9
-
10
-
11
-
12
-
13
-
14
-
15
-
16
-
17
-
18
-
19
-
20
-
21
-
22
-
23
-
24
-
25
-
26
-
27
-
28
-
29
-
30
-
31
-
32
-
33
-
34
-
35
-
36
-
37
-
38
-
39
-
40
-
41
-
42
-
43
-
44
-
45
-
46
-
47
-
48
-
49
-
50
-
51
-
52
-
53
-
54
-
55
-
56
-
57
-
58
-
59
-
60
-
61
-
62
-
63
-
64
-
65
-
66
-
67
-
68
-
69
-
70
-
71
-
72
-
73
-
74
-
75
-
76
-
77
-
78
-
79
-
80
-
81
-
82
-
83
-
84
-
85
-
86
-
87
-
88
-
89
-
90
-
91
-
92
-
93
-
94
-
95
-
96
-
97
-
98
-
99
-
100
-
101
-
102
-
103
-
104
 |
 |

User Guide
HP Smart Tank series
HP Smart Tank
6000 series
HP Smart Tank
7000 series
HP Smart Tank
7300 series