HP Smart Tank 7300 User Guide - Page 52
Scan using Webscan, To enable Webscan, Tips for successful scanning and copying
 |
View all HP Smart Tank 7300 manuals
Add to My Manuals
Save this manual to your list of manuals |
Page 52 highlights
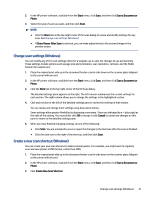
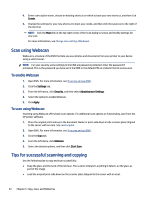
4. Enter a descriptive name, choose an existing shortcut on which to base your new shortcut, and then click Create. 5. Change the settings for your new shortcut to meet your needs, and then click the save icon to the right of the shortcut. NOTE: Click the More link at the top right corner of the Scan dialog to review and modify settings for any scan. For more information, see Change scan settings (Windows). Scan using Webscan Webscan is a feature of the EWS that lets you scan photos and documents from your printer to your device using a web browser. NOTE: For your security, some settings in the EWS are password-protected. Enter the password if prompted. This is the password you have set in the EWS or the default PIN on a label in the ink access area. To enable Webscan 1. Open EWS. For more information, see To access and use EWS. 2. Click the Settings tab. 3. From the left menu, click Security, and then select Administrator Settings. 4. Select the option to enable Webscan. 5. Click Apply. To scan using Webscan Scanning using Webscan offers basic scan options. For additional scan options or functionality, scan from the HP printer software. 1. Place the original print-side up in the document feeder or print-side down on the scanner glass (aligned to the corner with an icon). See Load original. 2. Open EWS. For more information, see To access and use EWS. 3. Click the Scan tab. 4. From the left menu, click Webscan. 5. Select the desired options, and then click Start Scan. Tips for successful scanning and copying Use the following tips to copy and scan successfully: ● Keep the glass and the back of the lid clean. The scanner interprets anything it detects on the glass as part of the image. ● Load the original print-side down on the scanner glass (aligned to the corner with an icon). 42 Chapter 5 Copy, Scan, and Mobile Fax
-
 1
1 -
2
-
3
-
4
-
5
-
6
-
7
-
8
-
9
-
10
-
11
-
12
-
13
-
14
-
15
-
16
-
17
-
18
-
19
-
20
-
21
-
22
-
23
-
24
-
25
-
26
-
27
-
28
-
29
-
30
-
31
-
32
-
33
-
34
-
35
-
36
-
37
-
38
-
39
-
40
-
41
-
42
-
43
-
44
-
45
-
46
-
 47
47 -
 48
48 -
 49
49 -
 50
50 -
 51
51 -
 52
52 -
 53
53 -
 54
54 -
 55
55 -
 56
56 -
 57
57 -
58
-
59
-
60
-
61
-
62
-
63
-
64
-
65
-
66
-
67
-
68
-
69
-
70
-
71
-
72
-
73
-
74
-
75
-
76
-
77
-
78
-
79
-
80
-
81
-
82
-
83
-
84
-
85
-
86
-
87
-
88
-
89
-
90
-
91
-
92
-
93
-
94
-
95
-
96
-
97
-
98
-
99
-
100
-
101
-
102
-
103
-
104
 |
 |
