HP Surestore 80fx 32/64/76 Slot, 5.2 Gbyte Drive Optical Jukebox Upgrade and C - Page 37
Removing the Drive From the Drive Enclosure
 |
View all HP Surestore 80fx manuals
Add to My Manuals
Save this manual to your list of manuals |
Page 37 highlights
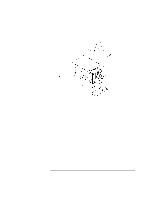
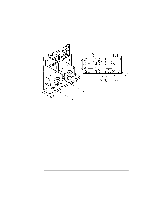
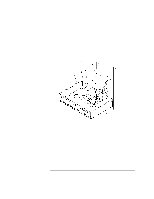
Figure 3-8 Converting 2.6 Gb Drive Jukeboxes to 5.2 Gb Drive Jukeboxes Replace 2.3 Gb Drives With 5.2 Gb Drives Removing the Drive From the Drive Enclosure 6. Mount a new drive into the drive enclosure. a. Place the new drive into the enclosure at the top position (see Figure 3-7). Secure with two T-10 screws on each side. b. Remove the adhesive backing on the plastic cable clamp and position the clamp on the rear of the drive as shown in #1 on Figure 3-7. c. As you connect the drive interface cable to its connector on the rear of the drive, slide the cable into the cable clamp. d. Replace the top and bottom cable access panels. Secure them with two T-10 screws apiece (see #1 and #2 on Figure 3-8). e. Slide the enclosure into the chassis and secure the enclosure to the chassis with one T-20 screw (see Figure 3-9). 3-11
-
 1
1 -
2
-
3
-
4
-
5
-
6
-
7
-
8
-
9
-
10
-
11
-
12
-
13
-
14
-
15
-
16
-
17
-
18
-
19
-
20
-
21
-
22
-
23
-
24
-
25
-
26
-
27
-
28
-
29
-
30
-
31
-
 32
32 -
 33
33 -
 34
34 -
 35
35 -
 36
36 -
 37
37 -
 38
38 -
 39
39 -
 40
40 -
 41
41 -
 42
42 -
43
-
44
-
45
-
46
-
47
-
48
-
49
-
50
-
51
-
52
-
53
-
54
-
55
-
56
-
57
-
58
 |
 |
