HP Thin Client PC t1000 Quick Reference Guide for Microsoft Windows NTe-based - Page 6
Default User Name and, Tab, Home, End
 |
View all HP Thin Client PC t1000 manuals
Add to My Manuals
Save this manual to your list of manuals |
Page 6 highlights
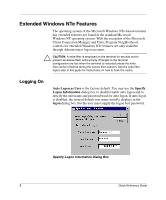
To disable auto logon: 1. Open the Specify Logon Information dialog box using the special key sequence: Tab, Home, End, ←, →. This dialog box may also be opened by selecting Winlog in the Control Panel window. 2. Select the Enable Auto Logon check box to enable automatic logon (default is selected). 3. Type the logon information in the Default User Name and Default Password text boxes: ❏ For a user logon account, enter an assigned user name in Default User Name and enter the corresponding password in Default Password. The factory-default user name and password are both User (enter in both text boxes). ❏ For an administrator logon account, enter Administrator in Default User Name and enter the password in Default Password. The factory-default administrator password is "Administrator". ✎ For security purposes, it is recommended that the passwords be changed from the defaults. An administrator can change passwords by typing Ctrl+Alt+Del to open the Windows NT Security dialog box and selecting Change Password. Passwords are case sensitive but user names are not case sensitive. ✎ Upon closing the Specify Logon Information dialog box after making changes, you are prompted to log off. If you shut down or restart the terminal instead, the changes will be lost unless the write filter cache is flushed before you restart or shut down the terminal. ✎ Additional user accounts may be created by a user manager tool accessed through a network share. However, due to local memory constraints, the number of additional users should be kept to a minimum. Also, certain local settings are recommended for each new user to configure the Start menu and to limit access to terminal resources. See the "New Local User Account" section later in this guide for additional information. Quick Reference Guide 3
-
 1
1 -
 2
2 -
 3
3 -
 4
4 -
 5
5 -
 6
6 -
 7
7 -
 8
8 -
 9
9 -
 10
10 -
 11
11 -
 12
12 -
13
-
14
-
15
-
16
-
17
-
18
-
19
-
20
-
21
-
22
-
23
-
24
-
25
-
26
-
27
-
28
-
29
-
30
-
31
-
32
-
33
-
34
-
35
-
36
-
37
-
38
 |
 |
