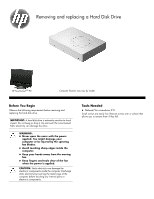
HP TouchSmart 610-1150xt Upgrading and Servicing Guide - Page 14
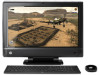
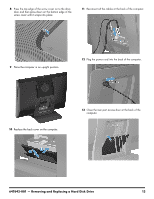
of the computer., Reinstall the drive door by sliding it toward the center
 |
View all HP TouchSmart 610-1150xt manuals
Add to My Manuals
Save this manual to your list of manuals |
Page 14 highlights
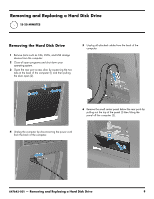
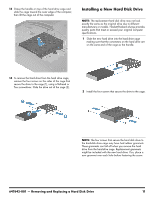
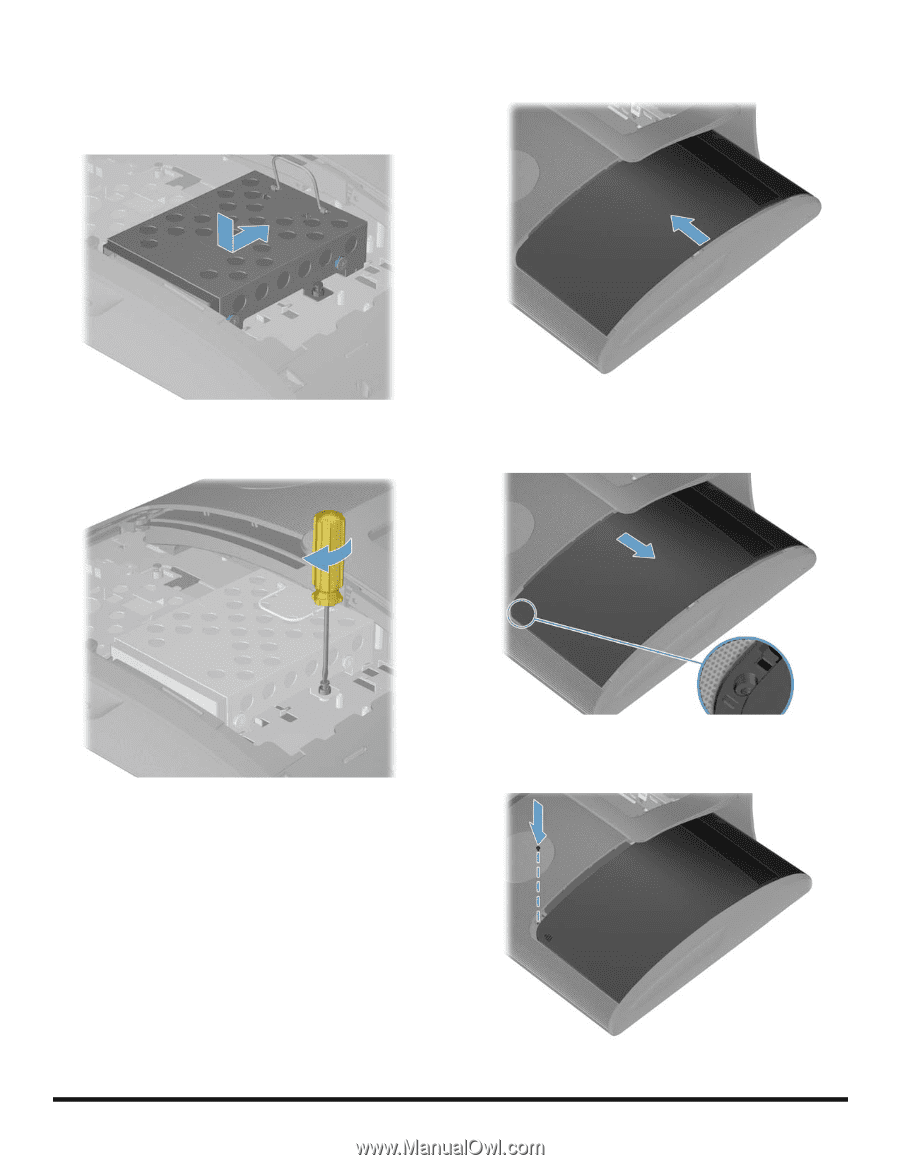
3 Set the hard drive cage down into the bay, aligning the tabs on the bottom of the cage with the tabs on the chassis. Slide the drive back toward the center of the computer until it stops, ensuring that the connector on the end of the drive is properly seated. 5 Reinstall the drive door by sliding it toward the center of the computer. 4 Tighten the captive screw with a flathead or Torx screwdriver, to secure the hard drive cage in place. 6 Slide the drive door to the edge of the computer making sure to align the screw hole in the drive door to the screw hole on the computer. 7 Install the screw securing the door to the back of the computer. 12 647642-001 - Removing and Replacing a Hard Disk Drive
-
 1
1 -
2
-
3
-
4
-
5
-
6
-
7
-
8
-
 9
9 -
 10
10 -
 11
11 -
 12
12 -
 13
13 -
 14
14 -
 15
15 -
 16
16 -
 17
17 -
 18
18 -
 19
19 -
20
-
21
-
22
-
23
 |
 |
12
647642-001
— Removing and Replacing a Hard Disk Drive
3
Set the hard drive cage down into the bay, aligning
the tabs on the bottom of the cage with the tabs on the
chassis. Slide the drive back toward the center of the
computer until it stops, ensuring that the connector on
the end of the drive is properly seated.
4
Tighten the captive screw with a flathead or Torx
screwdriver, to secure the hard drive cage in place.
5
Reinstall the drive door by sliding it toward the center
of the computer.
6
Slide the drive door to the edge of the computer
making sure to align the screw hole in the drive door
to the screw hole on the computer.
7
Install the screw securing the door to the back of the
computer.