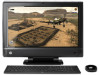
HP TouchSmart 610-1150xt Upgrading and Servicing Guide - Page 7
Installing a New CD/DVD Drive, aligning the screw holes on the panel with the screw
 |
View all HP TouchSmart 610-1150xt manuals
Add to My Manuals
Save this manual to your list of manuals |
Page 7 highlights
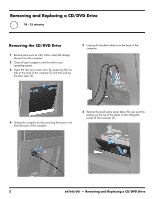
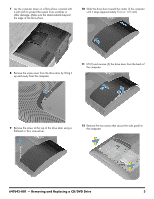
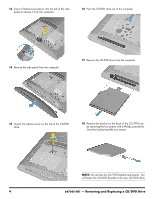
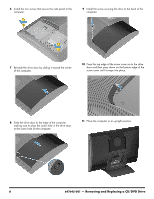
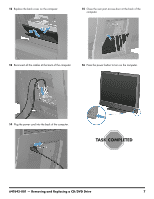
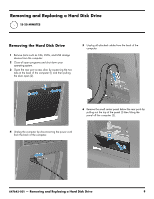
Installing a New CD/DVD Drive NOTE: The replacement CD/DVD drive may not look exactly the same as the original drive due to different manufacturers or models. Hewlett-Packard always provides quality parts that meet or exceed your original computer specifications. 1 Install the screws that secure the bracket to the back of the CD/DVD drive with a Phillips screwdriver. 3 Push the CD-DVD drive (1) into the computer until the hole in the bracket aligns with the captive screw (2). 4 Tighten the captive screw on the top of the CD-DVD drive. 2 Insert the CD-DVD drive into the slot on the computer. 5 Reinstall the side panel on the side of the computer, aligning the screw holes on the panel with the screw holes on the computer. Press firmly on the center of the side panel until it snaps into place. 647642-001 - Removing and Replacing a CD/DVD Drive 5
-
 1
1 -
 2
2 -
 3
3 -
 4
4 -
 5
5 -
 6
6 -
 7
7 -
 8
8 -
 9
9 -
 10
10 -
 11
11 -
 12
12 -
13
-
14
-
15
-
16
-
17
-
18
-
19
-
20
-
21
-
22
-
23
 |
 |
