HP Vectra VE 6/xxx HP Vectra VE 6/xxx Series 8, User's Guide for Minitower Mod - Page 28
Removing and Replacing the Cover
 |
View all HP Vectra VE 6/xxx manuals
Add to My Manuals
Save this manual to your list of manuals |
Page 28 highlights
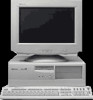
WARNING 2 How to Install Accessories in Your PC Removing and Replacing the Cover Removing and Replacing the Cover For your safety, never remove the PC's cover without first removing the power cord from the power outlet, and any connection to a telecommunications network. Always replace the cover on the PC before switching on the PC again. Removing the Cover 1 Switch off the display and PC. 2 Disconnect all power cords and any telecommunications cables. 3 Unscrew the three thumb screws at the back of the PC. If it is the first time you are removing the cover, you will probably need to use a screwdriver to loosen the screws. 4 While standing at the back of the PC, slide the cover towards you by about 15 mm (1/2 - 3/4 inch) and then lift it off the PC chassis. Step 4 Step 3 20 English
-
 1
1 -
2
-
3
-
4
-
5
-
6
-
7
-
8
-
9
-
10
-
11
-
12
-
13
-
14
-
15
-
16
-
17
-
18
-
19
-
20
-
21
-
22
-
 23
23 -
 24
24 -
 25
25 -
 26
26 -
 27
27 -
 28
28 -
 29
29 -
 30
30 -
 31
31 -
 32
32 -
 33
33 -
34
-
35
-
36
-
37
-
38
-
39
-
40
-
41
-
42
-
43
-
44
-
45
-
46
-
47
-
48
-
49
-
50
-
51
-
52
-
53
-
54
-
55
-
56
-
57
-
58
 |
 |
