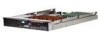
Intel MFS5000SI User Guide - Page 26
Removing Socket Protective Cover, Lowering Load Plate and Socket Lever
 |
UPC - 735858196932
View all Intel MFS5000SI manuals
Add to My Manuals
Save this manual to your list of manuals |
Page 26 highlights
9. Remove the socket protective cover. Grasp the socket protective cover tab and pull away from the load plate (see letter "A" in the following figure). Remove the socket protective cover (see letter "B") and store for future use. Note: Retain the socket protective cover for later use when removing a processor that will not be replaced. A B TP02076 Figure 13. Removing Socket Protective Cover 10. Lower the processor load plate (see letter "A" in the following figure). With your finger, push down on the load plate (see letter "B"). Lower the socket lever until it is fully latched (see letter "C"). C A B AF002224 Figure 14. Lowering Load Plate and Socket Lever 11. Ensure that the thermal material is intact on the bottom of the heatsink. 12. Align the heatsink over the processor, thermal material side down, with the captive screws in line with the holes on the heatsink retention module. Press down firmly on the heatsink. 14 Intel® Compute Module MFS5000SI User Guide
-
 1
1 -
2
-
3
-
4
-
5
-
6
-
7
-
8
-
9
-
10
-
11
-
12
-
13
-
14
-
15
-
16
-
17
-
18
-
19
-
20
-
 21
21 -
 22
22 -
 23
23 -
 24
24 -
 25
25 -
 26
26 -
 27
27 -
 28
28 -
 29
29 -
 30
30 -
 31
31 -
32
-
33
-
34
-
35
-
36
-
37
-
38
-
39
-
40
-
41
-
42
-
43
-
44
-
45
-
46
-
47
-
48
-
49
-
50
-
51
-
52
-
53
-
54
-
55
-
56
-
57
-
58
-
59
-
60
-
61
-
62
-
63
-
64
-
65
-
66
-
67
-
68
-
69
-
70
-
71
-
72
-
73
-
74
-
75
-
76
-
77
-
78
-
79
-
80
-
81
-
82
-
83
-
84
-
85
-
86
-
87
-
88
-
89
-
90
-
91
-
92
-
93
-
94
-
95
-
96
-
97
-
98
-
99
-
100
-
101
-
102
-
103
-
104
-
105
-
106
-
107
-
108
-
109
-
110
-
111
-
112
 |
 |
