JVC HR-XVS44U Supplementary Material
JVC HR-XVS44U Manual
 |
View all JVC HR-XVS44U manuals
Add to My Manuals
Save this manual to your list of manuals |
JVC HR-XVS44U manual content summary:
- JVC HR-XVS44U | Supplementary Material - Page 1
DVD PLAYER & VIDEO CASSETTE RECORDER HR-XVS44U INSTRUCTIONS For Customer Use: Enter below the Model No. and Serial No. which are located on the rear of cabinet. Retain this information for future reference. Model No. Serial No. LPT0856-001A - JVC HR-XVS44U | Supplementary Material - Page 2
user to the presence of important operating and maintenance (servicing) instructions in the literature accompanying the appliance. WARNING: TO PREVENT equipment. Declaration of Conformity Model Number: HR-XVS44U Trade Name: JVC Responsible Party: JVC Americas Corp. Address: 1700 Valley Road - JVC HR-XVS44U | Supplementary Material - Page 3
on all sides to allow for ventilation (10 cm or more on both sides, on top and at the rear.) When discarding batteries, environmental problems must be considered and the local rules or laws governing the disposal of these batteries must be followed strictly. Failure to heed the following precautions - JVC HR-XVS44U | Supplementary Material - Page 4
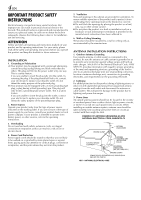
servicing. ATTENTION Follow and obey all warnings and instructions marked on your product and its operating instructions. For your safety, please read all the safety and operating instructions with regard to proper grounding of the mast and supporting structure, grounding of the lead-in wire to an - JVC HR-XVS44U | Supplementary Material - Page 5
or other hazards. 4. Safety Check Upon completion of any service or repairs to this product, ask the service technician to perform safety checks to determine that the product is in safe operating condition. HOW TO USE THIS INSTRUCTION MANUAL ● All major sections and subsections are listed in the - JVC HR-XVS44U | Supplementary Material - Page 6
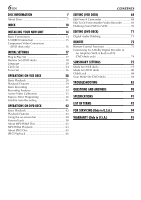
deck only 74 SUBSIDIARY SETTINGS 75 Mode Set (VCR deck 75 Mode Set (DVD deck 80 Child Lock 84 Scan Mode Set (DVD deck 84 TROUBLESHOOTING 85 QUESTIONS AND ANSWERS 90 SPECIFICATIONS 91 LIST OF TERMS 92 FOR SERVICING (Only in U.S.A.) 94 WARRANTY (Only in U.S.A.) 95 - JVC HR-XVS44U | Supplementary Material - Page 7
back such as shown below. Examples of DVD VIDEO labels which can be played back using this unit. Marks of discs in this instruction manual Allows operation with a DVD VIDEO disc. Allows operation with a Video CD disc. Allows operation with a disc including MP3/ WMA files. Allows operation with - JVC HR-XVS44U | Supplementary Material - Page 8
For example, the third track is Track 3. The same is true for Video CD discs. Track 1 Track 2 Track 3 Track 4 NOTE: Video CD discs that support Playback Control (PBC) The still image or motion image which follows a menu screen is called a "scene". Each scene has a scene number. For more details - JVC HR-XVS44U | Supplementary Material - Page 9
Placing a Disc 1 Open the disc tray. Press OPEN/CLOSE (x) on the DVD deck to open the disc tray. x ● Pressing the button again closes the disc tray. ● Do not block the disc tray with your hand while it is opening or closing as this may result in hardware failure. ● Do not place unplayable discs or - JVC HR-XVS44U | Supplementary Material - Page 10
10 EN FRONT VIEW INDEX A Power Button (POWER (1)) ੬ pg. 18 B VCR Indicator ੬ pg. 28, 32 C VHS Cassette Loading Slot D VCR/DVD Button ੬ pg. 28, 32, 42 E Disc Tray F Stop Button (STOP (8)) ੬ pg. 28, 32, 42 G DVD Indicator ੬ pg. 42 H Play Button (PLAY (4)) ੬ pg. 28, 42 I DVD Open/Close Button (OPEN/ - JVC HR-XVS44U | Supplementary Material - Page 11
REAR VIEW EN 11 A Region Number Label ੬ pg. 7 B AC Power Cord ੬ pg. 14 C S-Video/Video/Audio Input Connectors (S-VIDEO/VIDEO/AUDIO INPUT (L-1)) ੬ pg. 41, 69 D S-Video/Video/Audio Output Connectors (S-VIDEO/VIDEO/AUDIO OUTPUT) ੬ pg. 14, 15, 16, 69 E Antenna Input Connector (VHF/UHF IN) ੬ pg. 14 F - JVC HR-XVS44U | Supplementary Material - Page 12
12 EN INDEX (cont.) ON-SCREEN DISPLAY (VCR deck) If you press DISPLAY on the Remote when "SUPERIMPOSE" is set to "ON" (੬ pg. 77), various operational indicators appear on the TV screen. For On-screen display for DVD deck, refer to "Using the on-screen bar" (੬ pg. 48). A Operation Mode Indicators - JVC HR-XVS44U | Supplementary Material - Page 13
the battery compartment or on the lid. The Remote can operate most of your unit's functions, as well as basic functions of TV sets of JVC and other brands. (੬ pg. 73) ● Point the Remote toward the remote sensor. ● The maximum operating distance of the remote control is about 8 m. NOTE: If the - JVC HR-XVS44U | Supplementary Material - Page 14
of the unit and the TV's audio/video input connectors. ● Set your TV to AV mode. ● For switching the TV's mode, refer to the instruction manual of your television. ● To obtain high-quality pictures, you can also use the S-VIDEO connection or Component Video Connection (DVD deck only). (੬ pg. 15 - JVC HR-XVS44U | Supplementary Material - Page 15
TV/VCR button on the unit's Remote to set your TV to the AV mode. (੬ pg. 73) ● For switching the TV's mode, refer to the instruction manual of your television. To S-VIDEO input connector To 75 ohm Terminal TV - JVC HR-XVS44U | Supplementary Material - Page 16
TV/VCR button on the unit's Remote to set your TV to the AV mode. (੬ pg. 73) ● For switching the TV's mode, refer to the instruction manual of your television. To Component Video Input connectors To 75 ohm Terminal TV - JVC HR-XVS44U | Supplementary Material - Page 17
channel from an adjacent time zone, or an incorrect PBS channel from a cable TV system. In this case, perform "Semiauto Clock Set" (੬ pg. 25) or "Manual Clock Set" (੬ pg. 25). ● If "- -:- -" appears on the front display panel, your antenna cable may not be connected to the unit or there may not - JVC HR-XVS44U | Supplementary Material - Page 18
18 EN Monitor Set (DVD deck) You can select the monitor type depending the TV used when you play back DVD VIDEO discs recorded for wide-screen TVs. ● Turn on the TV and select the VCR channel (or AV mode). ● Slide the TV/VCR/DVD switch to the right. INITIAL SETTINGS (cont.) A Turn on the unit. - JVC HR-XVS44U | Supplementary Material - Page 19
* The default setting is bold in the table below. 8 MONITOR TYPE 16:9 NORMAL (Wide television conversion): Select this when the aspect ratio of your TV is 16:9 (wide TV). 16:9 AUTO (Wide television conversion): Select this when the aspect ratio of your TV is fixed to 16:9 (wide TV). The unit - JVC HR-XVS44U | Supplementary Material - Page 20
20 EN Language ● Turn on the TV and select the VCR channel (or AV mode). ● Slide the TV/VCR/DVD switch to the right. INITIAL SETTINGS (cont.) On-screen Language Set (VCR deck) This VCR deck offers you the choice to view on-screen messages in 3 different languages. A Turn on the unit. Press POWER - JVC HR-XVS44U | Supplementary Material - Page 21
Language Set (DVD deck) This DVD deck offers you the choice to view on-screen messages in 3 different languages. You can change the language setting manually as required. A Turn on the unit. Press POWER (1). B Select the DVD deck. On the unit Press VCR/DVD repeatedly so that the DVD indicator - JVC HR-XVS44U | Supplementary Material - Page 22
22 EN INITIAL SETTINGS (cont.) Menu/Audio/Subtitle Language Set (DVD deck only) Some DVD discs contain the DVD menu display, audio, subtitle in the multiple languages. With these discs, you can set the default language as you like. ● The procedure shows how to set "MENU LANGUAGE" on the DVD Set Up - JVC HR-XVS44U | Supplementary Material - Page 23
FI Finnish FJ Fiji FO Faroese FY Frisian GA Irish GD Scots Gaelic GL Galician GN Guarani GU Gujarati HA Hausa HI Hindi HR Croatian HU Hungarian HY Armenian IA Interlingua IE Interlingue IK Inupiak IN Indonesian IS Icelandic IW Hebrew JI Yiddish JW Javanese KA Georgian - JVC HR-XVS44U | Supplementary Material - Page 24
24 EN Clock Set ● Turn on the TV and select the VCR channel (or AV mode). ● Slide the TV/VCR/DVD switch to the right. INITIAL SETTINGS (cont.) Perform clock setting only if the clock has not been set correctly by the Plug&Play setting. Preparations A Turn on the unit. Press POWER (1). B Select the - JVC HR-XVS44U | Supplementary Material - Page 25
incorrect PBS channel from a cable TV system. If you selected "AUTO" for the host channel in step B, be sure to select the correct time zone manually. EN 25 E Complete the Semiauto Clock Set. Press SET UP MENU to return to normal screen. IMPORTANT Turn off the unit after performing Semiauto Clock - JVC HR-XVS44U | Supplementary Material - Page 26
26 EN Tuner Set ● Turn on the TV and select the VCR channel (or AV mode). ● Slide the TV/VCR/DVD switch to the right. INITIAL SETTINGS (cont.) Auto Channel Set Perform Auto Channel Set only if channels have not been set correctly by the Plug&Play setting. A Turn on the unit. Press POWER (1). B - JVC HR-XVS44U | Supplementary Material - Page 27
Set screen. Press rt to move the highlight bar (arrow) to "TUNER SET", then press OK or e. E Access the Manual Channel Set screen. Press rt to move the highlight bar (arrow) to "MANUAL CHANNEL SET", then press OK or e. F Add or skip the desired channels. To add channels A Press the number keys - JVC HR-XVS44U | Supplementary Material - Page 28
28 EN Basic Playback ● Turn on the TV and select the VCR channel (or AV mode). ● Slide the TV/VCR/DVD switch to the right. Clean the video heads using a dry cleaning cassette - ECL-3F - when: ● Rough, poor picture appears while a tape is played back. ● The picture is unclear or no picture appears. ● - JVC HR-XVS44U | Supplementary Material - Page 29
Playback Features ● Turn on the TV and select the VCR channel (or AV mode). ● Slide the TV/VCR/DVD switch to the right. ATTENTION In the search, still, slow-motion or frame-by-frame playback mode, ● the picture will be distorted. ● the noise bars will appear. ● there may be a loss of colour. ● you - JVC HR-XVS44U | Supplementary Material - Page 30
30 EN OPERATIONS ON VCR DECK (cont.) Index Search x Your unit automatically marks index codes at the beginning of each recording. This function gives you quick access to any one of 9 index codes in either direction. NOTE: Before starting, make sure the unit is in the Stop mode. Activate Index - JVC HR-XVS44U | Supplementary Material - Page 31
the unit stops automatically. 3 Stop Repeat Playback. Press STOP (8) at any time. ● Pressing PLAY (4), REW (3), FF (5) or PAUSE (9) also stops Repeat Playback. EN 31 Manual Tracking Your unit is equipped with automatic tracking control. During playback, you can override this and adjust the tracking - JVC HR-XVS44U | Supplementary Material - Page 32
32 EN Basic Recording ● Turn on the TV and select the VCR channel (or AV mode). ● Slide the TV/VCR/DVD switch to the right. OPERATIONS ON VCR DECK (cont.) A Load a cassette. Insert a cassette with the record safety tab intact. ● The unit's power comes on automatically and the counter is reset to 0: - JVC HR-XVS44U | Supplementary Material - Page 33
Recording Features ● Turn on the TV and select the VCR channel (or AV mode). ● Slide the TV/VCR/DVD switch to the right. EN 33 Record One Program While Watching Another If your unit is connected to the TV via the AV connection, press TV/VCR. The unit's VCR indicator on the front display panel and - JVC HR-XVS44U | Supplementary Material - Page 34
34 EN OPERATIONS ON VCR DECK (cont.) Elapsed Recording Time Indication 1 Set the counter display. Press DISPLAY until a counter reading appears on the front display panel. 2 Reset the counter. Press C.RESET before starting recording or playback. ● The counter is reset to "0:00:00" and shows the - JVC HR-XVS44U | Supplementary Material - Page 35
Active Video Calibration The Video Calibration checks the condition of the tape in use during playback and recording, and compensates to provide the highest-possible playback and recording pictures. You can set "VIDEO CALIBRATION" to "ON" or "OFF" to your preference. (੬ pg. 76) Playback The unit - JVC HR-XVS44U | Supplementary Material - Page 36
36 EN Express Timer Programing Before performing Express Timer Programing: ● Make sure that the unit's built-in clock is set properly. ● Insert a cassette with the safety tab in place. The unit will come on automatically. ● Turn on the TV and select the VCR channel (or AV mode). ● Slide the TV/VCR/ - JVC HR-XVS44U | Supplementary Material - Page 37
F Enter the channel position. Press CH +/-. G Set the tape speed. Press SP/EP. H Return to the normal screen. Press PROG. or OK. "PROGRAM COMPLETED" appears on the TV screen for about 5 seconds, then the normal screen appears. If "PROGRAM NOT COMPLETED PROGRAM OVERLAP" appears on the TV screen, see - JVC HR-XVS44U | Supplementary Material - Page 38
38 EN OPERATIONS ON VCR DECK (cont.) Check, cancel and change programs A Disengage the timer mode. Press TIMER, then press POWER (1). B Access the Program Check screen. Press PROG. CHECK. C Access the Program screen. Press PROG. CHECK again to check more information. Each time you press PROG. CHECK - JVC HR-XVS44U | Supplementary Material - Page 39
EN 39 To cancel or change a program D Cancel or change a program. Press CANCEL to cancel a program. To change program settings, press the appropriate button: START +/-, STOP +/-, DATE +/-, CH +/-, DAILY (number key "8"), WEEKLY (number key "9") and/or SP/EP. E Return to the normal screen. Press PROG - JVC HR-XVS44U | Supplementary Material - Page 40
40 EN OPERATIONS ON VCR DECK (cont.) When programs overlap each other If "PROGRAM NOT COMPLETED PROGRAM OVERLAP" appears, you have another program overlapping the program you have just made. The Program Check screen appears and conflicting programs will start blinking. ATTENTION If there is a - JVC HR-XVS44U | Supplementary Material - Page 41
DBS receivers. ● The "N" indicator blinks while Satellite Auto Recording is in progress. ● For timer programing of the DBS receiver, refer to the instruction manual of the DBS receiver. ● Satellite Auto Recording is not possible if your DBS receiver does not have a timer. ● Pressing the unit's POWER - JVC HR-XVS44U | Supplementary Material - Page 42
42 EN Basic Playback ● Turn on the TV and select the VCR channel (or AV mode). ● Slide the TV/VCR/DVD switch to the right. OPERATIONS ON DVD DECK To play back a MP3/WMA/JPEG disc, see pages 62 - 67. A Load the disc. A Press OPEN/CLOSE (x) on the DVD deck to open the disc tray. ● The unit's power - JVC HR-XVS44U | Supplementary Material - Page 43
/DVD switch to the right. Playback Control (PBC) Function - Locating a desired scene using the menu of the Video CD with PBC Some Video CD discs supports the PBC function. PBC is an abbreviation of "PlayBack Control." A Video CD disc recorded with PBC has its own menus, such as a list of the - JVC HR-XVS44U | Supplementary Material - Page 44
44 EN OPERATIONS ON DVD DECK (cont.) Locating the start point of the item or skip the item Press SKIP (2) or SKIP (6) during playback. Example: To locate the beginning of item B from the current position, press SKIP (2) twice. To locate the beginning of item D from the current position, press SKIP - JVC HR-XVS44U | Supplementary Material - Page 45
Still Picture/Frame-By-Frame Playback EN 45 2 Resume playback. Press PLAY (4). The unit start playback from the resume point. ● "RESUME PLAY" appears on the front display panel. 1 Pause during playback. Press PAUSE (9). 2 Activate frame-by-frame playback. Press PAUSE (9) to advance a still picture - JVC HR-XVS44U | Supplementary Material - Page 46
46 EN OPERATIONS ON DVD DECK (cont.) ● Each time you press w e, the setting changes as follows: NONE]ACTION]DRAMA]THEATER](Back to the beginning) NONE: ACTION: DRAMA: THEATER: No effect Suitable for action movies and sports programs in which sounds dynamically move. Provides the natural and warm - JVC HR-XVS44U | Supplementary Material - Page 47
settings. Go to step 3. NOTE: You cannot adjust the parameters of "NORMAL" and "CINEMA". To adjust picture appearance manually 3 Access USER menu. Press w e repeatedly to select "USER 1" or "USER 2". USER 1 GAMMA +0 BRIGHTNESS +0 CONTRAST +0 SATURATION +0 TINT +0 SHARPNESS +3 Y DELAY - JVC HR-XVS44U | Supplementary Material - Page 48
48 EN Using the onscreen bar OPERATIONS ON DVD DECK (cont.) How to Access the on-screen bar Press PLAY SETUP twice whenever a disc is loaded. Example: During DVD VIDEO playback You can check disc information while the disc is loaded and you can use some functions using the on-screen bar. The on- - JVC HR-XVS44U | Supplementary Material - Page 49
Basic operation on the on-screen bar Example: When selecting the Repeat mode of DVD During playback or while stopped A Access the on-screen bar. Press PLAY SETUP twice. The on-screen bar appears on the TV screen. ● The currently selected item is highlighted. B Select menu item. Press w e to move 0 - JVC HR-XVS44U | Supplementary Material - Page 50
50 EN Repeat Playback You can repeat playback as you like according to the type of disc. DVD VIDEO: during playback Audio CD: during playback or in stop mode Video CD/SVCD: in stop mode or during playback with PBC disactivated When using the on-screen bar A Access the on-screen bar. Press - JVC HR-XVS44U | Supplementary Material - Page 51
A-B Repeat Playback Time Search EN 51 You can repeat the desired part. A Access the on-screen bar. Press PLAY SETUP twice. The on-screen bar appears on the TV screen. B Select menu item. Press w e to move 0 to , then press OK. ● The following pop-up window appears under the selected item. - JVC HR-XVS44U | Supplementary Material - Page 52
52 EN OPERATIONS ON DVD DECK (cont.) Chapter Search You can start playback the desired chapter using the on-screen bar. A Access the on-screen bar. Press PLAY SETUP twice. The on-screen bar appears on the TV screen. B Select menu item. Press w e to move 0 to , then press OK. ● The following - JVC HR-XVS44U | Supplementary Material - Page 53
Program Playback Random Playback EN 53 You can play back up to 99 tracks in the desired order. A Access the on-screen bar. Press PLAY SETUP twice in stop mode. B Select the menu item. Press w e to move 0 to , then press OK. ● The program table appears under the on-screen bar. You can play - JVC HR-XVS44U | Supplementary Material - Page 54
54 EN OPERATIONS ON DVD DECK (cont.) C Select the subtitle language. Press rt repeatedly to select the desired subtitle language, then press OK. ● Each time you press the button, the subtitle language changes. To clear the on-screen bar Press PLAY SETUP. NOTES: ● For DVD VIDEO Some subtitle - JVC HR-XVS44U | Supplementary Material - Page 55
different angles. If the disc contains "multi-angle" parts, " " appears on the TV screen at the beginning of the "multi-angle" part when "ON SCREEN GUIDE" is set to "ON". ● During playback When using the on-screen bar A Access the on-screen bar. Press PLAY SETUP twice. The on-screen bar - JVC HR-XVS44U | Supplementary Material - Page 56
56 EN OPERATIONS ON DVD DECK (cont.) B Select menu item. Press w e to move 0 to , then press OK. ● The following pop-up window appears under the selected item. Example: "ENGLISH" is selected out of 4 audio languages recorded. Audio Language Selection C Select the audio language. Press rt - JVC HR-XVS44U | Supplementary Material - Page 57
Audio Channel Selection When you play certain karaoke (DVD/Video CD/SVCD), you can enjoy karaoke by selecting the audio channel to play. ● The sound of each audio channel depends on the contents of the disc. ● During playback When using the on-screen bar A Access the on-screen bar. Press PLAY - JVC HR-XVS44U | Supplementary Material - Page 58
DVD VIDEO discs which contain violent (and other) scenes according to the level set by the user. For example, if a movie which includes violent scenes supports the parental lock feature, such scenes which you do not want to let children view can be cut or replaced with other scenes. ● Turn on - JVC HR-XVS44U | Supplementary Material - Page 59
EN 59 H Enter the password. Press the number keys to enter a four-digit number as your password, then press OK. ● The 0 moves to "EXIT". PARENTAL LOCK COUNTRY CODE SET LEVEL PASSWORD EXIT US 4 _ _ _ _ SELECT OK NEW PASSWORD? ••• PRESS 0 ~ 9 KEY TO EXIT, PRESS [SET UP MENU]. I Return to the - JVC HR-XVS44U | Supplementary Material - Page 60
South Sandwich Islands GT Guatemala GU Guam GW Guinea-Bissau GY Guyana HK Hong Kong HM Heard Island and McDonald Islands HN Honduras HR Croatia HT Haiti HU Hungary ID Indonesia IE Ireland IL Israel IN India IO British Indian Ocean Territory IQ Iraq IR Iran (Islamic - JVC HR-XVS44U | Supplementary Material - Page 61
LC Saint Lucia LI Liechtenstein LK Sri Lanka LR Liberia LS Lesotho LT Lithuania LU Luxembourg LV Latvia LY Libyan Arab Jamahiriya MA Morocco MC Monaco MD Moldova, Republic of MG Madagascar MH Marshall Islands ML Mali MM Myanmar MN Mongolia MO Macau MP Northern - JVC HR-XVS44U | Supplementary Material - Page 62
/WMA format (we refer to those discs as MP3/WMA discs in this manual). Operations for MP3/WMA discs are similar to those for Audio CD discs, not be played back or it takes time to start playback. ● The unit does not support "packet writing" discs. ● If there are any Tracks (files) which are stored on - JVC HR-XVS44U | Supplementary Material - Page 63
MP3/WMA Playback You can search and play back desired groups and tracks using the MP3/WMA control display. ● Turn on the TV and select the VCR channel (or AV mode). ● Slide the TV/VCR/DVD switch to the right. EN 63 Using the MP3/WMA control display A Turn on the unit. Press POWER (1). B Select the - JVC HR-XVS44U | Supplementary Material - Page 64
64 EN OPERATIONS ON DVD DECK (cont.) Repeat Playback You can repeat playback of the current group, track or all groups. ● While MP3/WMA control display is on the TV: A Access the repeat mode. Press PLAY SETUP during playback. ● The current repeat mode is displayed on the MP3/WMA control display. B - JVC HR-XVS44U | Supplementary Material - Page 65
the JPEG format (we refer to those discs as JPEG discs in this manual). Operations for JPEG discs are similar to those for Audio CD discs, though be played back or it takes time to start playback. ● The unit does not support "packet writing" discs. ● If there are any Files which are stored on a disc - JVC HR-XVS44U | Supplementary Material - Page 66
66 EN JPEG Playback You can search and play back desired groups and files using the JPEG control display. ● Turn on the TV and select the VCR channel (or AV mode). ● Slide the TV/VCR/DVD switch to the right. NOTES: ● PLAY (4), STOP (8), PAUSE (9), SKIP (2) and SKIP (6) buttons function the same as - JVC HR-XVS44U | Supplementary Material - Page 67
Group/file selection To start slide-show playback by specifying the group/file number A Press TITLE. B Press the number keys (0-10, +10) to enter the group number. C Press the number keys (0-10, +10) to enter the file number. Example: To select 3: Press 3. To select 14: Press +10, then 4. To select - JVC HR-XVS44U | Supplementary Material - Page 68
68 EN Edit From A Camcorder A If the camcorder has no S-VIDEO output connector: Recorder VIDEO input AUDIO input Audio cable (not provided) Video cable (not provided) VIDEO OUT Camcorder AUDIO OUT Player B If the camcorder has an S-VIDEO output connector: S-VIDEO input Recorder AUDIO - JVC HR-XVS44U | Supplementary Material - Page 69
79) ● When using VIDEO connector, set "REAR AUX INPUT" to "VIDEO". (੬ pg. 79) ● When using another recorder as the recording deck, refer to its instruction manual. D Set the edit mode. See "PICTURE CONTROL" on page 76. E Engage the Record Pause mode of the recording deck. Locate the point where you - JVC HR-XVS44U | Supplementary Material - Page 70
: ● You cannot start dubbing when the scan mode is set to the progressive mode. Set it to the interlace mode. (੬ pg. 84) ● Set "ON SCREEN GUIDE" to "OFF" (੬ pg. 83) if you do not want to record the on-screen display for DVD discs during dubbing. ● There may be a discrepancy of - JVC HR-XVS44U | Supplementary Material - Page 71
EDITING (DVD DECK) Digital Audio Dubbing ● Turn on the TV and select the VCR channel (or AV mode). ● Slide the TV/VCR/DVD switch to the right. Recorder Digital audio device (MD deck etc.) Optical cable (not supplied) Player Rear of unit DIGITAL AUDIO OUT Note for connection: Remove the connector - JVC HR-XVS44U | Supplementary Material - Page 72
72 EN Remote Control Functions Remote A/B/C/D Code Switching The Remote is capable of controlling four JVC video units independently. Each of units can respond to one of four codes (A, B, C or D). The remote control is preset to send A code signals because your - JVC HR-XVS44U | Supplementary Material - Page 73
+/-, TV VOL+/- (Volume), MUTE (TV Muting), number keys. ● For some brands of TV, you must press OK after having pressed the number keys. BRAND NAME JVC HITACHI MAGNAVOX MITSUBISHI PANASONIC RCA SHARP SONY SAMSUNG SANYO SEARS TOSHIBA ZENITH CODE 01, 03 10 02 03 04, 11 05 06 07 12 13 - JVC HR-XVS44U | Supplementary Material - Page 74
74 EN REMOTE (cont.) Connecting To A Dolby Digital Decoder or An Amplifier With A Built-in DTS (DVD deck only) These instructions enable you to connect your unit to dolby digital decoder or amplifier with a built-in DTS. DIGITAL AUDIO OUT To DIGITAL AUDIO input Dolby Digital - JVC HR-XVS44U | Supplementary Material - Page 75
SUBSIDIARY SETTINGS Mode Set (VCR deck) ● Turn on the TV and select the VCR channel (or AV mode). ● Slide the TV/VCR/DVD switch to the right. EN 75 You can change various mode settings on the Function Set screen by following the procedure described below. ● For each mode setting, see pages 76 to 79 - JVC HR-XVS44U | Supplementary Material - Page 76
76 EN 8 S-VHS ET ON OFF 8 VIDEO CALIBRATION ON OFF 8 PICTURE CONTROL AUTO EDIT SOFT SHARP SUBSIDIARY SETTINGS (cont.) * The default setting is bold in the table below. You can record in SP mode on VHS cassettes with S-VHS picture quality. You can play back a tape recorded using the S-VHS ET - JVC HR-XVS44U | Supplementary Material - Page 77
tape if you set "AUTO SP]EP TIMER" to "ON". In this case, make sure the mode is not engaged, then set the tape speed manually during timer programing. ● In order to ensure that the recording fits on the tape, this feature may leave a slight nonrecorded section at the end of - JVC HR-XVS44U | Supplementary Material - Page 78
78 EN 8 2ND AUDIO RECORD ON OFF 8 AUDIO MONITOR HI-FI HI-FI L HI-FI R NORM MIX SUBSIDIARY SETTINGS (cont.) * The default setting is bold in the table below. ● When this function is set to "ON"; If a SAP program is received, the SAP audio is recorded on both the normal and Hi-Fi tracks. The main - JVC HR-XVS44U | Supplementary Material - Page 79
8 S-VHS MODE ON OFF 8 FRONT AUX INPUT VIDEO S-VIDEO 8 REAR AUX INPUT VIDEO S-VIDEO 8 AUTO POWER OFF 3H OFF EN 79 * The default setting is bold in the table below. Your unit can record in S-VHS (Super VHS), S-VHS ET or VHS. ● To record in S-VHS: Set "S-VHS MODE" to "ON". Then, insert a cassette - JVC HR-XVS44U | Supplementary Material - Page 80
DIGITAL AUDIO OUTPUT (੬ pg. 81) ANALOG DOWN MIX (੬ pg. 82) D. RANGE CONTROL (੬ pg. 82) OUTPUT LEVEL (੬ pg. 82) OTHERS RESUME (੬ pg. 83) ON SCREEN GUIDE (੬ pg. 83) PARENTAL LOCK (੬ pg. 58) SUBSIDIARY SETTINGS (cont.) ● The procedure shows how to set "RESUME" to "ON" on the DVD Set Up menu screen - JVC HR-XVS44U | Supplementary Material - Page 81
Picture Settings 8 MONITOR TYPE 16:9 NORMAL 16:9 AUTO 4:3 LB 4:3 PS 8 PICTURE SOURCE VIDEO (NORMAL) VIDEO (ACTIVE) FILM AUTO 8 SCREEN SAVER ON OFF 8 MP3&WMA/JPEG MP3&WMA JPEG Audio Settings 8 DIGITAL AUDIO OUTPUT PCM ONLY DOLBY DIGITAL/PCM STREAM/PCM EN 81 * The default setting is bold in the table - JVC HR-XVS44U | Supplementary Material - Page 82
82 EN 8 ANALOG DOWN MIX DOLBY SURROUND STEREO 8 D. RANGE CONTROL WIDE RANGE NORMAL TV MODE 8 OUTPUT LEVEL STANDARD LOW SUBSIDIARY SETTINGS (cont.) Set to the appropriate mode according to your audio system when you play back a DVD VIDEO disc recorded with surround multichannel audio. This setting - JVC HR-XVS44U | Supplementary Material - Page 83
connected to the analog outputs to minimum. Others Settings * The default setting is bold in the table below. 8 RESUME ON OFF DISC RESUME 8 ON SCREEN GUIDE ON OFF When this function is set to "ON", you can use the resume function. (੬ pg. 45) ON: You can start playback from the resume - JVC HR-XVS44U | Supplementary Material - Page 84
enjoy a high quality picture by setting the progressive scan mode to active. ● Refer also to the instruction manuals supplied with your TV. ● If your TV equipped with component video connectors does not support the progressive video input, do not change the scan mode to the "PROGRESSIVE". * 480p and - JVC HR-XVS44U | Supplementary Material - Page 85
TROUBLESHOOTING EN 85 Before requesting service for a problem, use this chart and see if you can repair the trouble yourself. Small problems are often easily corrected, and this can save you the trouble its AV mode. Try manual tracking. (੬ pg. 31) Use a dry cleaning cassette ECL-3F, or consult your - JVC HR-XVS44U | Supplementary Material - Page 86
86 EN PLAYBACK (DVD deck) TROUBLESHOOTING (cont.) SYMPTOM 1. The button do not work. 2. The DVD deck can not be operated. POSSIBLE CAUSE ● The operation is prohibited on the placed disc. ● The - JVC HR-XVS44U | Supplementary Material - Page 87
EN 87 2. Not MP3/WMA files but JPEG files are ● The MP3&WMA/JPEG setting is set to played. "JPEG". 3. The MP3/WMA control display appears on the TV screen, but no operation can be performed. ● No MP3/WMA files or JPEG files are recorded to the disc, or the disc is an unplayable disc (such as CD - JVC HR-XVS44U | Supplementary Material - Page 88
88 EN TROUBLESHOOTING (cont.) TIMER RECORDING (VCR deck) SYMPTOM POSSIBLE CAUSE CORRECTIVE ACTION 1. Timer recording won't work. ● The clock and/or the timer have been set Re-perform - JVC HR-XVS44U | Supplementary Material - Page 89
EN 89 OTHER PROBLEMS SYMPTOM POSSIBLE CAUSE CORRECTIVE ACTION 1. The image of TV broadcast appears during host channel is incorrect. "Semiauto Clock Set" (੬ pg. 25), or perform "Manual Clock Set" (੬ pg. 25). ATTENTION This unit contains microcomputers. External electronic noise or - JVC HR-XVS44U | Supplementary Material - Page 90
search to normal playback, the picture is disturbed. Should I be concerned about this? A. No, it is normal. Q. Noise bar appear during search. What's the problem? A. This is normal. Q. Sometimes, during Index Search, the unit can't find the program I want to see. Why not? A. There may be index codes - JVC HR-XVS44U | Supplementary Material - Page 91
SPECIFICATIONS EN 91 GENERAL Power requirement : AC 120 Vd, 60 Hz Power consumption Power on : 28 W Power off : 3.1 W Temperature Operating : 5°C to 40°C (41°F to 104°F) Storage : -20°C to 60°C (-4°F to140°F) Operating position : Horizontal only Dimensions (WxHxD) : 435 mm x 93 mm x - JVC HR-XVS44U | Supplementary Material - Page 92
Set 27 Manual Clock Set 25 Manual Tracking 31 Mode Set (DVD deck) ANALOG DOWN MIX 82 AUDIO LANGUAGE 22 D. RANGE CONTROL 82 DIGITAL AUDIO OUT 81 MENU LANGUAGE 22 MONITOR TYPE 19, 81 MP3&WMA/JPEG 81 ON SCREEN GUIDE 83 ON SCREEN LANGUAGE 21 OUTPUT LEVEL 82 PICTURE SOURCE 81 RESUME - JVC HR-XVS44U | Supplementary Material - Page 93
P Pan&Scan 19 Parental Lock Country/Area Code List 60 To change the settings 59 To set Parental Lock for the first time 58 To temporarily release the Parental Lock 59 Playback (DVD deck 42 - 67 Playback (JPEG 66 - 67 Playback (MP3/WMA 63 - 64 Playback (VCR deck 28 - 31 Playback Control (PBC - JVC HR-XVS44U | Supplementary Material - Page 94
(Only in U.S.A.) HOW TO LOCATE YOUR JVC SERVICE CENTER TOLL FREE: 1-800-537-5722 http://www.jvc.com Dear Customer, In order to receive the most satisfaction from your purchase, please read the instruction booklet before operating the unit. In the event that repair is necessary, or for the - JVC HR-XVS44U | Supplementary Material - Page 95
bill of sale plus a letter of explanation of the problem to the nearest JVC Factory Service Center, the name and location of which will be Manual, normal maintenance, video and audio head cleaning; 4. Damage that occurs in shipment, due to act of God, and cosmetic damage; 5. Signal reception problems - JVC HR-XVS44U | Supplementary Material - Page 96
HR-XVS44U EN Printed in Beijing 0803-TY-ID-BJ
-
 1
1 -
 2
2 -
 3
3 -
 4
4 -
 5
5 -
 6
6 -
 7
7 -
8
-
9
-
10
-
11
-
12
-
13
-
14
-
15
-
16
-
17
-
18
-
19
-
20
-
21
-
22
-
23
-
24
-
25
-
26
-
27
-
28
-
29
-
30
-
31
-
32
-
33
-
34
-
35
-
36
-
37
-
38
-
39
-
40
-
41
-
42
-
43
-
44
-
45
-
46
-
47
-
48
-
49
-
50
-
51
-
52
-
53
-
54
-
55
-
56
-
57
-
58
-
59
-
60
-
61
-
62
-
63
-
64
-
65
-
66
-
67
-
68
-
69
-
70
-
71
-
72
-
73
-
74
-
75
-
76
-
77
-
78
-
79
-
80
-
81
-
82
-
83
-
84
-
85
-
86
-
87
-
88
-
89
-
90
-
91
-
92
-
93
-
94
-
95
-
96
 |
 |
DVD PLAYER &
VIDEO CASSETTE RECORDER
INSTRUCTIONS
LPT0856-001A
HR-XVS44U
For Customer Use:
Enter below the Model No. and
Serial No. which are located on the
rear of cabinet. Retain this
information for future reference.
Model No.
Serial No.