JVC KY-F550U Instruction Manual - Page 34
Setting Procedures
 |
View all JVC KY-F550U manuals
Add to My Manuals
Save this manual to your list of manuals |
Page 34 highlights
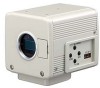
5. Setting Via the Menu Screen (continued) Setting Procedures The various functions of this unit can be set using the menu screen. Settings will be stored in the memory of this unit and will remain recorded when the power is turned off. [MENU] [5] [SET] 5/ BARS MENU SET ∞/ AW 1 2 34 [∞] Switch 4: [OFF] 3. - - - MENU - - - EXPOSURE . . WH I TE BA L ANCE . . PROCESS . . SYSTEM . . CAPTURE . . F I L E MANAGE . . EX I T "MENU" Screen 4. - - - EXPOSURE - - - I R I S MODE AU TO MANUA L L EVE L - - - - - - GA I N S T EP LEVE L 0dB SHUT TER S T EP LEVEL NORMAL ADVANCED EXPOSURE . . PAGE BACK 1. Set the Switch 4 located at the side of this unit to [OFF] (lower side). 1 23 4 ON OFF Switch 4 2. Switch on the power to this unit. 3. Press the [MENU] button for 1-2 seconds. The "MENU" screen will be displayed. 4. Use the [5/∞] buttons to select an item, followed by pressing the [SET] button. The submenu screen will be displayed. 5. For the submenu screens, similarly, use the [5/∞] buttons to select an item, then press the [SET] button. The set value starts blinking and adjustment is possible. 6. Use the [5/∞] buttons to alter the set value, followed by press- ing the [SET] button. Set value will be confirmed and recorded in the memory of this unit. Note If there is a huge difference in the magnitude of value to be set, press and hold the [5/∞] buttons to speed up the change. Use this when making a significant change to the set value. 7. Press the [MENU] button for 1-2 seconds. The normal screen will be displayed. "EXPOSURE" Screen (Example) (Submenu Screen) 32
-
 1
1 -
2
-
3
-
4
-
5
-
6
-
7
-
8
-
9
-
10
-
11
-
12
-
13
-
14
-
15
-
16
-
17
-
18
-
19
-
20
-
21
-
22
-
23
-
24
-
25
-
26
-
27
-
28
-
 29
29 -
 30
30 -
 31
31 -
 32
32 -
 33
33 -
 34
34 -
 35
35 -
 36
36 -
 37
37 -
 38
38 -
 39
39 -
40
-
41
-
42
-
43
-
44
-
45
-
46
-
47
-
48
-
49
-
50
-
51
-
52
-
53
-
54
-
55
-
56
 |
 |
