JVC LT-32E478 Instructions
JVC LT-32E478 - 32" LCD TV Manual
 |
UPC - 046838028946
View all JVC LT-32E478 manuals
Add to My Manuals
Save this manual to your list of manuals |
JVC LT-32E478 manual content summary:
- JVC LT-32E478 | Instructions - Page 1
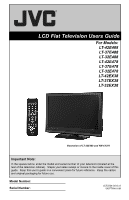
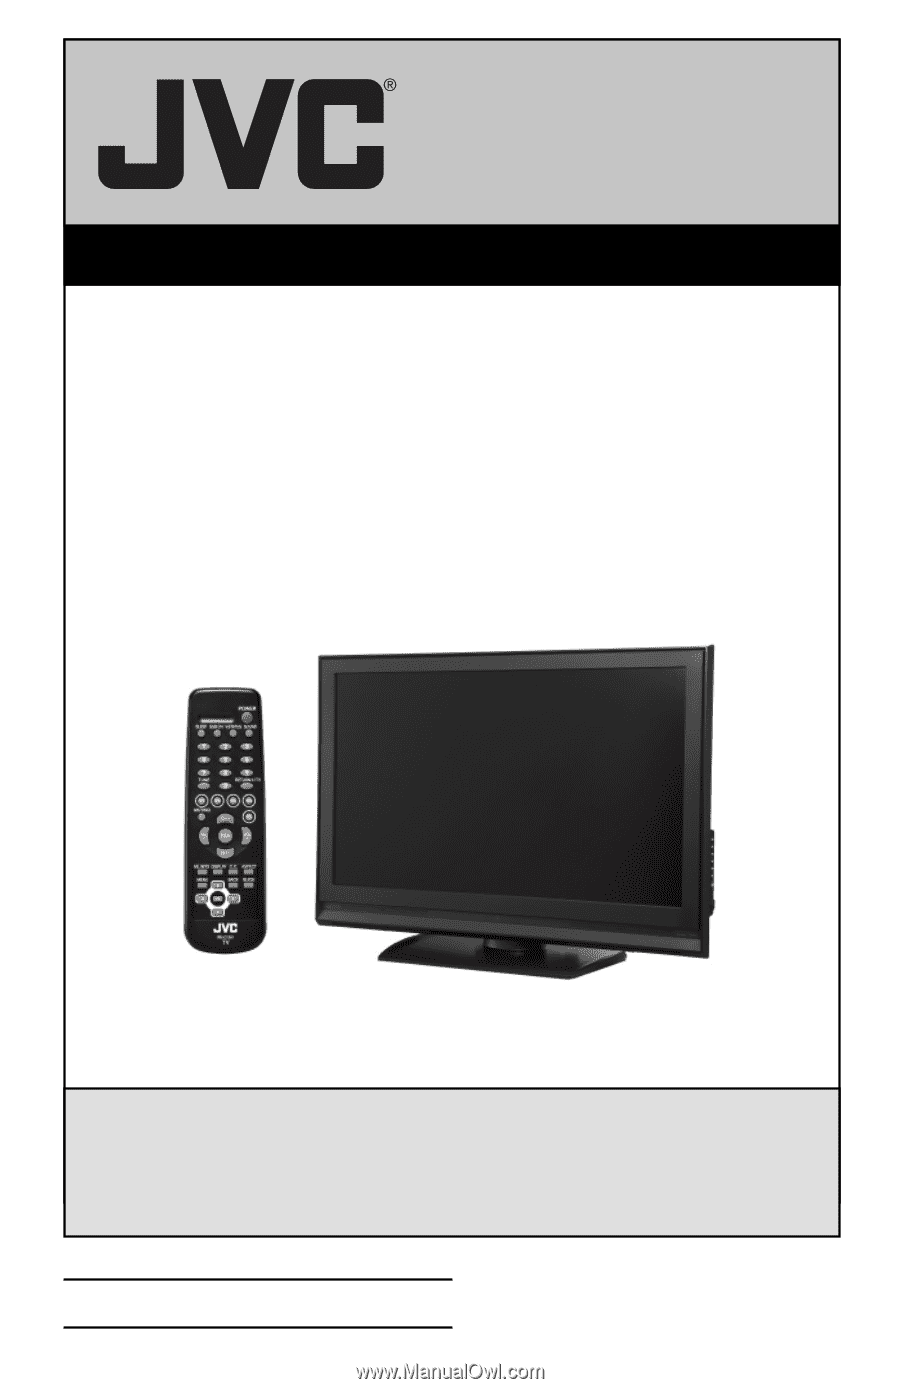
LCD Flat Television Users Guide For Models: LT-42E488 LT-37E488 LT-32E488 LT-42E478 LT-37E478 LT-32E478 LT-42EX38 LT-37EX38 LT-32EX38 Illustration of LT-32E488 and RM-C1291 Important Note: In the spaces below, enter the model and serial number of your television (located at the rear of the - JVC LT-32E478 | Instructions - Page 2
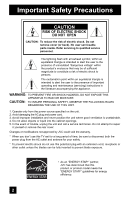
event of trouble, unplug the unit and call a service technician. Do not attempt to repair it yourself or remove the rear cover. Changes or modifications not approved by JVC could void the warranty. * When you don't use this TV set for a long period of time, be sure to disconnect both the power plug - JVC LT-32E478 | Instructions - Page 3
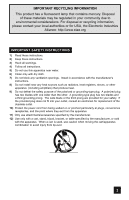
INSTRUCTIONS 1) Read these instructions. 2) Keep these instructions. 3) Heed all warnings. 4) Follow all instructions of the obsolete outlet. 10) Protect the power cord from being walked on or pinched manufacturer. 12) Use only with a cart, stand, tripod, bracket, or table specified by the - JVC LT-32E478 | Instructions - Page 4
close to the outlet as possible. The main power supply for this TV is controlled by inserting or removing the power plug. 19) Batteries shall not be exposed to excessive heat such as sunshine, fire or the like. 20) When this TV is connected to the wall outlet, it is always on standby even when all - JVC LT-32E478 | Instructions - Page 5
note for customers who subscribe to basic cable services (do not have a separate cable box) and plan to use their JVC TV remote control to select channels. Once you run the Auto Tuner Setup (which detects and programs all the channels your TV is receiving through the RF input), every channel - JVC LT-32E478 | Instructions - Page 6
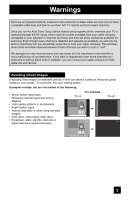
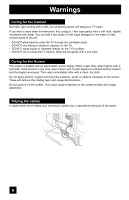
non-scratching duster will keep your TV clean. If you wish to wipe down the television, first unplug it. Then wipe gently TV. • DO NOT spray liquids or cleaners directly on the TV's surface. • DO NOT rub or scrub the TV harshly. Wipe the set gently with a soft cloth. Caring for the Screen The screen - JVC LT-32E478 | Instructions - Page 7
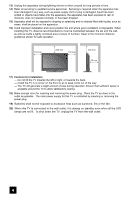
(supplied) into the hole. 1) Place the TV face down on a soft cloth on a table. 2) Remove the four screws from the back of the TV. 3) Pull out the stand from the TV. 4) Cover the hole with a bottom cover and tighten the screw. Note: • To re-install the stand, reverse the procedure from 4) to 1). 7 - JVC LT-32E478 | Instructions - Page 8
Important Safety Precautions . . 2 Warnings 5 Quick Setup 9 Unpacking your TV 9 TV Models 10 TV Remote Control 11 Getting Started 12 The Remote Control 12 Connecting Your Devices 13 Interactive Plug-in Menu 21 Onscreen Menus 24 Using the Guide 24 Onscreen Menu System 25 Initial Setup 28 - JVC LT-32E478 | Instructions - Page 9
your TV Thank you for your purchase of a JVC LCD Flat Television. Before you begin setting up your new television, please check to make sure you have all of the following items. In addition to this guide, your television box should include: 1 Television POWER 1 Remote Control POWER SLEEP - JVC LT-32E478 | Instructions - Page 10
Quick Setup TV Models Before you connect your television to another device, please refer to the proper diagrams for your specific TV and remote. These will help assist you in understanding how to connect your television to another device, as well as use the remote to set up your television. Rear - JVC LT-32E478 | Instructions - Page 11
Control Quick Setup POWER SLEEP SUB CH V.STATUS SOUND 1 2 3 4 5 6 7 8 9 TUNE RETURN+/TV 0 V1 V2 V3 V4 MUTING CH+ V5 VO- L FAV. VOL + CH- ML/MTS DISPLAY C.C. ASPECT MENU BACK GUIDE OK RM-C1291 TV RM-C1291 Notes: • For information on remote control buttons, see pages - JVC LT-32E478 | Instructions - Page 12
the cover back into place. Basic Operation Turn the television on and off by pressing the POWER button at the top right corner of the remote. If this is the first time you are turning on the TV, the interactive plug-in menu appears. POWER Using Menu Buttons To use the menu functions, press the - JVC LT-32E478 | Instructions - Page 13
an external antenna or cable TV system to your TV. S-Video Cable Used to power cord into the nearest power outlet and turn on the TV. • If you follow these diagrams and the television television system, refer to the satellite TV manual. No VCR Connection Cable or Antenna Output Coaxial Cable TV - JVC LT-32E478 | Instructions - Page 14
the most common colors for DVD cables. Some models may vary colors. Please consult the user's manual for your DVD player for more information. • L PR R R R 75 Ω (VHF/UHF) TV Rear Panel DIGITAL AUDIO INPUT 1 OPTICAL OUT INPUT 2 PHOTO VIEWER / SERVICE Green Blue Red Y PB PR OUT AUDIO OUT - JVC LT-32E478 | Instructions - Page 15
COMPONENT INPUT 3 S-VIDEO Y VIDEO PB L PR R INPUT 4 INPUT 5 / INPUT 1 AUDIO AUDIO OUT Y VIDEO VIDEO PB L L L PR R R R 75 Ω (VHF/UHF) TV Rear Panel DIGITAL AUDIO INPUT 1 OPTICAL OUT INPUT 2 PHOTO VIEWER / SERVICE Green Blue Red Y PB PR OUT AUDIO OUT R L DVD Player 15 - JVC LT-32E478 | Instructions - Page 16
you televison by using the input jacks located on the back of the television. TV Rear Panel CAMCORDER INPUT 3 S-VIDEO Y VIDEO PB L PR R TV. 3) Connect a red cable from the camcorder RIGHT AUDIO OUT, into the RIGHT AUDIO IN on the back of the TV. Note: • If your camcorder is a mono sound model - JVC LT-32E478 | Instructions - Page 17
AUDIO INPUT on the amplifier. 2) Connect a red cable from the RIGHT AUDIO OUTPUT on the back of the TV to the RIGHT AUDIO INPUT on the amplifier. Notes: • Refer to your amplifier's manual for more information. • You can use AUDIO OUTPUT for your home theater system. • If you have a device connected - JVC LT-32E478 | Instructions - Page 18
Ω (VHF/UHF) DIGITAL AUDIO INPUT 1 OPTICAL OUT INPUT 2 PHOTO VIEWER / SERVICE TV Rear Panel 1) Connect the HDMI to DVI Cable from the DIGITAL OUT on the back of your DTV decoder, to the HDMI INPUT-1 on the back of your television. 2) Connect a red cable from the DTV decoder RIGHT AUDIO OUT, to - JVC LT-32E478 | Instructions - Page 19
Ω (VHF/UHF) DIGITAL AUDIO INPUT 1 OPTICAL OUT INPUT 2 PHOTO VIEWER / SERVICE TV Rear Panel 1) Connect the HDMI Cable from the DIGITAL OUT on the back of your DTV or HDMI device, to the HDMI INPUT-1 on the back of your television. Notes: • When you do the above connection, set "Video-1 Audio" in - JVC LT-32E478 | Instructions - Page 20
AUDIO INPUT 1 OPTICAL OUT INPUT 2 PHOTO VIEWER / SERVICE TV Rear Panel 1) Connect the optical cable from underneath the television to the back of the amplifier. Notes: • This See page 50. • Refer to your owners manual on using your amplifier. • You cannot output sound from your Optical Output connection if - JVC LT-32E478 | Instructions - Page 21
to appear. • Setting the TV's clock to the correct time so your timer functions will work properly. You can choose "Auto" or "Manual" for setting the clock. skip over it. Language After the "JVC Interactive Plug-in Menu" has been displayed, the TV automatically switches to the "Language" settings. - JVC LT-32E478 | Instructions - Page 22
the Daylight Saving Time feature automatically adjusts your TV's clock for Daylight Saving. • The manually. • You will have to reset the clock after a power interruption. You must set the clock before operating any timer functions. Manual Clock Set To set your clock manually, choose "Manual - JVC LT-32E478 | Instructions - Page 23
TV television, or you can continue on in this guide for more information on programming your remote control, or using the JVC onscreen menu system to customize your television "Skip", it finished without doing the Auto Tuner Setup. Cable Users: After your auto tuner setup is complete, you may, (depending - JVC LT-32E478 | Instructions - Page 24
TV's side panel instead of the remote, Front Menu screen showing "Video Status", "Aspect", "Auto Tuner Setup" and "Menu" will appear (following right screen). The "Interactive Plug-in Menu" will appear the first time the TV is plugged in. Menu Initial Setup - + Tuner Setup External Input Picture - JVC LT-32E478 | Instructions - Page 25
menu follow later in this guide. For information about the Interactive Plug-in Menu, see pages 21 - 23. 1. To open the onscreen menu system, press the MENU button on the remote control. The main menu will appear Menu Initial Setup - + Tuner Setup External Input Picture Adjust Sound Adjust Clock - JVC LT-32E478 | Instructions - Page 26
Off Noise Reduction Off Natural Cinema Off Position Adjustment Reset Select OK BACK Operate Back MENU Exit Picture Adjust 2/2 Note: • The HDMI Size menu can only be displayed when a 480p picture signal is input to the HDMI terminal and the picture is being displayed on the screen. 26 - JVC LT-32E478 | Instructions - Page 27
Demo Onscreen Menus π† √® Press the MENU button The left main menu will appear To select a menu from the main menu To enter The following menu you selected will appear Press the BACK button to return to the previous menu screen Sound Adjust Bass 0 Treble 0 Balance 0 Optical Out Turn On - JVC LT-32E478 | Instructions - Page 28
Setup Noise Muting This feature inserts a blank black screen over channels which are not broadcasting or are too weak the power cord, and plug it back in. Do this if your batteries die, or you lose your remote control. - Use the remote control. - Press the MENU button on the front of the TV for - JVC LT-32E478 | Instructions - Page 29
the V-Chip settings of your television to match your personal tastes. The TV Ratings Set Movie Ratings Set Canadian Ratings English Set Canadian Ratings French Advanced V-Chip Rating Advanced Canadian Rating Unrated Select BACK Operate Back On View MENU Exit √® π† The V-Chip main screen - JVC LT-32E478 | Instructions - Page 30
or comedic violence, which children should be able to discern from reality. Programs with the following ratings are designed for the entire audience. ❒ TV G stands for General Audience Most parents would find these programs suitable for all age groups. They contain little or no violence, no strong - JVC LT-32E478 | Instructions - Page 31
will appear) Enter the password by using the 10 button keypad The V-Chip main screen will appear To turn V-Chip "On" or "Off" To move to "Set US TV Ratings" To operate Initial Setup > V-Chip V-Chip Set US TV Ratings Set Movie Ratings Set Canadian Ratings English Set Canadian Ratings French - JVC LT-32E478 | Instructions - Page 32
G - General Audience In the opinion of the review board, these films contain nothing in the way of sexual To "V-Chip" To operate (Password input screen will appear) Enter the password by using the 10 button keypad The V-Chip main screen will appear √® π† √® To turn BACK Back MENU Exit 32 - JVC LT-32E478 | Instructions - Page 33
To "V-Chip" To operate (Password input screen will appear) Enter the password by using the 10 button keypad The V-Chip main screen will appear √® π† √® To turn V- BACK Back MENU Exit Note: • For instructions on "Set Canadian Ratings French", please see page 33 in the French user's guide. 33 - JVC LT-32E478 | Instructions - Page 34
programming which does not contain a rating signal. Programming on television stations which do not broadcast rating signals will be placed main screen will appear To turn V-Chip "On" or "Off" To "Unrated" To "View" or "Block" Press MENU when done Initial Setup > V-Chip V-Chip Set US TV Ratings - JVC LT-32E478 | Instructions - Page 35
-digit lock code. Your TV comes preset with a lock . No. - - - - Notes: • After a power interruption you must reset the lock code. • Write your "Invalid Lock Code !" will appear on the screen. The channel cannot be accessed until the correct television is turned off. • See also "Set Lock Code". 35 - JVC LT-32E478 | Instructions - Page 36
" To select a caption (CC1 to CC4) or text channel (Text1 to Text4) To "Digital Service" To select 1, 2, 3, 4, 5 or 6 To "Appearance" To enter To select "Auto" ("Manual", see page 37) Press the MENU button when finished Notes: • If you want to reset your settings to the default settings, select - JVC LT-32E478 | Instructions - Page 37
Caption > Appearance 1/2 Preview Closed Caption Sample Appearance Mode Font Size Font Style Text / Edge Opacity Background Opacity Select Operate Manual Standard Auto Solid Solid BACK Back MENU Exit Closed Caption > Appearance 2/2 Preview Closed Caption Sample Text Color Edge Color - JVC LT-32E478 | Instructions - Page 38
a TV signal. The LED is lit as "Low" when there is no TV signal. Select BACK Operate Back MENU Exit • When the On Timer turns On, the LED is lit as "Low" when you turn the power off. • If you set a timer on the TV, the power indicator will light even if the TV is on stand - JVC LT-32E478 | Instructions - Page 39
-up allows you to lessen the time for the TV to turn on and ready for viewing. π† √® π† √® Press the MENU button To "Initial Setup" To enter To "Quick Start-up" To turn "On" or "Off" Press the MENU button when finished Notes: • Standby power consumption is higher when you have this feature - JVC LT-32E478 | Instructions - Page 40
, check your antenna cable and the settings for Tuner Mode/Scan Mode. • You can also access the "Front Menu" screen by using the MENU button on the side of the TV instead of the remote control. It has "Video Status", "Aspect", "Auto Tuner Setup" and "Menu". Choose "Auto Tuner Setup" by pressing MENU - JVC LT-32E478 | Instructions - Page 41
Tuner Setup Channel Summary Channel summary allows you to customize the line-up of channels received by your TV. You can add or delete channels from the line-up or prevent any unauthorized viewers from watching any or all channels. Press the MENU button π† √® - JVC LT-32E478 | Instructions - Page 42
Tuner Setup How to set the channel station. Press the MENU button - + Tuner Setup > Channel Summary > Station π† √® π† √® √® To "Tuner Setup" To enter To "Channel Summary" To enter To "Station" Ch No. 9 Set Reset √® π† Press the OK button to enter To select the character you want To move to - JVC LT-32E478 | Instructions - Page 43
Tuner Setup Find Channel Add a digital channel that does not exist in the channel map. π† √® π† √® Press the MENU button To "Tuner Setup" To enter To "Find Channel" To enter Add a channel using 0 to 9 Press the OK button to finish - + Tuner Setup Auto Tuner Setup Channel Summary Find Channel - JVC LT-32E478 | Instructions - Page 44
the picture is being displayed on the screen. • You can select "Auto" only when the signal is 480p for HDMI. When you select "Auto", the television will select "Size1" or "Size2" automatically. Video-1 Audio This feature is used if you have a DVI or HDMI compatible component connected to your TV - JVC LT-32E478 | Instructions - Page 45
To select the desired video input To select the desired preset input label (see chart below) Press the MENU button when finished External Input HDMI Size Video-1 Audio Video Input Label Auto Digital Select BACK Operate Back MENU Exit External Input > Video Input Label Video-1 Video-2 Video - JVC LT-32E478 | Instructions - Page 46
on your television. Tint Tint allows you to adjust the levels of red and green in your TV picture. Color The color function lets you make all the colors in the TV picture appear either more vivid or subtle. Picture Picture allows you to adjust the levels of black and white on the TV screen, giving - JVC LT-32E478 | Instructions - Page 47
TV supports the Color Management function to ensure dull colors are compensated to produce natural hues. π† √® π† √® π† Press the MENU button To "Picture button when finished Dynamic Gamma JVC's Dynamic Gamma Circuitry (DGC) makes it easier to see dark areas when a picture has many dark areas, - JVC LT-32E478 | Instructions - Page 48
per-second, is broadcast at the television rate of 30 frames-per-second. π† √® π† √® π† Press the MENU button To "Picture Adjust" To enter To "Natural you change the screen size, perform the position adjustment again. • Position adjustment allows you to adjust the screen position horizontally when - JVC LT-32E478 | Instructions - Page 49
disappears for a moment, and then the settings are reset to the default setting for all the picture adjustments except for Natural Cinema and Position Adjustment. Picture Adjust 2/2 Video Status Color Management Standard On Dynamic Gamma Off Noise Reduction Off Natural Cinema Off Position - JVC LT-32E478 | Instructions - Page 50
television. Bass - You can increase or decrease the level of low-frequency sound in the TV's audio with the bass adjustment. Treble - Use treble to adjust the level of high-frequency sound in your TV if the audio source is from your HDMI device. Manufactured under license from Dolby Laboratories. - JVC LT-32E478 | Instructions - Page 51
Sound Adjust Turn On Volume Turn On Volume allows you to set the volume level when you turn the TV on. π† √® π† √® Press the MENU button To "Sound Adjust" To enter To "Turn On Volume" To set the volume level Current 0 1 2 3 48 49 50 Press the - JVC LT-32E478 | Instructions - Page 52
when the Mode is set to Auto, the Daylight Saving Time feature automatically adjusts your TV's clock for Daylight Saving. • The real time and D.S.T. may not be set . In this case, set your clock manually. • You will have to reset the clock after a power interruption. You must set the clock before - JVC LT-32E478 | Instructions - Page 53
√® π† To "On Time" To set the hour (AM/PM) you want the TV to turn on To move to minutes To set the minutes To accept "On Time" and move a power interruption, the timer settings must be reset. • If your clock is not set, "Please set clock first !" will appear on the screen. Please see Manual Set - JVC LT-32E478 | Instructions - Page 54
. 4) Connect your device to the Photo Viewer Terminal on this TV by using a USB cable. JVC Everio Camera (Example) TV Rear Panel 75 Ω (VHF/UHF) DIGITAL AUDIO INPUT 1 OPTICAL OUT INPUT 2 PHOTO VIEWER / SERVICE USB Cable 5) The TV screen will display a "hourglass" icon and then display the Photo - JVC LT-32E478 | Instructions - Page 55
memory as "thumbnails" . π† √® To "Multi Screen" To enter Photo Viewer Multi Screen 1/2 Date: Jan/01/04 Dimensions: 640x430 The thumbnail Exit 101-0008 The following image appears. You can look at the pictures by using your remote control buttons. 123 456 789 Prev. + Next - VOLUME - - JVC LT-32E478 | Instructions - Page 56
recognized. In this case, turn Quick Start-up Off, turn the TV off and turn the TV back on. Interval Time You can set the time to change to in Menu is completed. • If you press any button on the television or remote, with the exception of POWER or MENU, the Auto Demo mode will stop for 30 seconds. - JVC LT-32E478 | Instructions - Page 57
can also access by pressing the INPUT button on the side of the TV instead of the remote. Channel +/- Use these buttons to move up or down all the available channels your TV is able to receive. To move rapidly through the channels using JVC's Hyperscan feature, press and hold CH+ or CH-. 57 - JVC LT-32E478 | Instructions - Page 58
+ - Lets you program a specific channel to return to while scanning through the channels using the CH+ and CH- buttons. TV - Returns to the TV mode. Press the RETURN+/TV and hold for three seconds Return Channel (123-456) Programmed ! The channel currently active has been programmed as your return - JVC LT-32E478 | Instructions - Page 59
TV picture display settings, including a display of your own preferences. Standard - Resets the picture display to the factory settings. Dynamic - Gives a vivid picture access the "Front Menu" screen by using the MENU button on the side of the TV instead of the remote control. It has "Video Status - JVC LT-32E478 | Instructions - Page 60
Button Functions Display The display screen shows the current information as follows. Press the DISPLAY level and scramble information, as well as the current time below. HD1080i CC ((o)) ((S)) Dolby Digital TV PG D L S V NR 108-1 11:00PM - 11:30PM Football fun meeting WEWEWEW • Clock - JVC LT-32E478 | Instructions - Page 61
. Aspect Ratios Panorama - With this ratio a normal 4:3 aspect picture is stretched to fit the dimensions of the 16:9 aspect screen. Cinema - This ratio "zooms in" on the center part of a 4:3 aspect picture, blowing it up to fill the 16:9 screen. Regular - The regular ratio is used when you want - JVC LT-32E478 | Instructions - Page 62
picture position to center. • You can also access the "Front Menu" screen by using the MENU button on the side of the TV instead of the remote signal from your HDMI device, the aspect mode will turn to "Full" automatically. If the television receives a 4:3 signal from your HDMI device when you are - JVC LT-32E478 | Instructions - Page 63
choice in what you wish to hear with a TV program. In addition to mono or stereo sound, , if one is available. • MTS unavailable if your television's Input source is in Video-1, 2, 3, 4 or you are using the HDMI. Multi Language English Spanish Sub Channel The main channel sometimes has minor - JVC LT-32E478 | Instructions - Page 64
will appear. π† √® √® To select the channel you want to delete To enter The screen to the right will appear. To "Yes" Press the OK button The channel was only. • The GUIDE will not show the correct time and date if you have not performed the set clock function on your television. See page 52. - JVC LT-32E478 | Instructions - Page 65
being detected for that channel. No Program or Weak Signal Audio / Data Only Channel This OSD appears when the selected channel is not broadcasting any picture or sound, or is only broadcasting data information. Audio / Data Only Channel 65 - JVC LT-32E478 | Instructions - Page 66
. If you think that there is a problem, contact the JVC Service Center where you purchased the television. PROBLEMS There is no power CHECK • See if the power cord became unplugged. • Check for a blown fuse or circuit breaker or a power outage. There is no picture or sound • The antenna could be - JVC LT-32E478 | Instructions - Page 67
the room or the temperature of the inside of the television changes. If there is no problem with the screen or sound, then there is no need to worry. • Although the picture may be temporarily disturbed and noise may be seen on the screen if the power is turned on immediately after it has been turned - JVC LT-32E478 | Instructions - Page 68
Input 3, 4 Terminal (Component Terminal) Input 1, 2 Terminal (HDMI Input Terminal) Audio Output Jacks (FIX) Optical Output Digital Audio Dimensions (inch/cm) W X H X D Weight (lbs / kg) Accessories LT-32E488 LT-32E478 LT-32EX38 LCD Flat Television NTSC, BTSC System (Multi-Channel Sound) ATSC - JVC LT-32E478 | Instructions - Page 69
3, 4 Terminal (Component Terminal) Input 1, 2 Terminal (HDMI Input Terminal) Audio Output Jacks (FIX) Optical Output Digital Audio Dimensions (inch/cm) W X H X D Weight (lbs / kg) Accessories LT-37E488 LT-37E478 LT-37EX38 LCD Flat Television LT-42E488 LT-42E478 LT-42EX38 NTSC, BTSC System (Multi - JVC LT-32E478 | Instructions - Page 70
70 - JVC LT-32E478 | Instructions - Page 71
71 *LIMITED WARRANTY and "TO OUR VALUED CUSTOMER" is only available for US customers. - JVC LT-32E478 | Instructions - Page 72
JVC COMPANY OF AMERICA Division of JVC Americas Corp. 1700 Valley Road Wayne, New Jersey, 07470 JVC CANADA, INC. 21 Finchdene Square Scarborough, Ontario Canada, M1X 1A7
-
 1
1 -
 2
2 -
 3
3 -
 4
4 -
 5
5 -
 6
6 -
 7
7 -
8
-
9
-
10
-
11
-
12
-
13
-
14
-
15
-
16
-
17
-
18
-
19
-
20
-
21
-
22
-
23
-
24
-
25
-
26
-
27
-
28
-
29
-
30
-
31
-
32
-
33
-
34
-
35
-
36
-
37
-
38
-
39
-
40
-
41
-
42
-
43
-
44
-
45
-
46
-
47
-
48
-
49
-
50
-
51
-
52
-
53
-
54
-
55
-
56
-
57
-
58
-
59
-
60
-
61
-
62
-
63
-
64
-
65
-
66
-
67
-
68
-
69
-
70
-
71
-
72
 |
 |
Important Note:
In the spaces below, enter the model and serial number of your television (located at the
rear of the television cabinet).
Staple your sales receipt or invoice to the inside cover of this
guide.
Keep this user’s guide in a convenient place for future reference.
Keep the carton
and original packaging for future use.
LCT2224-001C-A
0407TNH-II-IM
Model Number:
Serial Number:
Illustration of LT-32E488 and RM-C1291
For Models:
LT-42E488
LT-37E488
LT-32E488
LT-42E478
LT-37E478
LT-32E478
LT-42EX38
LT-37EX38
LT-32EX38
LCD Flat Television Users Guide