JVC LT-32E478 Instructions - Page 54
Photo Viewer, Selected Mass Storage device
 |
UPC - 046838028946
View all JVC LT-32E478 manuals
Add to My Manuals
Save this manual to your list of manuals |
Page 54 highlights
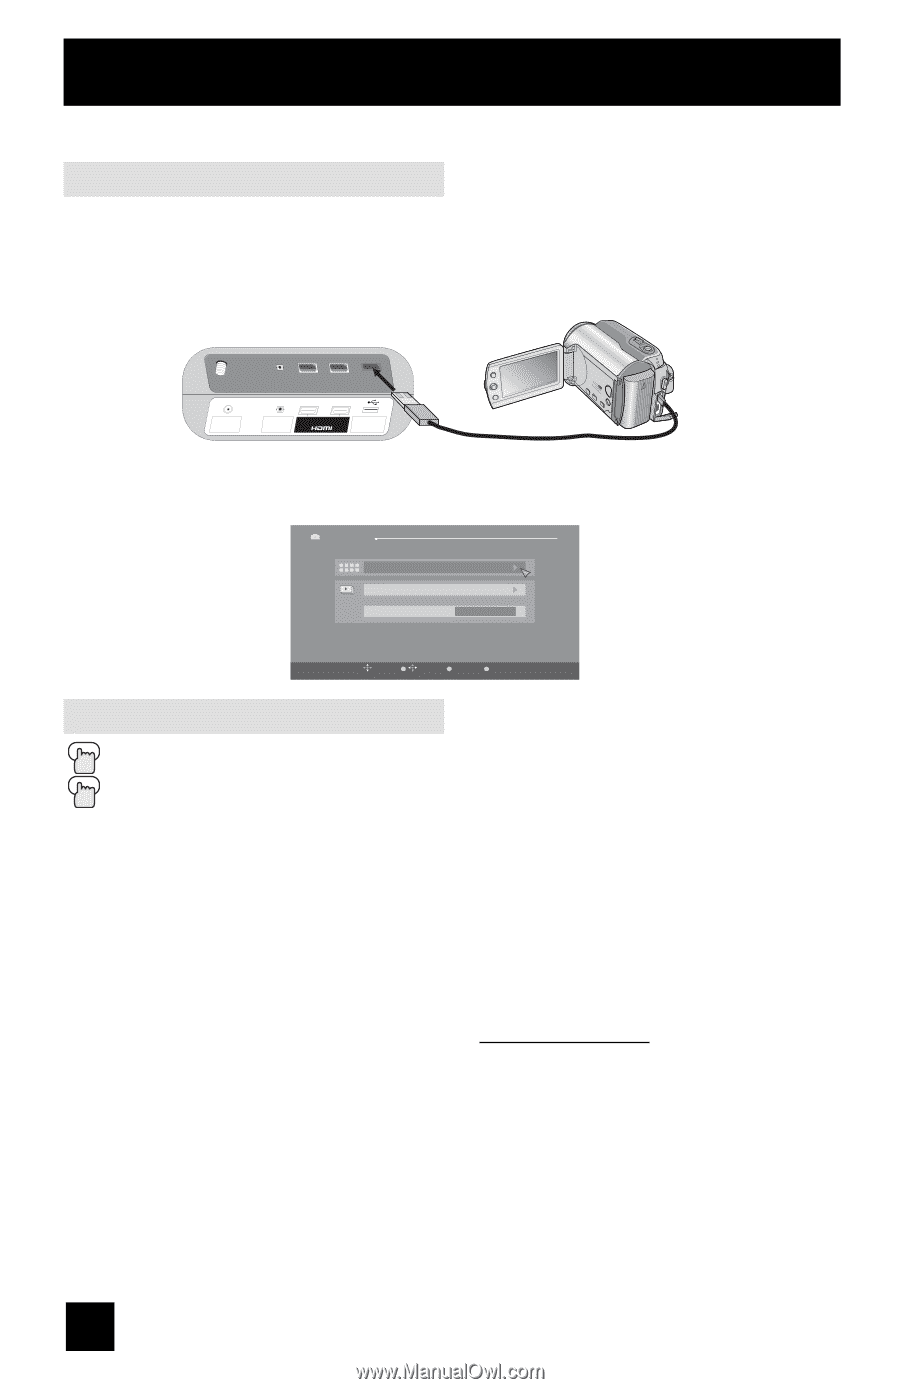
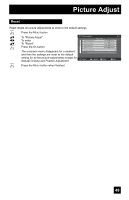
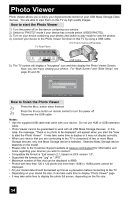
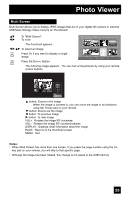
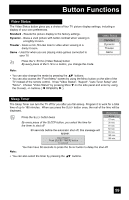
Photo Viewer Photo Viewer allows you to enjoy your digital pictures stored on your USB Mass Storage Class devices. You are able to view them on this TV as high quality images. How to start the Photo Viewer 1) Turn the power off on the device containing your photos. 2) Switch to "PHOTO" mode if your device has a mode switch (VIDEO/PHOTO). 3) Turn on your device containing your photos and switch to play mode to view the photos. 4) Connect your device to the Photo Viewer Terminal on this TV by using a USB cable. JVC Everio Camera (Example) TV Rear Panel 75 Ω (VHF/UHF) DIGITAL AUDIO INPUT 1 OPTICAL OUT INPUT 2 PHOTO VIEWER / SERVICE USB Cable 5) The TV screen will display a "hourglass" icon and then display the Photo Viewer Screen. Now, you can enjoy viewing your photos. For "Multi Screen" and "Slide Show", see page 55 and 56. Photo Viewer Multi-Screen Slide Show Interval Time (sec) 5 OK BACK Select Operate Back MENU Exit How to finish the Photo Viewer Press the MENU button when finished Press the POWER button on remote control to turn the power off Disconnect the USB cable Notes: • Use the supplied USB cable that came with your device. Do not use HUB or USB extension cable. • Photo Viewer cannot be guaranteed to work with all USB Mass Storage Devices. In this case, the message, "There is no photo to be displayed" will appear when you start the "How to start the Photo Viewer". It may take some time to display or it may not display correctly. • When your device that you are connecting to the TV is composed of two or more Mass Storage devices, only one Mass Storage device is selected. Selected Mass Storage device depends on the model. • Please refer to the Customer Support website at www.jvc.com/support for information and notes regarding your devices you wish to connect. • Compatible file format is "Exif version 2.1, based on DCF version 1.0". • Supported file formats are ".jpg" or ".JPG". • Maximum number of files that can be displayed is 9999. • Photos with less than 120 x 120 pixels and more than 16383 x 16383 pixels cannot be displayed. • All your stored data should be backed up first as a precaution before connecting to the TV. • Depending on your stored file size, it can take extra time to display "Photo Viewer" page. • It may take extra time to display the photo full screen, depending on the file size. 54
-
 1
1 -
2
-
3
-
4
-
5
-
6
-
7
-
8
-
9
-
10
-
11
-
12
-
13
-
14
-
15
-
16
-
17
-
18
-
19
-
20
-
21
-
22
-
23
-
24
-
25
-
26
-
27
-
28
-
29
-
30
-
31
-
32
-
33
-
34
-
35
-
36
-
37
-
38
-
39
-
40
-
41
-
42
-
43
-
44
-
45
-
46
-
47
-
48
-
 49
49 -
 50
50 -
 51
51 -
 52
52 -
 53
53 -
 54
54 -
 55
55 -
 56
56 -
 57
57 -
 58
58 -
 59
59 -
60
-
61
-
62
-
63
-
64
-
65
-
66
-
67
-
68
-
69
-
70
-
71
-
72
 |
 |