Kenmore 7754 Use and Care Guide
Kenmore 7754 - Elite 30 in. Gas Range Manual
 |
View all Kenmore 7754 manuals
Add to My Manuals
Save this manual to your list of manuals |
Kenmore 7754 manual content summary:
- Kenmore 7754 | Use and Care Guide - Page 1
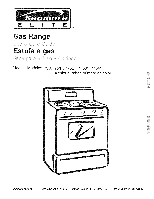
E L I T E ® Gas Estufa a Models, Modelos 790.7751", 7752*, 7753*, 7754* * = color number, nemero de color ...iii ... _¢) ¢2 ¢)¢2 www.sears.com Sears Roebuck and Co., Hoffman Estates, IL 60179 U.S.A. pin 316544101 Rev A (0807) - Kenmore 7754 | Use and Care Guide - Page 2
Range ...7 Range Features Service ...back cover Kenmore Elite Appliance Warranty One Year Limited Warranty When installed, operated and maintained according to all instructions supplied with the product, if this appliance instructions supplied with the product. 9. Damage to or failure of parts - Kenmore 7754 | Use and Care Guide - Page 3
. Know how to disconnect the power to the range at the circuit breaker or fuse box in case of an emergency. User servicing=Do not repair or replace any part of the appliance unless specifically recommended in the manuals. All other servicing should be done only by a qualified technician, This may - Kenmore 7754 | Use and Care Guide - Page 4
suggested in this manual. Improper installation of range if it is to be IMPORTANT=ELECTRIC IGNITION MODELS ONLY appliance. IMPORTANT INSTRUCTIONS YOUR COOKTOP FOR USING flame size so Use Proper Flame Size--Adjust iMPORTANT iNSTRUCTiONS YOUR RANGE the parts listed in this Use & Care Guide. Before - Kenmore 7754 | Use and Care Guide - Page 5
may occur if the range is not installed by a qualified installer or electrician. Any additions, changes or conversions required in order for this appliance to satisfactorily meet the application needs must be made by Sears Service. (Some models) Please Note: Models equipped with a double right - Kenmore 7754 | Use and Care Guide - Page 6
of mechanical failure of any covered refrigerator or freezer. Rental reimbursement longer than promised. if repair of your covered product takes repair [] [] 10% discount off the regular price of any non-covered service and related installed parts. [] [] Once you purchase the Agreement, a simple - Kenmore 7754 | Use and Care Guide - Page 7
for the double burner see the General Care & Cleaning section• a. Be sure to follow the installation instructions before installing and using your new range. b. Remove all packing tape from cooktop area. Remove all Burner Caps and Burner Heads. c. Discard all packing material located under - Kenmore 7754 | Use and Care Guide - Page 8
Features Your Elite Gas Range Features 1. 2. 3. 4. 5. 6. 7. 8. 9. 10. 11. 12. 13. 14. 15. 16. include: Electronic Oven Control with Timer. accessory). 33. Leveling Legs and Anti-tip Bracket (included). iiiiiiiiiiiiiii NOTE: The features of your range may vary according to model type & color. - Kenmore 7754 | Use and Care Guide - Page 9
the rack onto the guides on the oven walls. Tilt the front of the rack upward and slide the rack back into place.This range has a total of Types of Oven Racks Flat Half Oven Rack Flat Handle Oven Rack Fig. 3 Your range may be equipped with one or more of the oven rack types shown; a Porcelain - Kenmore 7754 | Use and Care Guide - Page 10
for most surface cooking needs. These burners are located at the left front and center positions on the cooktop. The POWER or Double (some models) Burners are best used for bringing large quantities of liquid rapidly up to temperature or when preparing larger quantities of food. These burner are - Kenmore 7754 | Use and Care Guide - Page 11
knobs do not have to be set at a particular setting. Use the guides and adjust the flame as needed. DO NOT cook with the surface control edge of the pan. Double Burner (some models): Fig. 2 The versatile Double ring burner offers a complete range of gas surface settings from the same burner - Kenmore 7754 | Use and Care Guide - Page 12
, store in a dry place and keep uncovered. After each use, clean with a stiff brush and hot water only. • DO NOT CLEAN GRIDDLE IN DISHWASHER. = Dry Immediately and apply a light coating of vegetable oil to griddle before storing. Using the Griddle: Preheat the griddle for 5 minutes on medium to - Kenmore 7754 | Use and Care Guide - Page 13
be turned ON (The Bread Proof indicator light will glow steady indicating the Bread Proofing feature in ON (See Fig. 5 & bread dough preparation instructions on this page). To return to standard Warmer Drawer settings touch pad at least once. Note: For Warmer Drawer Fig. 1 . iii ...iii ... best - Kenmore 7754 | Use and Care Guide - Page 14
the Warmer Drawer and Bread Proof Control setting instructions at the top of this page, Fig.l Rack glide lever (See Fig.2). Pull the drawer away from the range, (Warm & Ready TM) To Replace Warmer 1. 2. 3. appliance from electric power before cleaning and servicing the Warmer Drawer, Fig. 3 14 - Kenmore 7754 | Use and Care Guide - Page 15
the oven as described below. Detailed instructions for each feature and function follow later in this Use & Care Guide. START-Use to start all oven features keys to select the feature that best fits your food item. *some models start or stop the Use to cooking select Add process. 1 Minute feature - Kenmore 7754 | Use and Care Guide - Page 16
for silent operation and later returned to operating with all the normal sounds and beeps. INSTRUCTIONS To change 1. PRESS sound to silent control operation: DISPLAY control from normal To tell if your range is set for normal or silent operation press and hold _s_tY_ for 6 seconds. (See Fig - Kenmore 7754 | Use and Care Guide - Page 17
control is left on for more than 11 hours and 59 minutes. The oven can be programmed to override this feature for Continuous Baking. INSTRUCTIONS To set the control Energy 1. PRESS Bake or 12 Hour DISPLAY for Continuous Saving features: for 6 seconds or until the control beeps for 6 seconds - Kenmore 7754 | Use and Care Guide - Page 18
control can be programmed to display temperatures in Fahrenheit or Celsius. The oven has been preset at the factory to display in Fahrenheit. INSTRUCTIONS To change display from Celsius to Fahrenheit: 1. PRESS to Celsius or DISPLAY Fahrenheit To tell if the display is set for Fahrenheit (F) or - Kenmore 7754 | Use and Care Guide - Page 19
pressing the pad in the future. To store a typical cookie recipe: (example for baking 375°F for 9 minutes and to shut=off automatically): INSTRUCTIONS 1. Arrange interior oven racks. If needed, Preheat* the oven to the desired set temperature. Place cookies on cookie sheet(s). Place cookie sheet on - Kenmore 7754 | Use and Care Guide - Page 20
Setting Oven Controls • Preheat for Electric Ranges Preheat Setting For the best baking performance "350 F", the default oven set temperature, will appear in the display (See Fig. 1). (See BAKE instructions for changing oven set temperature.) @ Fig. 1 3. Press @. "PRE" and "BAKE" will appear - Kenmore 7754 | Use and Care Guide - Page 21
Things to Know Before Setting any Basic Oven Cooking Function This appliance has been factory pre-set to start any BAKE, CONV temperature from 170°F to 550°F (The sample shown below is for 350°F). INSTRUCTIONS To set the Bake Temperature 1. 2. PRESS DISPLAY to 350°F: Arrange interioroven - Kenmore 7754 | Use and Care Guide - Page 22
the desired amount of time you select. INSTRUCTIONS To program the oven to begin baking After the Cook Time feature has been activated, _to review the time remaining. Once Cook Time has started baking, poultry, should be chilled in the refrigerator first. Even when chilled, they should not - Kenmore 7754 | Use and Care Guide - Page 23
Start feature. The Setting The BAKE _, automatic timer of the DELAY START feature will turn the oven ON and OFF at the times you select. INSTRUCTIONS To program the oven for a Delay Start and to shut off automatically (example for baking at 375°F for 50 minutes and starting at 5:30 - Kenmore 7754 | Use and Care Guide - Page 24
Setting Oven Controls • Setting Broil (Gas Range) The _roilj//_ pad controls the Broil Flour may be explosive and water can cause a grease fire to spread and cause personal injury. v INSTRUCTIONS To set the oven to broil 1. PRESS setting (550°F): DISPLAY at the default 2. Place the broiler - Kenmore 7754 | Use and Care Guide - Page 25
to thoroughly heat the oven from top to bottom to give more evenly browned foods. Refer to Fig. 3 for foods to cook in each category. INSTRUCTIONS To set the Food Convection Roast feature (example for PRESS DISPLAY meats to cook at 350°F): 1. Arrange interioroven racks and place food in oven - Kenmore 7754 | Use and Care Guide - Page 26
racks, place in positions 1, 3 & 5 when using 3 racks (See Fig. 1). Cakes will have better results when baked using the C_k_ keypad. +++++++++_! 4. INSTRUCTIONS To set the oven for Convection temperature 1. 2. PRESS Bake and DISPLAY to 350°F: Arrange interior oven racks and place food in oven - Kenmore 7754 | Use and Care Guide - Page 27
in the display. Convection Convert MUST be used with a Convection Bake keypad. Cook Time or Delay Start functions may be added. INSTRUCTIONS Using Convection Convert feature to adjust oven temperature from a Bake recipe (example below when setting oven for 350°F): 1. 2. Arrange interioroven racks - Kenmore 7754 | Use and Care Guide - Page 28
Meat Probe (some models) Using and only the probe supplied with your appliance; any other may result in damage to the probe or the appliance. Handle the probe carefully when the probe so that the tip rests in the center of the thickest part of the meat. Do not allow the probe to touch bone, fat, - Kenmore 7754 | Use and Care Guide - Page 29
, but you should know that cooking it to only 140°F/60°C means some food poisoning organisms may survive." (Source. Safe Food Book, Your Kitchen Guide, USDA Re_ June 1985.) The lowest temperature recommended by the USDA is 145°F/63°C for medium rare fresh beef. Setting the oven to automatically stop - Kenmore 7754 | Use and Care Guide - Page 30
settings of a Cook Time or a Delay Start, Some tips you should review for best possible results using Slow Cook feature: • Completely thaw all Cook feature recipes provided in the back of this Use & Care Guide. ...iii ... INSTRUCTIONS To Program the Oven to begin baking with the Slow Cook feature - Kenmore 7754 | Use and Care Guide - Page 31
KEYPADS should not be used once the Sabbath feature is activated. INSTRUCTIONS To Program the Oven for 350°F, Begin Baking immediately and activate the continue to step 6. Refer to the Cook Time or Delay Start instructions for more information. Remember the oven will shut down after completing a - Kenmore 7754 | Use and Care Guide - Page 32
For further assistance, guidelines for proper usage, and a complete list of models with the Sabbath feature, please visit the web at http:\\www.star=k. be used after cooking has finished using Cook Time or Delay Start, iNSTRUCTiONS To set Warm 1. PRESS & Hold: Arrange interior oven racks and - Kenmore 7754 | Use and Care Guide - Page 33
cycle, the outside of the range can become very hot to the touch. DO NOT leave small children unattended near the appliance. The health of some : • DO NOT use oven cleaners or oven protective coatings in or around any part of the Self-Cleaning oven. • DO NOT clean the oven door gasket. The - Kenmore 7754 | Use and Care Guide - Page 34
cycle, the outside of the range can become VERY HOT to the touch. DO NOT leave small children unattended near the appliance. DO NOT force the oven hot air or steam to escape. The oven may still be VERY HOT. INSTRUCTIONS To start an immediate Self=Cleaning cycle or to set a Delay Start time of - Kenmore 7754 | Use and Care Guide - Page 35
3. If a Self-Cleaning=Cycle has started but not finished and a power failure occurs, the appliance may be thoroughly cleaned. After the door unlocks and power has been restored, set for another Self hours in advance see the instructions to set the control for the 24 hour time of day display mode. 35 - Kenmore 7754 | Use and Care Guide - Page 36
higher or lower than the recommended temperature. The baking results should help you to decide how much of an adjustment is needed. INSTRUCTIONS To adjust 1. 2. PRESS higher: DISPLAY the oven temperature Press _ak_ for 6 seconds (See Fig. 1). Fig. 1 To increase the temperature use the number - Kenmore 7754 | Use and Care Guide - Page 37
or around the controls may cause damage to the appliance. OVEN LOCKOUT DO NOT use abrasive cleaners. This parts & interior Warmer Drawer area Porcelain Oven Racks coated _ Oven Door To clean Oven Door follow the instructions in Removing & Replacing Lift-Off Oven and the Door Care Instructions - Kenmore 7754 | Use and Care Guide - Page 38
. Fi 1.3 Care & Cleaning of Stainless Steel (some models) Some models are equipped with stainless steel exterior parts. Special care and cleaning are required for maintaining the appearance of stainless parts. Refer to the Care & Cleaning Table for detailed cleaning instructions. Fig. 4 38 - Kenmore 7754 | Use and Care Guide - Page 39
flame. Refer to the following instructions: THE COOKTOP IS NOT REMOVABLE Burner Grates. Do not remove any parts from the cooktop until they have completely models) - The Burner Grates are dishwasher safe and may be cleaned in the dishwasher. Remove any excessive soils before placing in the dishwasher - Kenmore 7754 | Use and Care Guide - Page 40
be manually appliance bulb. Replace glass shield over bulb and snap wire holder into place. Turn power back on again at the main source (or plug the range back in). The clock will then need to be reset. To reset, see Setting the Clock and Timer in this Use & Care Guide. Holder Please Note: Models - Kenmore 7754 | Use and Care Guide - Page 41
Before You Call • Solutions to Common Problems Before you call for service, review this list. It may save you time and expense. The list includes common occurrences that are not the result of defective workmanship or materials in this appliance. OCCURRENCE Range is not level. POSSIBLE CAUSE/ - Kenmore 7754 | Use and Care Guide - Page 42
Common Problems (cont spatters. If broiling often, clean on a regular basis (some models). Oven Door is open. Close the oven door before starting to Adjusting Your Oven Temperature. Controls are not set properly. Follow instructions in Self-Cleaning section. Self-Cleaning cycle does not work. Self - Kenmore 7754 | Use and Care Guide - Page 43
Recipes for Slow Cook Slow Cook Turkey Breast 1 turkey breast 2 cups chicken broth 1 medium onion, sliced 2 teaspoons minced garlic 1 teaspoon salt ½ teaspoon pepper In a roasting pan, place turkey breast meat-side up. Rub salt and pepper under the skin, and inside the cavity. Pour chicken broth - Kenmore 7754 | Use and Care Guide - Page 44
the replacement parts, accessories and owner's manuals that you need to do-it-yourself. installation of home appliances Your ,ome 888-SU-HOGAR (1-888-784-6427) ® ® Registered Trademark / TM Trademark / SM Service Mark of Sears Brands, LLC Brands, LLC © Sears Brands, LLC ® Marca Registrada
-
 1
1 -
 2
2 -
 3
3 -
 4
4 -
 5
5 -
 6
6 -
 7
7 -
8
-
9
-
10
-
11
-
12
-
13
-
14
-
15
-
16
-
17
-
18
-
19
-
20
-
21
-
22
-
23
-
24
-
25
-
26
-
27
-
28
-
29
-
30
-
31
-
32
-
33
-
34
-
35
-
36
-
37
-
38
-
39
-
40
-
41
-
42
-
43
-
44
 |
 |
E
L
I
T
E
®
Gas
Estufa
a
Models, Modelos
790.7751",
7752*,
7753*,
7754*
* = color number,
nemero
de color
_¢)
¢2
¢)¢2
..........
iii
.........
www.sears.com
Sears Roebuck and Co., Hoffman
Estates, IL 60179 U.S.A.
pin 316544101
Rev A (0807)