Kenmore 7754 Use and Care Guide - Page 13
Kenmore 7754 - Elite 30 in. Gas Range Manual
 |
View all Kenmore 7754 manuals
Add to My Manuals
Save this manual to your list of manuals |
Page 13 highlights
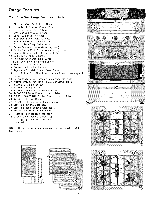
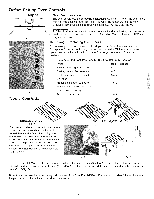
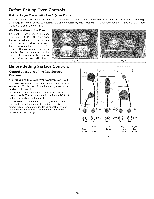
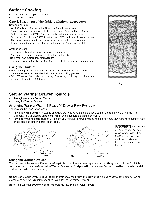
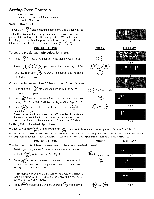
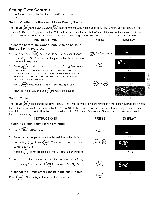
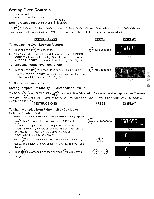
Setting Warmer Drawer Controls • • • Warmer Drawer & Bread Proofing Indicator Lights Setting Warmer Drawer & Bread Proofing Controls Warmer Drawer Food Temperature Settings Warmer (Warm & Ready TM) Drawer & Bread Proofing indicator Lights The control and indicator lights for the Warmer Drawer and Bread Proofing features are located on the control panel. The indicator lights will turn ON when the control is set, and remain ON until the controls are turned OFF. To Set the Warmer 1. Touch the O Drawer & Bread Proofing Controls: pad at the Warmer Drawer control position. The Warmer Drawer indicator light will flash. Note: If no further pads are touched within 25 seconds the request to power the Warmer Drawer ON will clear. 2. Set the desired power level. Touch (Fig. 2) or once to turn ON the power level for HI Med Proof Bread ho o (,,V) v to turn ON the power level for LO (Fig. 4). The Warmer Drawer indicator light will glow steady indicating the Warmer Drawer is ON. . Each touch of the CV-"_ or C/X_ v v pads will decrease or increase through 6 power levels from Hi (Fig. 2) to MED (Fig. 3) to LO (Fig. 4) and to the Bread Proofing feature (Fig. 5). If the Warmer Drawer is set at the LO setting and the pad is touched again the Bread Proofing feature will be turned ON (The Bread Proof indicator light will glow steady indicating the Bread Proofing feature in ON (See Fig. 5 & bread dough preparation instructions on this page). To return to standard Warmer Drawer settings touch pad at least once. Note: For Warmer Drawer Fig. 1 . iii ...iii ... best results, preheat the Warmer Drawer before adding the food or bread dough. An empty drawer will preheat in approximately 15 minutes. When the food or dough is ready for removal, touch the O pad once to turn the Warmer Drawer or Bread Proof feature OFF. The Warmer Drawer indicator light will turn OFF. Hio O Med Warmer Drawer Food Temperature Settings Warmer Drawer Recommended Food Settings Table Food Item Use the recommended Warmer Drawer food temperature settings table (See Fig. 6). If a particular food is not listed, start with the MED setting. If more crispness is desired, remove the lid or aluminum foil from the food. Bacon Hamburger Patties Poultry Pork Chops Fried Foods Pizza Gravies Casseroles Eggs Roasts (Beef, Pork, Lamb) Vegetables Biscuits Rolls, hard Pastries Rolls (soft) Empty Dinner Plates Fig. 6 Lo Med Proof Bread Lo Proof Bread o Setting HI HI HI HI HI HI MED MED MED MED MED MED MED MED LO LO Fig. 2 Fig. 3 Hio O Hio 0 Med o Proof Bread Med Proof Bread Lo Fig. 4 Lo Fig. 5 Most foods can be kept at serving temperatures on the MED setting. When a combination of foods are to be kept warm (for instance, a meat with 2 vegetables and rolls), use the HI setting. To avoid heat loss, do not open the Warmer Drawer repeatedly while in use. 13
-
 1
1 -
2
-
3
-
4
-
5
-
6
-
7
-
 8
8 -
 9
9 -
 10
10 -
 11
11 -
 12
12 -
 13
13 -
 14
14 -
 15
15 -
 16
16 -
 17
17 -
 18
18 -
19
-
20
-
21
-
22
-
23
-
24
-
25
-
26
-
27
-
28
-
29
-
30
-
31
-
32
-
33
-
34
-
35
-
36
-
37
-
38
-
39
-
40
-
41
-
42
-
43
-
44
 |
 |
