KitchenAid KEHU309SSS Use & Care Guide - Page 12
Oven Use
 |
UPC - 883049035307
View all KitchenAid KEHU309SSS manuals
Add to My Manuals
Save this manual to your list of manuals |
Page 12 highlights
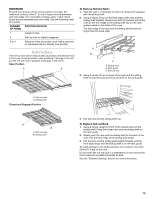
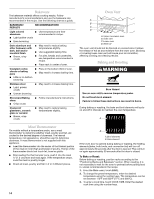
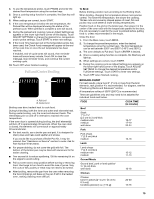
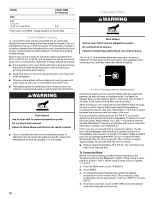
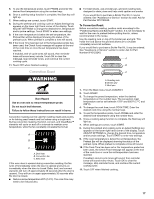
Control Lock The Control Lock shuts down the control panel keys to avoid unintended use of the oven(s). The Control Lock will remain set after a power failure, if set before the power failure occurs. display and a confirmation tone sounds indicating the oven control has been locked. "Controls locked" and lock icon will appear in the display for approximately 5 seconds. When the control is locked, only the TIMER SET, TIMER OFF and OVEN LIGHT keys will function. The Control Lock is preset unlocked, but can be locked. To Lock Control: Touch and hold START for approximately 5 seconds, until "controls locked" and a lock icon appears in the If a key is touched while the controls are touched, the invalid key touch tone will sound and a reminder message will be displayed indicating the controls are locked. To Unlock Control: Repeat to unlock the control. A tone will sound and a controls unlocked message will be displayed for approximately 5 seconds. OVEN USE Odors and smoke are normal when the oven is used the first few times, or when it is heavily soiled. During oven use, the heating elements will not remain on, but will cycle on and off throughout oven operation. IMPORTANT: The health of some birds is extremely sensitive to the fumes given off. Exposure to the fumes may result in death to certain birds. Always move birds to another closed and wellventilated room. The oven is equipped with a water filtration system. This system is required for the use of the steam cooking functionality. IMPORTANT: The oven will shut off the steam functions until the filter is replaced. The water filter needs to be changed occasionally. The life of the filter will depend on factors such as the amount of steam cooking done and the hardness of the water in your home. The oven has a sensor to determine when the filter needs to be changed. NOTE: It is normal to hear sounds during steam cooking cycles related to the opening and closing of the water inlet valve and water flowing into the steam system. Aluminum Foil IMPORTANT: To avoid permanent damage to the oven bottom finish, do not line the oven bottom with any type of foil, liners or cookware. ■ For best cooking results, do not cover entire rack with foil because air must be able to move freely. ■ To catch spills, place foil on rack below dish. Make sure foil is at least ½" (1.3 cm) larger than the dish and that it is turned up at the edges. Positioning Racks and Bakeware IMPORTANT: To avoid permanent damage to the porcelain finish, do not place food or bakeware directly on the oven door or bottom. RACKS ■ Position racks before turning on the oven. ■ Do not position racks with bakeware on them. ■ Make sure racks are level. To move a rack, pull it out to the stop position, raise the front edge, then lift out. Use the following illustration and charts as a guide. 5 4 3 2 1 Traditional Cooking FOOD RACK POSITION* Large roasts, turkeys, angel food, bundt cakes, quick breads, pies 1 or 2 Yeast breads, casseroles, meat and 2 poultry Cookies, biscuits, muffins, cakes 2 or 3 *On models with the CleanBake™ feature, foods may be placed on a lower rack position. Convection Cooking OVEN SETTING NUMBER OF RACK RACKS USED POSITION(S) Convection Bake 1 1, 2 or 3 Convection Bake 2 1 or 2 and 4 Convection Bake 3 1, 3 and 5 Convection Roast 1 1, 2 or 3 Convection Broil 1 3 or 4 12
-
 1
1 -
2
-
3
-
4
-
5
-
6
-
 7
7 -
 8
8 -
 9
9 -
 10
10 -
 11
11 -
 12
12 -
 13
13 -
 14
14 -
 15
15 -
 16
16 -
 17
17 -
18
-
19
-
20
-
21
-
22
-
23
-
24
-
25
-
26
-
27
-
28
-
29
-
30
-
31
-
32
-
33
-
34
-
35
-
36
-
37
-
38
-
39
-
40
-
41
-
42
-
43
-
44
-
45
-
46
-
47
-
48
-
49
-
50
-
51
-
52
-
53
-
54
-
55
-
56
-
57
-
58
-
59
-
60
-
61
-
62
-
63
-
64
-
65
-
66
-
67
-
68
-
69
-
70
-
71
-
72
 |
 |