KitchenAid KEHU309SSS Use & Care Guide - Page 30
Water Filter Cartridge Replacement, General Cleaning - installation
 |
UPC - 883049035307
View all KitchenAid KEHU309SSS manuals
Add to My Manuals
Save this manual to your list of manuals |
Page 30 highlights
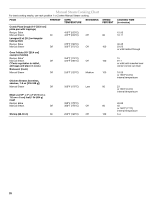
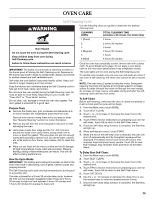
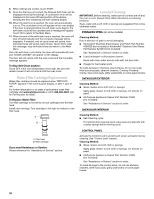
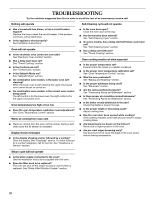
8. When settings are correct, touch START. 9. Once the Start key is touched, the Delayed Self-Clean will be displayed showing the settings. A countdown timer will be displayed in the lower left hand portion of the display showing the time remaining until self-cleaning begins. 10. When the start time is reached, the oven will automatically turn on. The countdown timer will appear on the oven display. If the door is opened before the self-clean cycle begins, the self-clean cycle will be canceled and a message will appear. Touch OK to return to the Main Menu. 11. When the end of the self-clean time is reached, the oven will shut off automatically and the Complete message will be displayed. If enabled, end-of-cycle tones will sound, then reminder tones will sound every minute. Touch OK to clear this message, stop reminder tones and return to the Main Menu Once the self-clean cycle starts, the door will automatically lock and "DOOR LOCKED" will appear on the display. The door will not unlock until the oven cools and the Complete message appears. To Stop Self-Clean anytime: Touch OFF. If the oven temperature is too high, the door will remain locked. It will not unlock until the oven cools. Water Filter Cartridge Replacement Water filter cartridge should be replaced when "REPLACE FILTER" appears in the control panel display, or after 1 year of use. For further information or to order a replacement water filter cartridge visit www.whirlpool.com or call 1-866-986-3223. Ask for Part Number 8212695. To Replace Water Filter: Turn filter cartridge to the left to remove cartridge from the filter head. Install new cartridge. Turn cartridge to the right to reattach to the filter head. A B A. Filter head B. Filter cartridge If you need Assistance or Service: Please reference the "Assistance or Service" section. General Cleaning IMPORTANT: Before cleaning, make sure all controls are off and the oven is cool. Always follow label instructions on cleaning products. Soap, water and a soft cloth or sponge are suggested first unless otherwise noted. STAINLESS STEEL (on some models) Cleaning Method: Rub in direction of grain to avoid damaging. ■ KitchenAid® Stainless Steel Cleaner and Polish Part Number 4396920 (not included) or KitchenAid® Stainless Steel Wipes Part Number 8212510 (not included): See "Assistance or Service" section to order. ■ Liquid detergent or all-purpose cleaner: Rinse with clean water and dry with soft, lint-free cloth. ■ Vinegar for hard water spots To avoid damage to stainless steel surfaces, do not use soapfilled scouring pads, abrasive cleaners, Cooktop Polishing Creme, steel-wool pads, gritty washcloths or some paper towels. OVEN DOOR EXTERIOR Cleaning Method: ■ Glass cleaner and a soft cloth or sponge: Apply glass cleaner to soft cloth or sponge, not directly on panel. ■ All-Purpose Appliance Cleaner Part Number 31682 (not included): See "Assistance or Service" section to order. OVEN DOOR INTERIOR Cleaning Method: ■ Self-Cleaning cycle: For optimal door cleaning result, wipe away any deposits with a damp sponge before running cycle. CONTROL PANEL Activate the Control Lock to avoid touch screen activation during cleaning. See "Control Lock" section. Cleaning Method: ■ Glass cleaner and soft cloth or sponge: Apply glass cleaner to soft cloth or sponge, not directly on panel. ■ All-Purpose Appliance Cleaner Part Number 31682 (not included): See "Assistance or Service" section to order. To avoid damage to the control panel, do not use abrasive cleaners, steel-wool pads, gritty washcloths or some paper towels. 30
-
 1
1 -
2
-
3
-
4
-
5
-
6
-
7
-
8
-
9
-
10
-
11
-
12
-
13
-
14
-
15
-
16
-
17
-
18
-
19
-
20
-
21
-
22
-
23
-
24
-
 25
25 -
 26
26 -
 27
27 -
 28
28 -
 29
29 -
 30
30 -
 31
31 -
 32
32 -
 33
33 -
 34
34 -
 35
35 -
36
-
37
-
38
-
39
-
40
-
41
-
42
-
43
-
44
-
45
-
46
-
47
-
48
-
49
-
50
-
51
-
52
-
53
-
54
-
55
-
56
-
57
-
58
-
59
-
60
-
61
-
62
-
63
-
64
-
65
-
66
-
67
-
68
-
69
-
70
-
71
-
72
 |
 |