Konica Minolta bizhub 181 bizhub 181 User Manual - Page 180
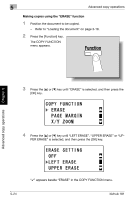
key until FRAME ERASE, CENTER ERASE or, appears beside ERASE in the COPY FUNCTION menu.
 |
View all Konica Minolta bizhub 181 manuals
Add to My Manuals
Save this manual to your list of manuals |
Page 180 highlights
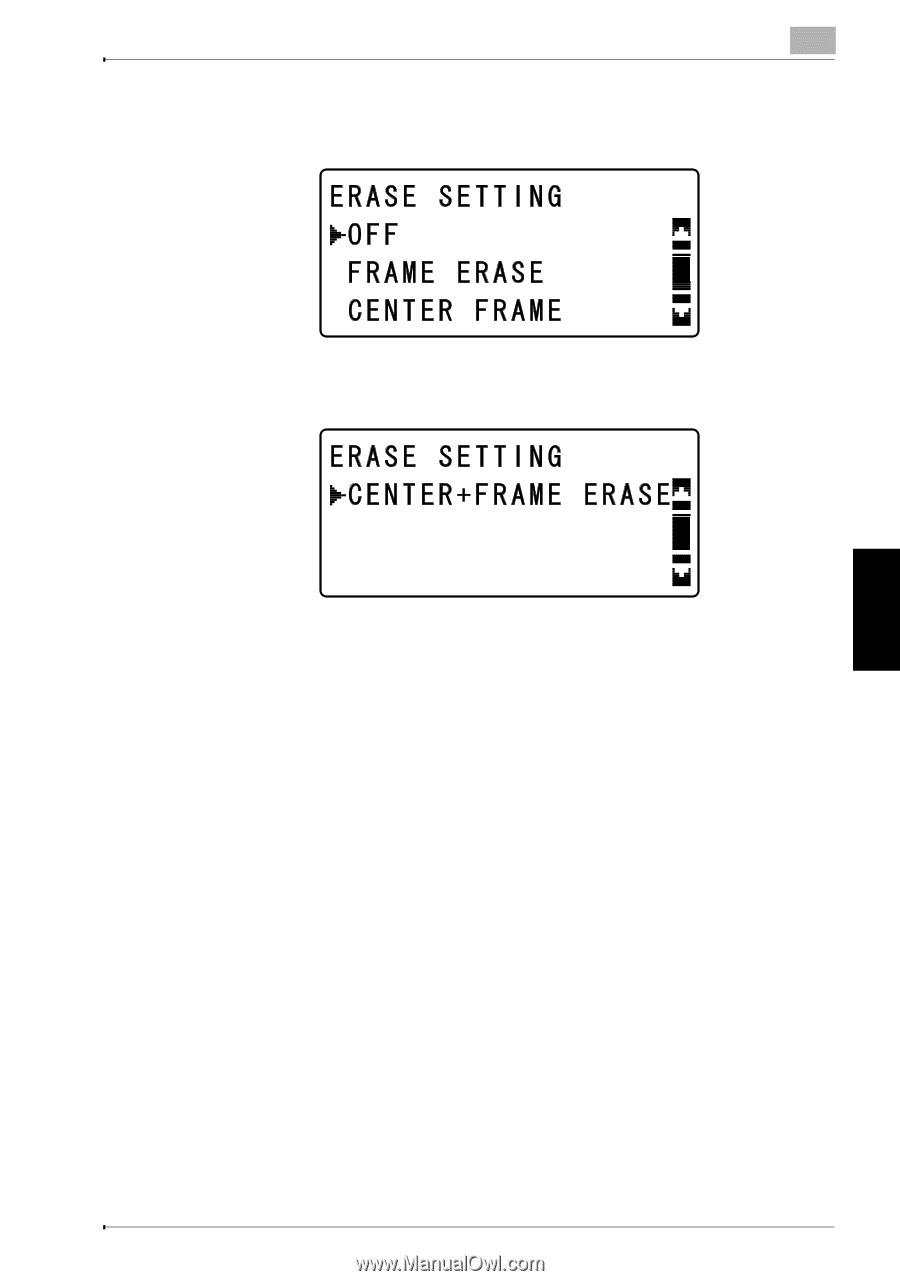
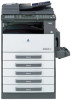
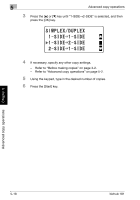
Advanced copy operations 5 6 Press the [+] or [,] key until "FRAME ERASE", "CENTER ERASE" or "CENTER+FRAME ERASE" is selected, and then press the [OK] key. Advanced copy operations Chapter 5 - For details on the areas that are erased, refer to "Frame/center erasing methods" on page 5-22. - The width of the erased area for the FRAME ERASE setting can be set between 3/16 inch and 13/16 inch, in Approx.1/16 inch increments. The manufacturer's default setting is 3/8 inch. - The width of the erased area for the CENTER ERASE setting is fixed at 3/8 inch. - The width of the erased area for the FRAME ERASE setting can be changed using the ERASE SETTING parameter in the Utility mode. (Refer to "Adjusting the width of the erased area ("ERASE SETTING" parameter)" on page 6-64.) "/" appears beside "ERASE" in the COPY FUNCTION menu. 7 Press the [Back] key. The main screen appears again. 8 If necessary, specify any other copy settings. - Refer to "Before making copies" on page 3-2. - Refer to "Advanced copy operations" on page 5-2. 9 Using the keypad, type in the desired number of copies, and then press the [Start] key. bizhub 181 5-21
-
 1
1 -
2
-
3
-
4
-
5
-
6
-
7
-
8
-
9
-
10
-
11
-
12
-
13
-
14
-
15
-
16
-
17
-
18
-
19
-
20
-
21
-
22
-
23
-
24
-
25
-
26
-
27
-
28
-
29
-
30
-
31
-
32
-
33
-
34
-
35
-
36
-
37
-
38
-
39
-
40
-
41
-
42
-
43
-
44
-
45
-
46
-
47
-
48
-
49
-
50
-
51
-
52
-
53
-
54
-
55
-
56
-
57
-
58
-
59
-
60
-
61
-
62
-
63
-
64
-
65
-
66
-
67
-
68
-
69
-
70
-
71
-
72
-
73
-
74
-
75
-
76
-
77
-
78
-
79
-
80
-
81
-
82
-
83
-
84
-
85
-
86
-
87
-
88
-
89
-
90
-
91
-
92
-
93
-
94
-
95
-
96
-
97
-
98
-
99
-
100
-
101
-
102
-
103
-
104
-
105
-
106
-
107
-
108
-
109
-
110
-
111
-
112
-
113
-
114
-
115
-
116
-
117
-
118
-
119
-
120
-
121
-
122
-
123
-
124
-
125
-
126
-
127
-
128
-
129
-
130
-
131
-
132
-
133
-
134
-
135
-
136
-
137
-
138
-
139
-
140
-
141
-
142
-
143
-
144
-
145
-
146
-
147
-
148
-
149
-
150
-
151
-
152
-
153
-
154
-
155
-
156
-
157
-
158
-
159
-
160
-
161
-
162
-
163
-
164
-
165
-
166
-
167
-
168
-
169
-
170
-
171
-
172
-
173
-
174
-
 175
175 -
 176
176 -
 177
177 -
 178
178 -
 179
179 -
 180
180 -
 181
181 -
 182
182 -
 183
183 -
 184
184 -
 185
185 -
186
-
187
-
188
-
189
-
190
-
191
-
192
-
193
-
194
-
195
-
196
-
197
-
198
-
199
-
200
-
201
-
202
-
203
-
204
-
205
-
206
-
207
-
208
-
209
-
210
-
211
-
212
-
213
-
214
-
215
-
216
-
217
-
218
-
219
-
220
-
221
-
222
-
223
-
224
-
225
-
226
-
227
-
228
-
229
-
230
-
231
-
232
-
233
-
234
-
235
-
236
-
237
-
238
-
239
-
240
-
241
-
242
-
243
-
244
-
245
-
246
-
247
-
248
-
249
-
250
-
251
-
252
-
253
-
254
-
255
-
256
-
257
-
258
-
259
-
260
-
261
-
262
-
263
-
264
-
265
-
266
-
267
-
268
-
269
-
270
-
271
-
272
-
273
-
274
-
275
-
276
-
277
-
278
-
279
-
280
-
281
-
282
-
283
-
284
-
285
-
286
-
287
-
288
-
289
-
290
-
291
-
292
-
293
-
294
-
295
-
296
-
297
-
298
-
299
-
300
-
301
-
302
-
303
-
304
-
305
-
306
-
307
-
308
-
309
-
310
-
311
-
312
-
313
-
314
-
315
-
316
-
317
-
318
-
319
-
320
-
321
-
322
 |
 |