Konica Minolta bizhub C3350 bizhub C3850/C3350 Copy Functions User Guide
Konica Minolta bizhub C3350 Manual
 |
View all Konica Minolta bizhub C3350 manuals
Add to My Manuals
Save this manual to your list of manuals |
Konica Minolta bizhub C3350 manual content summary:
- Konica Minolta bizhub C3350 | bizhub C3850/C3350 Copy Functions User Guide - Page 1
User's Guide Copy Functions - Konica Minolta bizhub C3350 | bizhub C3850/C3350 Copy Functions User Guide - Page 2
Removal 2-2 Making the image glossy ([Glossy]) ...2-2 Adjusting the image quality level to fit the original ([Image Adjust 2-3 Enlarging or reducing an image for copying ([Zoom 2-3 Adding a margin on pages ([Page Margin 2-3 3 Saving the Number of Print Sheets Copying on both sides of paper - Konica Minolta bizhub C3350 | bizhub C3850/C3350 Copy Functions User Guide - Page 3
1 Copy Operations - Konica Minolta bizhub C3350 | bizhub C3850/C3350 Copy Functions User Guide - Page 4
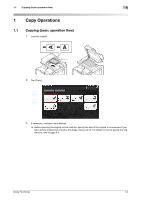
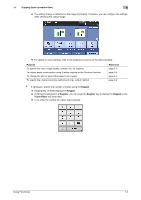
flow) 1 Load the original. 2 Tap [Copy]. 3 If necessary, configure copy settings. % Before scanning the original on this machine, specify the size of the original to be scanned. If you fail to set the original size correctly, the image may be cut off. For details on how to specify the original size - Konica Minolta bizhub C3350 | bizhub C3850/C3350 Copy Functions User Guide - Page 5
the following table. Purpose To specify the color, image quality, density, etc. for copying To reduce paper consumption using 2-sided copying or the Combine function To change the size or type of the paper to be copied To specify the original scanning method and copy output method Reference page - Konica Minolta bizhub C3350 | bizhub C3850/C3350 Copy Functions User Guide - Page 6
- inal, delete inactive jobs from the Job screen. The original is scanned, and copying starts. Related setting You can change the default copy settings to suit your environment. To configure settings: [Utility] - [User Settings] - [Copier Settings] - [Default Copy Settings] [Copy Functions] 1-4 - Konica Minolta bizhub C3350 | bizhub C3850/C3350 Copy Functions User Guide - Page 7
intruder copy. 1 Tap [Interrupt]. The indicator of [Interrupt] lights up in blue and printing of the current job is suspended. 2 Load the original. 3 Configure copy settings. 4 Press the Start key. The original is scanned, and copying starts. 5 After the copy job is completed, tap [Interrupt]. The - Konica Minolta bizhub C3350 | bizhub C3850/C3350 Copy Functions User Guide - Page 8
[Proof Copy]. 6 Tap [Start] or press the Start key. Copying begins for only one copy. 7 Check the proof copy. % To check the copy result again, tap [Proof Copy]. % To reconfigure settings, tap [Cancel]. 8 Check that no problem is detected on the copy result, then tap [Print]. Copying begins for the - Konica Minolta bizhub C3350 | bizhub C3850/C3350 Copy Functions User Guide - Page 9
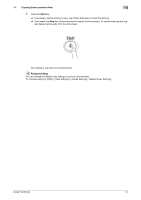
1.4 Recalling a program for copying 1 1.4 Recalling a program for copying Program Program is a function used to register a combination of various copy settings as a recall key. When you register a program, you can easily recall the combination of various copy settings from the main screen. - Konica Minolta bizhub C3350 | bizhub C3850/C3350 Copy Functions User Guide - Page 10
program is applied. % When you tap [Check Setting], you can view the registered content of the selected program. % Tap [Delete] to delete the selected program. 5 Press the Start key. % If necessary, before starting a copy, tap [Check Settings] to check the settings. The original is - Konica Minolta bizhub C3350 | bizhub C3850/C3350 Copy Functions User Guide - Page 11
2 Specifying the Color and Image Quality for Copying - Konica Minolta bizhub C3350 | bizhub C3850/C3350 Copy Functions User Guide - Page 12
cost color copy than one printed in full color. In the scanned original, an area judged to be color is copied with the specified color, and an area judged to be black is copied in black. Adjusting the copy density ([Density]) To display: [Density] Adjust the density of a copy image. Selecting - Konica Minolta bizhub C3350 | bizhub C3850/C3350 Copy Functions User Guide - Page 13
the entire original image, including its edges. If you select [Set Zoom], you can change the value of the image with the same size as for the original. Select a preset zoom when copying from a standard size original onto a standard size sheet of paper. When [Paper] is set to [Auto], the paper tray - Konica Minolta bizhub C3350 | bizhub C3850/C3350 Copy Functions User Guide - Page 14
paper. • [Left Bind]: Select this option to add a binding margin at the left of the paper. • [Right Bind]: Select this option to add a binding margin at the right of the paper. • [Top Bind]: Select this option to add back sides of paper do not turn upside down. Tips If part of the image is lost when - Konica Minolta bizhub C3350 | bizhub C3850/C3350 Copy Functions User Guide - Page 15
3 Saving the Number of Print Sheets - Konica Minolta bizhub C3350 | bizhub C3850/C3350 Copy Functions User Guide - Page 16
Print Sheets Copying on both sides of paper ([Duplex]) Copy the 1-sided original on both sides of paper, or copy the 2-sided original on both sides or on a single side of sheets of paper. By using both sides of paper for copying, you can reduce paper 7 Press the Start key. The original is scanned, - Konica Minolta bizhub C3350 | bizhub C3850/C3350 Copy Functions User Guide - Page 17
image onto the same side of one sheet. The following describes the operation flow in the case where multiple 1-sided originals are copied, two pages are reduced into the same side of one page, and printed on both sides of paper [OK]. 9 Press the Start key. The original is scanned, and copying starts - Konica Minolta bizhub C3350 | bizhub C3850/C3350 Copy Functions User Guide - Page 18
mm) at the top and left edges of a card, are not scanned by shade clear processing. 2 Tap [Paper], and specify the paper tray for printing the card. % The available paper sizes are A4, letter (8-1/2 e 11), and legal (8-1/2 e 14). 3 Tap [ID Copy]. 4 Press the Start key. The front side of the card is - Konica Minolta bizhub C3350 | bizhub C3850/C3350 Copy Functions User Guide - Page 19
4 Specifying the Size or Type of the Paper to Be Copied - Konica Minolta bizhub C3350 | bizhub C3850/C3350 Copy Functions User Guide - Page 20
of Tray 1 to Tray 3 and make a copy. Tray 2 and Tray 3 are available when the optional Paper Feed Unit is installed. Tap this button to copy onto the paper loaded into the Manual Feed Tray. If necessary, change the size and type settings of the paper loaded in the selected paper tray. • [Paper Type - Konica Minolta bizhub C3350 | bizhub C3850/C3350 Copy Functions User Guide - Page 21
5 Specifying the Method to Scan the Original and the Method to Output Copy - Konica Minolta bizhub C3350 | bizhub C3850/C3350 Copy Functions User Guide - Page 22
original tray, and do not load the sheets up to the point where the top of the stack is higher than the , mark. Doing so may cause a paper jam involving the originals, damage the originals, and/or cause an ADF failure. 2 Tap [Application] - [Original] - [Separate Scan], then set to [ON]. 3 Press the - Konica Minolta bizhub C3350 | bizhub C3850/C3350 Copy Functions User Guide - Page 23
for each set is one, this option is automatically switched to Group, and the sheet is output. If the number of printed sheets is two or greater, this option is automatically switched to Sort, and the sheets are output. Select this item to feed out separately page - Konica Minolta bizhub C3350 | bizhub C3850/C3350 Copy Functions User Guide - Page 24
6 Index - Konica Minolta bizhub C3350 | bizhub C3850/C3350 Copy Functions User Guide - Page 25
Finishing 5-3 G Glossy 2-2 Group 5-3 H How to Copy 1-2 I ID Copy 3-3 Image Adjust 2-3 Interrupt 1-5 O Original Size 5-2 Original Type 2-2 P Page Margin 2-3 Paper 4-2 Program 1-7 Recalling 1-8 Register 1-7 Proof Copy 1-6 S Separate Scan 5-2 Sort 5-3 Z Zoom 2-3 [Copy Functions] 6-2 - Konica Minolta bizhub C3350 | bizhub C3850/C3350 Copy Functions User Guide - Page 26
http://konicaminolta.com A3GN-9566-00A © 2013 2013. 8
-
 1
1 -
 2
2 -
 3
3 -
 4
4 -
 5
5 -
 6
6 -
 7
7 -
8
-
9
-
10
-
11
-
12
-
13
-
14
-
15
-
16
-
17
-
18
-
19
-
20
-
21
-
22
-
23
-
24
-
25
-
26
 |
 |
User's Guide Copy Functions