Konica Minolta bizhub C3350 bizhub C3850/C3350 Copy Functions User Guide - Page 14
Original Direction]
 |
View all Konica Minolta bizhub C3350 manuals
Add to My Manuals
Save this manual to your list of manuals |
Page 14 highlights
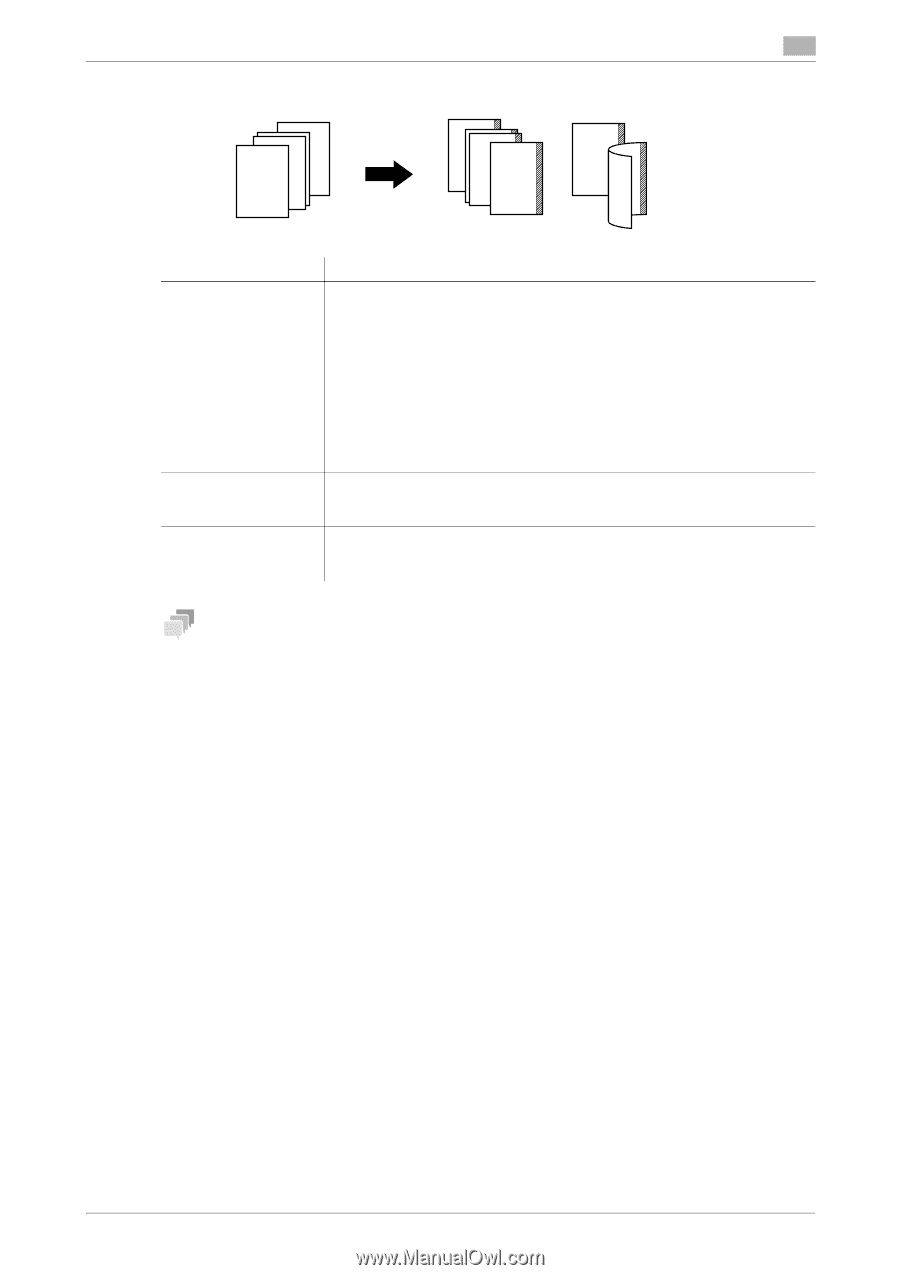
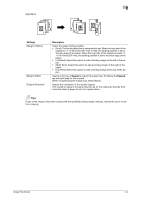
2 Right Bind 1DGA2BEH2DGACFDGAI1BEHBE4HCFCFIDGA2I2BEHCFI4 4 DGAB2EHCF4DGDAGAI 1BBEEHHDGACCFF2IIBEHCFI1 3 ABC 3DGEHFIBEFC2 1 HI Settings [Margin Position] [Margin Width] [Original Direction] Description Select the paper binding position. • [Auto]: The binding direction is automatically set. When the long side of the original is 11-11/16 inches (297 mm) or less, the binding position is set to the long edge of the paper. When the long side of the original exceeds 1111/16 inches (297 mm), the binding position is set to the short edge of the paper. • [Left Bind]: Select this option to add a binding margin at the left of the paper. • [Right Bind]: Select this option to add a binding margin at the right of the paper. • [Top Bind]: Select this option to add a binding margin at the top of the paper. Use the [+]/[-] key or Keypad to adjust the margin size. To display the Keypad, tap the input area for the numeral. When not specifying the margin size, select [None]. Specify the orientation of the loaded original. This machine copies in the same direction as for the original so that the front and back sides of paper do not turn upside down. Tips If part of the image is lost when copied with the specified binding margin settings, reduce the zoom to perform copying. [Copy Functions] 2-4
-
 1
1 -
2
-
3
-
4
-
5
-
6
-
7
-
8
-
 9
9 -
 10
10 -
 11
11 -
 12
12 -
 13
13 -
 14
14 -
 15
15 -
 16
16 -
 17
17 -
 18
18 -
 19
19 -
20
-
21
-
22
-
23
-
24
-
25
-
26
 |
 |